
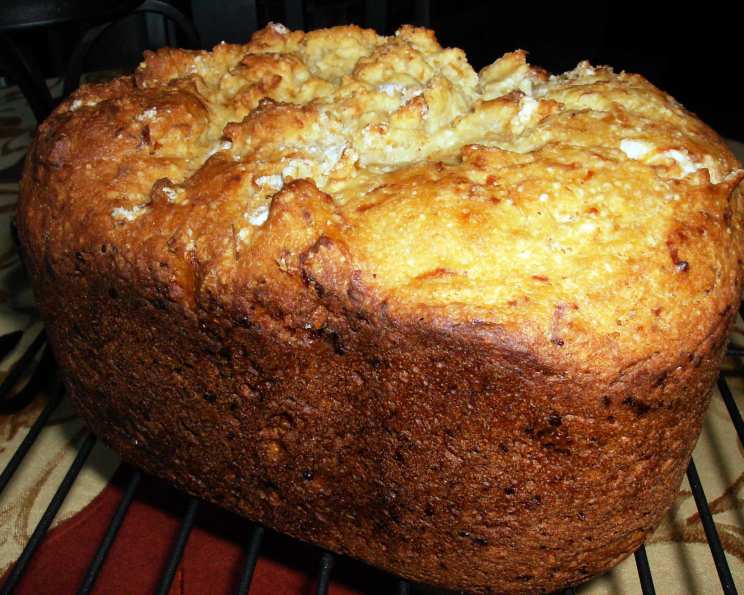
Cheesy Gluten-Free Loaf – Large (Abm)
The scent of warm bread baking always brings me back to my grandmother’s kitchen. She wasn’t much for elaborate desserts, but her homemade loaves were legendary. One particular Sunday, I remember sneaking a still-warm slice from a cheddar loaf she’d just pulled from the oven. The crispy crust gave way to a soft, chewy interior, and the melted cheese pulled into long, savory strings. Although she never made a gluten-free version, this recipe reminds me of that comforting, cheesy goodness—a welcome embrace in a loaf of bread.
Recipe Overview
- Prep Time: 20 minutes
- Cook Time: 2 hours 34 minutes (bread machine time)
- Total Time: 2 hours 54 minutes
- Yields: 1 large loaf (approximately 2 pounds)
- Dietary Type: Gluten-Free
Ingredients
- 1 3/4 cups low-fat milk, heated to 80-90°F
- 3 tablespoons olive oil
- 2 large eggs, at room temperature (warm gently by placing whole eggs in a bowl and covering with moderately hot tap water)
- 3 tablespoons honey
- 1 teaspoon cider vinegar
- 1 1/2 teaspoons salt
- 2 cups brown rice flour
- 1 cup potato starch
- 1/2 cup tapioca flour
- 1/4 cup garfava flour (garbanzo and fava flour blend, such as Bob’s Red Mill brand)
- 1/4 cup quinoa flour
- 2 1/2 teaspoons xanthan gum
- 3/4 teaspoon gelatin
- 1/3 cup shredded provolone cheese, plus 2 tablespoons for topping
- 1/3 cup shredded mozzarella cheese, plus 2 tablespoons for topping
- 1/4 cup grated parmesan cheese
- 2 1/4 teaspoons active dry yeast (instant or bread machine yeast)
Equipment Needed
- Bread machine (preferably Cuisinart Convection Bread Maker, but others may work)
- Bread pan (that fits your machine)
- Mixing bowl
- Rubber spatula
- Wire rack
Instructions
- Ensure the kneading paddle is securely placed in the bread pan.
- Pour the milk, olive oil, eggs, honey, and cider vinegar into the bread pan. Adding wet ingredients first helps with even mixing.
- In a separate mixing bowl, thoroughly combine the brown rice flour, potato starch, tapioca flour, garfava flour, quinoa flour, xanthan gum, gelatin, 1/3 cup shredded provolone cheese, 1/3 cup shredded mozzarella cheese, and grated parmesan cheese. Stir until evenly distributed.
- Carefully add the dry flour mixture to the bread pan, on top of the wet ingredients. Make sure it’s evenly distributed across the surface.
- Add the active dry yeast to the bread pan last, making a small well in the flour and pouring it in. This keeps the yeast separate from the wet ingredients until the mixing begins.
- Place the bread pan into your bread machine (ideally a Cuisinart Convection Bread Maker for best results).
- On the bread machine control panel, select the Gluten Free menu option. If your machine doesn’t have a specific gluten-free setting, use the closest equivalent or a basic setting with adjustments for rising and baking times.
- Select your desired crust color – usually Medium is a good starting point, but adjust to your preference.
- Select the correct loaf size setting for your machine to match the approximately 2-pound loaf.
- Press Start to initiate the mixing, kneading, rising, and baking cycle.
- While the dough is kneading (typically in the first 5-10 minutes of the cycle), use a rubber spatula to scrape down the sides of the bread pan. This helps ensure all ingredients are fully incorporated into the dough, especially the dry flours which can sometimes stick to the edges.
- When the bread machine cycle is complete, carefully remove the bread pan from the machine. Use oven mitts, as the pan will be hot.
- Gently remove the loaf from the bread pan. If it sticks slightly, you can loosen the sides with a spatula.
- Transfer the freshly baked loaf to a wire rack to cool completely. Cooling on a wire rack prevents the bottom from becoming soggy.
- Once cooled, slice with a serrated bread knife. A fully cooled loaf slices much more cleanly.
Expert Tips & Tricks
- Temperature is Key: Heating the milk to the correct temperature (80-90°F) activates the yeast properly, ensuring a good rise. Too hot, and you risk killing the yeast; too cold, and it won’t activate.
- Xanthan Gum is Your Friend: Xanthan gum is crucial in gluten-free baking as it mimics the binding properties of gluten. Don’t skip it!
- Scraping is Essential: Gluten-free flours can be a bit stubborn. Scraping down the sides of the pan during the initial kneading helps everything come together smoothly.
- Cheese Placement: Adding some of the shredded cheese at the beginning of the dough cycle infuses the whole loaf with cheesy flavor. Saving some for the top adds a nice, melted, browned crust.
- Check for Doneness: If your bread machine allows you to monitor the internal temperature, aim for about 200-210°F for optimal doneness.
- If your bread is consistently sinking in the middle, try reducing the amount of liquid slightly or adding an extra teaspoon of xanthan gum.
Serving & Storage Suggestions
Serve this cheesy gluten-free loaf warm or at room temperature. It’s fantastic on its own, toasted with butter, or as part of a sandwich. It pairs perfectly with soups, salads, or chili. For a delightful appetizer, slice and serve with a variety of cheeses and charcuterie.
To store, wrap the cooled loaf tightly in plastic wrap or place it in an airtight container. It will keep at room temperature for 2-3 days, in the refrigerator for up to a week, or in the freezer for up to 2 months. To reheat, wrap individual slices in foil and warm in a 350°F (175°C) oven for about 10-15 minutes, or toast slices as needed. Freezing the loaf after slicing makes it easy to grab a piece whenever you need it.
Nutritional Information
| Nutrient | Amount per Serving (estimated) | % Daily Value* |
|---|---|---|
| Calories | 207 kcal | 10% |
| Total Fat | 14.2g | 22% |
| Saturated Fat | 4.4g | 22% |
| Cholesterol | 36.6mg | 12% |
| Sodium | 345mg | 14% |
| Total Carbohydrate | 29.2g | 10% |
| Dietary Fiber | 1.7g | 7% |
| Sugars | 5.6g | |
| Protein | 6.8g | 14% |
*Percent Daily Values are based on a 2,000 calorie diet.
Variations & Substitutions
- Dairy-Free: Substitute the low-fat milk with unsweetened almond milk or coconut milk beverage. Use a dairy-free cheese alternative (shredded or grated) to maintain the cheesy flavor.
- Herb Infusion: Add 1-2 tablespoons of dried herbs, such as rosemary, thyme, or oregano, to the dry ingredients for an herby twist.
- Spicy Cheese: Use a spicy provolone or mozzarella cheese, or add a pinch of red pepper flakes to the dry ingredients for a kick.
- Seed Addition: Incorporate 2-3 tablespoons of sunflower seeds, pumpkin seeds, or flax seeds into the dry ingredients for added texture and nutrition.
- Sweet and Savory: Add 1/4 cup of dried cranberries or chopped dates to the dry ingredients for a touch of sweetness.
FAQs (Frequently Asked Questions)
Q: Can I use a different type of gluten-free flour blend?
A: While this recipe is specifically formulated for the flours listed, you can experiment. Be aware that different blends have different absorption rates, so you may need to adjust the liquid.
Q: My loaf is dense. What went wrong?
A: Possible causes include using expired yeast, not measuring ingredients accurately, or not scraping down the sides of the pan during kneading. Ensure freshness and accuracy in your measurements.
Q: Can I bake this in a regular oven instead of a bread machine?
A: This recipe is designed for a bread machine. Baking in a regular oven would require significant adjustments to the rising and baking times, and the results may not be the same.
Q: Why is gelatin included in the recipe?
A: Gelatin helps to improve the texture and structure of gluten-free bread, adding a bit of chewiness that is often missing. You can omit it, but the texture may be slightly different.
Q: How can I make this recipe vegan?
A: Substitute the eggs with flax eggs (1 tablespoon ground flaxseed mixed with 3 tablespoons of water, let sit for 5 minutes to thicken). Also, use dairy-free milk and cheese alternatives, and ensure the gelatin is replaced with a vegan alternative like agar-agar.
Final Thoughts
Don’t be intimidated by gluten-free baking! This Cheesy Gluten-Free Loaf is a delightful journey in creating a comforting and flavorful bread. Embrace the process, experiment with variations, and don’t hesitate to share your creations with friends and family. This loaf is best enjoyed with a simple tomato soup on a chilly day. Happy baking!