
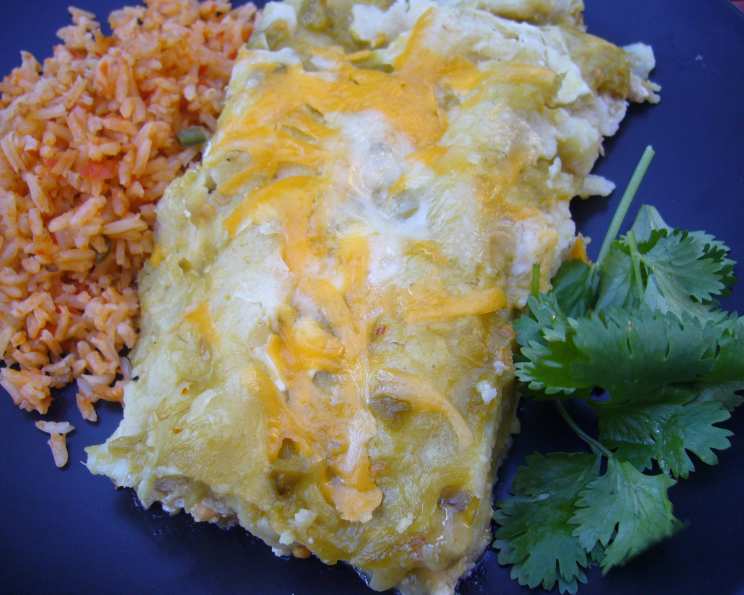
Cheesy Green Enchiladas: A Flavorful Fiesta
The scent of bubbling cheese and warm tortillas transports me back to my childhood. My abuela’s kitchen, always filled with laughter and the aroma of simmering sauces, was where I first tasted enchiladas like these. She’d hum a lively tune as she rolled them, each one a little imperfect but brimming with love. This recipe aims to capture that same comforting, vibrant flavor, bringing a little of abuela’s magic to your table.
Recipe Overview
- Prep Time: 20 minutes
- Cook Time: 40-45 minutes
- Total Time: 1 hour 5 minutes
- Servings: 6-8
- Dietary Type: Gluten-Free (if using corn tortillas)
Ingredients
- 9 boneless skinless chicken thighs, cooked and shredded
- 2 cups cheddar cheese, shredded
- 2 cups Monterey Jack pepper cheese, shredded
- 7 ounces diced green chilies
- 2 1/2 cups sour cream
- 1/2 teaspoon garlic powder
- 1/2 teaspoon chili powder
- 1/2 teaspoon onion powder
- 1 (28 ounce) can green enchilada sauce
- 20 flour tortillas (or corn tortillas for a gluten-free option)
- Salt and pepper to taste
- Cooking spray or oil
Equipment Needed
- 9×13 inch baking dish
- Large bowl
- Mixing spoon
- Shredder
Instructions
-
Preheat your oven to 350°F (175°C). This ensures even cooking and prevents the tortillas from drying out.
-
Lightly coat a large 9×13 inch baking dish with cooking spray or oil. This will prevent the enchiladas from sticking and make serving easier.
-
In a large bowl, combine the cooked and shredded chicken, 1 1/2 cups of the cheddar cheese, 1 1/2 cups of the Monterey Jack pepper cheese, the diced green chilies, 2 cups of the sour cream, garlic powder, chili powder, and onion powder.
-
Mix all the ingredients in the bowl until they are thoroughly combined. Taste and adjust seasoning with salt and pepper as needed. This step ensures every bite is packed with flavor.
-
To assemble the enchiladas, prepare a large bowl with the green enchilada sauce and a plate for rolling.
-
Take one flour tortilla and dip it into the bowl of green enchilada sauce, ensuring it’s completely coated. Soaking the tortillas makes them pliable and prevents cracking during rolling.
-
Place the sauced tortilla on the plate. Add approximately 1/4 to 1/2 cup of the chicken filling along one edge of the tortilla. The amount of filling will depend on the size of your tortillas and how full you want your enchiladas to be.
-
Carefully roll the tortilla into a tube and place it seam-side down in the prepared baking dish.
-
Repeat steps 6-8 until you have filled the baking dish or run out of filling. Pack the enchiladas snugly to prevent them from unraveling during baking.
-
Pour the remaining green enchilada sauce evenly over the enchiladas, ensuring a thin layer covers the top. This keeps them moist and adds another layer of flavor.
-
Dollop the remaining 1/2 cup of sour cream evenly over the top of the enchiladas.
-
Sprinkle the remaining 1/2 cup of cheddar cheese and 1/2 cup of Monterey Jack pepper cheese evenly over the top of the enchiladas. The cheese will melt and create a delicious, golden-brown crust.
-
Cover the baking dish with aluminum foil. This helps the enchiladas heat through evenly and prevents the cheese from burning during the initial baking phase.
-
Bake in the preheated oven for 25 minutes with the foil on.
-
Remove the foil and bake for an additional 15-20 minutes, or until the cheese is melted, bubbly, and lightly golden brown. The enchiladas are done when they are heated through and the sauce is bubbling around the edges.
-
Let the enchiladas cool for a few minutes before serving. This prevents burning your mouth and allows the cheese to set slightly.
Expert Tips & Tricks
- Chicken Prep: For a richer flavor, consider using rotisserie chicken instead of poached chicken thighs.
- Cheese Blend: Experiment with different cheese combinations to suit your taste preferences. Pepper jack adds a nice kick, while Oaxaca cheese offers a creamy, mild flavor.
- Make Ahead: Assemble the enchiladas ahead of time and store them, covered, in the refrigerator for up to 24 hours before baking. Add a few minutes to the baking time if baking from cold.
- Tortilla Warmth: Lightly warming the tortillas in a dry skillet or microwave makes them more pliable and less likely to tear when rolling.
- Creamy Sauce: For an even creamier sauce, blend a small amount of sour cream or cream cheese into the enchilada sauce before pouring it over the enchiladas.
Serving & Storage Suggestions
Serve these cheesy green enchiladas hot, garnished with fresh cilantro, diced tomatoes, or a dollop of guacamole. They pair perfectly with a side of Mexican rice and refried beans.
Leftover enchiladas can be stored in an airtight container in the refrigerator for up to 3-4 days. Reheat them in the oven at 350°F (175°C) until heated through, or microwave in 30-second intervals. They can also be frozen for up to 2 months. Thaw overnight in the refrigerator before reheating.
Nutritional Information
| Nutrient | Amount per Serving | % Daily Value |
|---|---|---|
| Calories | 450 kcal | 23% |
| Total Fat | 25g | 38% |
| Saturated Fat | 15g | 75% |
| Cholesterol | 75mg | 25% |
| Sodium | 725mg | 30% |
| Total Carbohydrate | 30g | 10% |
| Dietary Fiber | 2g | 8% |
| Sugars | 2g | – |
| Protein | 30g | 60% |
Note: Nutritional information is an estimate and may vary based on specific ingredients and portion sizes.
Variations & Substitutions
- Vegetarian: Substitute the chicken with black beans, pinto beans, or sauteed vegetables like zucchini, bell peppers, and corn.
- Spicy: Add a pinch of cayenne pepper to the chicken filling or use a spicier green enchilada sauce.
- Dairy-Free: Substitute the sour cream with a plant-based sour cream alternative and use dairy-free shredded cheese.
- Gluten-Free: Use corn tortillas instead of flour tortillas. Be sure to check that the enchilada sauce is also gluten-free.
- Creamy Chicken Enchiladas: Add 8 ounces of cream cheese to the chicken mixture for an extra creamy dish.
- Quesadillas: If you have leftover chicken filling, use it to make quesadillas.
FAQs (Frequently Asked Questions)
Q: Can I use corn tortillas instead of flour tortillas?
A: Absolutely! Corn tortillas offer a gluten-free option and a slightly different flavor profile. Just be sure to warm them slightly before rolling to prevent them from cracking.
Q: Can I make these enchiladas ahead of time?
A: Yes, you can assemble the enchiladas and store them in the refrigerator for up to 24 hours before baking. Add a few minutes to the baking time if baking from cold.
Q: Can I freeze these enchiladas?
A: Yes, you can freeze them for up to 2 months. Thaw them overnight in the refrigerator before reheating.
Q: What if my enchiladas are too dry?
A: Make sure the tortillas are well coated with enchilada sauce before rolling. You can also add a little extra sauce to the top before baking to keep them moist.
Q: Can I use a different type of cheese?
A: Of course! Feel free to experiment with different cheeses like Oaxaca, Monterey Jack (without peppers), or a Mexican cheese blend.
Final Thoughts
I hope you enjoy making these cheesy green enchiladas as much as I do. They’re a guaranteed crowd-pleaser, perfect for a weeknight dinner or a festive gathering. Don’t be afraid to personalize the recipe with your favorite ingredients and flavors. And remember, the most important ingredient is always love! Pair these enchiladas with a refreshing margarita or a crisp Mexican beer for the ultimate fiesta experience. ¡Buen provecho!