
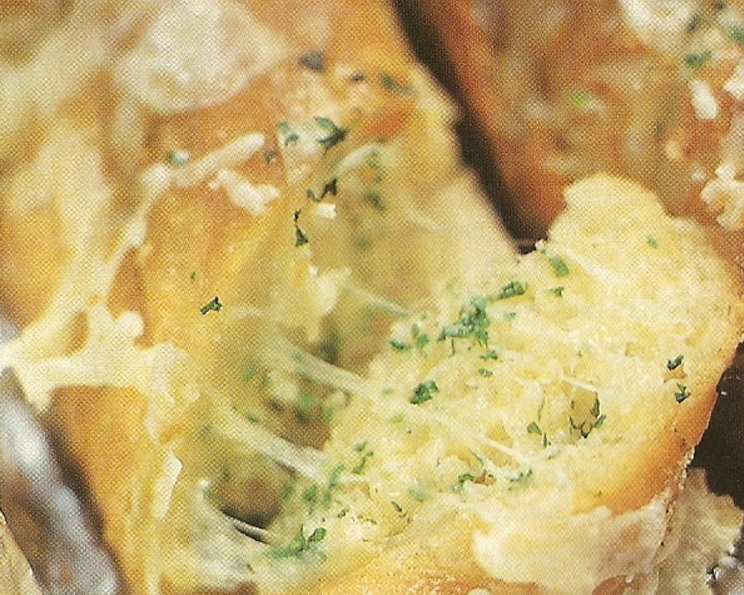
Cheesy No-Garlic Bread: A Simple Comfort
I have vivid memories of weekend barbecues growing up, the smoky aroma of grilling meats mingling with laughter and the comforting scent of buttery bread. While my dad was a grill master, my mom always brought her famous garlic bread. However, my younger brother, a notorious garlic hater, was forever excluded. This cheesy, no-garlic bread recipe is inspired by that memory – a way to enjoy the simple pleasure of warm, cheesy bread without the pungent bite of garlic, ensuring everyone at the table can dig in with a smile.
Recipe Overview
- Prep Time: 10 minutes
- Cook Time: 12-15 minutes
- Total Time: 25 minutes
- Servings: 8
- Yield: 2 baguettes
- Dietary Type: Vegetarian
Ingredients
- 2 French baguettes (or 1 long)
- 100 g (about 7 tablespoons) butter, softened
- 2 tablespoons fresh parsley, chopped
- 1 tablespoon fresh basil (or dill or fennel), chopped
- 100 g (about 1 cup) grated cheddar cheese
- 1 tablespoon parmesan cheese, grated
- 1⁄4 teaspoon sugar
- 1⁄4 teaspoon pepper
Equipment Needed
- Bread knife
- Mixing bowl
- Spoon or spatula
- Aluminum foil
Instructions
-
Begin by preparing the baguettes. Using a bread knife, carefully cut each baguette into slices about 1-inch thick, slicing sideways. Be sure not to cut all the way through the bottom crust; you want the slices to remain connected. This creates pockets for the flavorful butter and cheese.
-
In a mixing bowl, combine the softened butter, chopped parsley, basil (or your chosen herb alternative), parmesan cheese, sugar, and pepper. Mix well until all ingredients are thoroughly incorporated and you have a homogenous herb butter. The sugar might seem odd, but it helps to balance the savory flavors and promote browning.
-
Now, the fun part: spreading the herb butter! Using a spoon or spatula, generously spread the herb butter mixture between each slice of the prepared baguettes. Ensure every nook and cranny is filled with flavor.
-
Next, poke in the cheddar cheese. Evenly distribute the grated cheddar cheese between the buttered slices. You can use your fingers to gently push the cheese into the bread, ensuring it melts beautifully during baking. If you prefer a more intense cheese flavor, feel free to add a little more than specified.
-
Wrap each baguette tightly in aluminum foil. This will help to trap the heat and steam, allowing the bread to become soft and the cheese to melt perfectly. Make sure the foil is sealed to prevent any butter from leaking out.
-
Baking time! Preheat your oven to 200°C (400°F). Place the foil-wrapped baguettes directly on the oven rack and bake for 12-15 minutes, or until the cheese is melted and bubbly and the bread is heated through. For a crispier crust, you can open the foil during the last 2-3 minutes of baking.
-
Alternatively, for a fantastic smoky flavor, you can also bake these on the barbeque grill. Wrap them in foil and cook on medium heat, turning on each side every few minutes, until heated through and the cheese is melted. This usually takes around 10-15 minutes. You can also use a grill pan indoors, following the same process.
-
Allow the bread to cool slightly before serving. This allows the cheese to set up a bit, preventing it from being too runny.
Expert Tips & Tricks
- Softening the butter: Ensure your butter is properly softened for easy mixing. If you forget to take it out of the fridge ahead of time, you can microwave it in short bursts (5-10 seconds) until it’s soft but not melted.
- Herb variations: Feel free to experiment with different herbs. Dill or fennel are excellent substitutes for basil, adding a unique twist to the flavor profile. You can also add a pinch of red pepper flakes for a touch of heat.
- Cheese choices: While cheddar is a classic choice, you can use other cheeses such as mozzarella, Monterey Jack, or even a blend of your favorites.
- Make-ahead tip: You can prepare the bread ahead of time and store it in the refrigerator for up to 24 hours before baking. Just make sure it’s tightly wrapped in foil.
- Freezing for later: These foil-wrapped breads can be frozen for future use. Thaw completely before baking as directed. This is perfect for those unexpected guests or quick side dishes.
Serving & Storage Suggestions
Serve the cheesy no-garlic bread warm, as a side dish to pasta, soup, salad, or grilled meats. It’s also fantastic on its own as a snack.
Leftovers can be stored in an airtight container in the refrigerator for up to 2 days. To reheat, wrap the bread in foil and bake in a preheated oven at 175°C (350°F) for about 10 minutes, or until heated through. You can also reheat it in the microwave, but the crust will become softer.
Nutritional Information
(Estimated, per serving):
| Nutrient | Amount per Serving | % Daily Value |
|---|---|---|
| Calories | 320 kcal | 16% |
| Total Fat | 18g | 28% |
| Saturated Fat | 11g | 55% |
| Cholesterol | 45mg | 15% |
| Sodium | 600mg | 25% |
| Total Carbohydrate | 30g | 10% |
| Dietary Fiber | 2g | 8% |
| Sugars | 2g | 4% |
| Protein | 8g | 16% |
Variations & Substitutions
- Gluten-free: Use gluten-free baguettes to make this recipe gluten-free.
- Vegan: Substitute the butter with a vegan butter alternative and the cheddar and parmesan cheese with vegan cheese alternatives. Look for vegan cheeses that melt well.
- Spicy: Add a pinch of red pepper flakes or a dash of hot sauce to the herb butter for a spicy kick.
- Italian Herbs: Use an Italian herb blend instead of parsley and basil for a different flavor profile.
FAQs (Frequently Asked Questions)
Q: Can I use dried herbs instead of fresh herbs?
A: Yes, you can use dried herbs, but use about half the amount as dried herbs are more concentrated in flavor.
Q: What if I don’t have parmesan cheese?
A: You can omit the parmesan cheese or substitute it with another hard, salty cheese like Romano or Asiago.
Q: How do I prevent the bread from getting soggy?
A: Ensure the bread is tightly wrapped in foil during baking to trap the steam. If you want a crispier crust, open the foil during the last few minutes of baking.
Q: Can I add other vegetables to the herb butter?
A: Yes, you can add finely chopped vegetables like sun-dried tomatoes or roasted red peppers to the herb butter for extra flavor and texture.
Q: How long does the bread last in the freezer?
A: The bread can last in the freezer for up to 2-3 months if properly wrapped in foil.
Final Thoughts
This cheesy no-garlic bread is a simple yet incredibly satisfying recipe that’s sure to become a family favorite. It’s versatile, customizable, and perfect for any occasion. Whether you’re serving it alongside a hearty pasta dish or simply enjoying it as a snack, this bread is guaranteed to bring smiles to your table. So, gather your ingredients, preheat your oven (or fire up your grill!), and prepare to indulge in a cheesy, buttery delight. Don’t be afraid to experiment with different herbs and cheeses to create your own signature version. And most importantly, have fun and share your creations with those you love!