
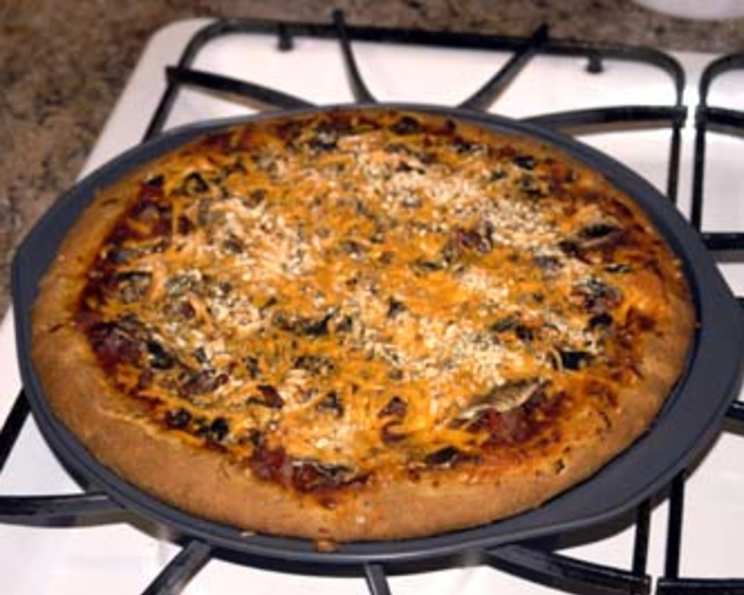
Chef Joey’s Vegan Pizza Crust: A Slice of Heaven
I still remember the first time I truly understood the power of a perfect pizza crust. It was during a late-night college study session fueled by instant coffee and the daunting prospect of final exams. A friend, a culinary student even back then, surprised us all by whipping up a homemade pizza. That crust, light, airy, and slightly sweet, was a revelation. It wasn’t just a vehicle for toppings; it was an experience in itself. This vegan pizza crust, adapted and perfected over years, captures that same magic – a delightful base that elevates any pizza creation.
Recipe Overview
- Prep Time: 30 minutes
- Cook Time: 20-25 minutes
- Total Time: 50-55 minutes
- Servings: 4-6
- Yield: 1 pie (12-15 inch)
- Dietary Type: Vegan
Ingredients
- 1 cup spelt flour
- 1 cup whole wheat pastry flour
- ¼ cup cornflour
- ¾ cup raw sugar
- ½ teaspoon mixed Italian herbs (or herbs of choice)
- 1 ½ teaspoons baking powder (aluminum free)
- ¾ teaspoon baking soda
- 1 ¼ cups plain soy yogurt (soy)
- 2 tablespoons olive oil
Equipment Needed
- Food processor
- Whisk
- Large mixing bowl
- 12-inch or 15-inch pizza pan
- Damp cloth
Instructions
- Begin by combining the dry ingredients. In the bowl of a food processor, add the spelt flour, whole wheat pastry flour, cornflour, raw sugar, Italian herbs, baking powder, and baking soda.
- Process the dry ingredients thoroughly, ensuring all components are fully incorporated. This initial blending step is crucial for even distribution of leavening agents and flavor.
- In a separate, large mixing bowl, prepare the wet ingredients. Use a whisk to thoroughly mix the soy yogurt and olive oil until well combined. This emulsification helps create a tender crust.
- With the food processor running, gradually add the yogurt and oil mixture through the feeding tube. Continue processing until a dough forms a ball. The consistency will be somewhat sticky at this stage, which is perfectly normal.
- Prepare a clean, flat surface by generously flouring it. Turn the sticky dough out onto this surface.
- Knead the dough for a few minutes until it becomes less sticky and easier to handle. Be cautious not to add excessive flour, as this can result in a tough crust. Aim for a slightly tacky texture.
- Place the kneaded dough into a bowl. Cover the bowl with a damp cloth and allow the dough to rest for approximately 25 minutes. This resting period allows the gluten to relax, resulting in a more tender and pliable crust.
- While the dough rests, prepare your pizza pan by lightly oiling it with olive oil. This will prevent the crust from sticking. Simultaneously, take this time to prepare your desired pizza toppings.
- After the 25-minute resting period, press the dough evenly onto the prepared pizza pan. Ensure the dough reaches the edges of the pan, creating a uniform base for your toppings.
- Add your desired pizza toppings, ensuring they are evenly distributed across the surface of the crust.
- Bake the pizza in a preheated oven at 400°F (200°C) for 20-25 minutes, or until the edges of the crust have risen and achieved a medium golden-brown color. The baking time may vary slightly depending on your oven.
- Once baked, carefully remove the pizza from the oven and allow it to cool for a few minutes before slicing and serving.
- Bon Appetit!
Expert Tips & Tricks
- For an extra crispy crust, try par-baking the crust for 5-7 minutes before adding toppings. This helps to set the base and prevent it from becoming soggy.
- Don’t be afraid to experiment with different herbs! Fresh basil, oregano, or rosemary can add a delightful depth of flavor to the crust.
- If you find the dough too sticky to handle, lightly oil your hands instead of adding more flour. This will prevent the dough from sticking without making it tough.
- For a deeper flavor profile, consider using a high-quality extra virgin olive oil with a robust, peppery taste.
- If you don’t have soy yogurt, other plant-based yogurts can be used. Coconut yogurt adds a subtle sweetness, while cashew yogurt offers a richer, creamier flavor.
Serving & Storage Suggestions
Serve the pizza immediately after baking for the best flavor and texture. The crust is most delicious when warm and slightly crispy. Leftover pizza can be stored in an airtight container in the refrigerator for up to 3 days. To reheat, preheat your oven to 350°F (175°C) and bake for 5-10 minutes, or until heated through. Alternatively, you can reheat individual slices in a skillet over medium heat until warmed. For longer storage, pizza slices can be frozen. Wrap them individually in plastic wrap and then place them in a freezer bag. Frozen pizza can be reheated directly from the freezer in the oven, but may require a longer baking time.
Nutritional Information
| Nutrient | Amount per Serving | % Daily Value |
|---|---|---|
| Calories | 334 kcal | N/A |
| Calories from Fat | N/A | 21% |
| Total Fat | 7.8 g | 11% |
| Saturated Fat | 1.1 g | 5% |
| Cholesterol | 0 mg | 0% |
| Sodium | 373.6 mg | 15% |
| Total Carbohydrate | 65.1 g | 21% |
| Dietary Fiber | 3.8 g | 15% |
| Sugars | 37.6 g | 150% |
| Protein | 4.5 g | 8% |
Variations & Substitutions
- Gluten-Free Crust: Substitute the spelt and whole wheat pastry flour with a gluten-free all-purpose flour blend. You may need to adjust the amount of liquid to achieve the desired dough consistency.
- Sweet Potato Crust: Add 1/2 cup of mashed sweet potato to the dough for a subtly sweet and nutrient-rich twist. Reduce the amount of soy yogurt slightly to compensate for the added moisture.
- Herb Infusion: Infuse the olive oil with garlic, rosemary, or chili flakes for added flavor complexity. Simply heat the oil with your chosen aromatics over low heat for a few minutes, then allow it to cool before using.
- Spiced Crust: Add a pinch of chili powder, smoked paprika, or cumin to the dry ingredients for a spicy or smoky kick.
FAQs (Frequently Asked Questions):
Q: Can I use regular all-purpose flour instead of spelt and whole wheat pastry flour?
A: Yes, you can substitute with all-purpose flour, but the texture and flavor will be slightly different. The spelt and whole wheat flours contribute to a more complex flavor and slightly denser texture.
Q: Why is my dough so sticky?
A: This dough is naturally a bit sticky due to the soy yogurt. Resist the urge to add too much extra flour; instead, lightly oil your hands and work surface to prevent sticking.
Q: Can I make this crust ahead of time?
A: Yes, you can prepare the dough ahead of time and store it in the refrigerator for up to 24 hours. Just make sure to wrap it tightly in plastic wrap to prevent it from drying out. Let it come to room temperature before pressing it into the pizza pan.
Q: What kind of toppings work best with this crust?
A: This crust is versatile and pairs well with a wide variety of toppings. Consider classic combinations like marinara sauce, vegan mozzarella, and vegetables, or experiment with more adventurous options like roasted butternut squash, caramelized onions, and balsamic glaze.
Q: Can I freeze the baked pizza crust?
A: Yes, you can freeze the baked crust (without toppings) for up to 2 months. Wrap it tightly in plastic wrap and then place it in a freezer bag. Thaw completely before adding toppings and baking.
Final Thoughts
Crafting this vegan pizza crust is more than just following a recipe; it’s about creating an experience. It’s about the joy of kneading the dough, the anticipation of the aroma filling your kitchen, and the satisfaction of sharing a delicious, homemade meal with loved ones. Don’t be afraid to experiment with different toppings, herbs, and spices to create your own signature vegan pizza. And most importantly, have fun! I encourage you to try this recipe and share your feedback. Pair it with a crisp green salad and a glass of your favorite beverage for a truly unforgettable meal. Happy baking!