
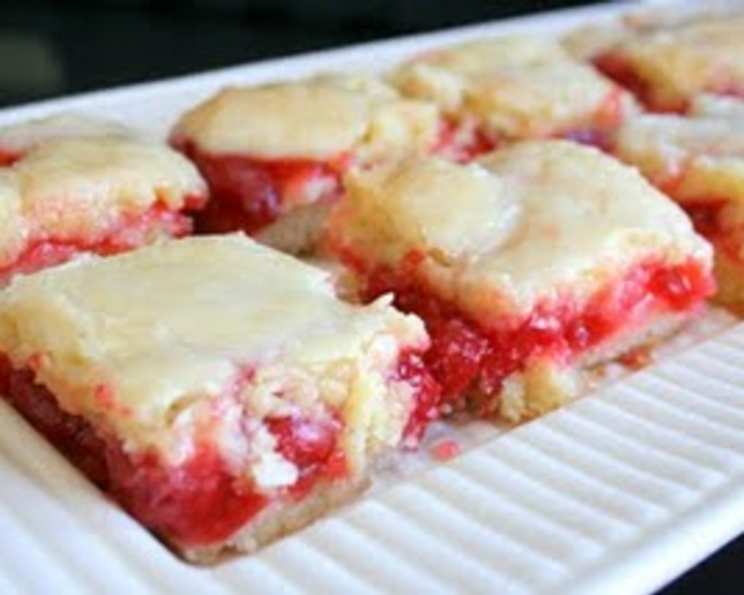
Cherry Bars: A Slice of Sweet Nostalgia
The first time I tasted cherry bars, I was at a summer potluck, the kind where everyone brings their “famous” dish. Amidst the potato salads and grilled corn, a humble pan of cherry bars sat unassuming. One bite, however, and I was hooked. The buttery crust, the sweet-tart burst of cherry filling, and the simple glaze brought back memories of childhood summers and simpler times. They weren’t fancy, but they were utterly comforting and delicious. Now, they’re my go-to treat for sharing with friends, a guaranteed crowd-pleaser that always disappears in a flash.
Recipe Overview
- Prep Time: 20 minutes
- Cook Time: 30-35 minutes
- Total Time: 50-55 minutes
- Servings: 12-16
- Yield: 1 pan (15x10x1 inch)
- Dietary Type: Vegetarian (can be adapted to dairy-free with substitutions)
Ingredients
-
For the Bars:
- 1 cup butter, softened
- 2 cups sugar
- 4 eggs
- 1 teaspoon vanilla extract
- ¼ teaspoon almond extract
- 3 cups all-purpose flour
- 1 teaspoon salt
- One 21-ounce can cherry pie filling (use 2 cans if you prefer a very cherry-filled bar)
-
For the Glaze:
- 1 cup powdered sugar
- ½ teaspoon vanilla extract
- ½ teaspoon almond extract
- 2 tablespoons milk
Equipment Needed
- 15x10x1-inch baking pan (or 9×13-inch pan)
- Mixing bowls
- Electric mixer or whisk
- Measuring cups and spoons
- Wire rack
Instructions
-
Preheat your oven to 350°F (175°C). Prepare your baking pan by greasing it thoroughly. This prevents the bars from sticking and ensures easy removal.
-
In a large mixing bowl, cream together the softened butter and sugar until light and fluffy. This step is crucial for a tender crust. Using an electric mixer makes this process easier, but you can also use a whisk for a more rustic approach.
-
Add the eggs one at a time, beating well after each addition. Ensure each egg is fully incorporated into the butter and sugar mixture to create a smooth batter.
-
Stir in the vanilla extract and almond extract. The almond extract enhances the cherry flavor beautifully, but you can omit it if you prefer a purely vanilla taste.
-
In a separate bowl, whisk together the all-purpose flour and salt. This ensures the salt is evenly distributed throughout the flour, which is important for proper flavor.
-
Gradually add the dry ingredients to the wet ingredients, mixing until just combined. Be careful not to overmix, as this can result in a tough crust. A few streaks of flour are okay.
-
Spread 3 cups of the batter evenly into the prepared baking pan. Use an offset spatula or the back of a spoon to create a smooth, uniform layer. This will form the base of your cherry bars.
-
Spread the cherry pie filling evenly over the batter. If you’re using two cans of cherry pie filling, now’s the time to spread it! Make sure the entire batter surface is covered with cherries.
-
Drop the remaining batter by teaspoonfuls over the cherry pie filling. Don’t worry about covering the entire surface; the batter will spread as it bakes. The goal is to create a rustic, dotted appearance.
-
Bake in the preheated oven for 30 to 35 minutes, or until a toothpick inserted into the center comes out clean. If using a 9×13-inch pan, start checking for doneness at 35 minutes, as the baking time may be longer. The bars should be golden brown on top.
-
Cool the bars completely on a wire rack before glazing. This prevents the glaze from melting and running.
-
Prepare the glaze by whisking together the powdered sugar, vanilla extract, almond extract, and milk in a small bowl until smooth. Add more milk, one teaspoon at a time, if needed to reach your desired consistency. The glaze should be pourable but not too thin.
-
Drizzle the glaze evenly over the cooled bars. Let the glaze set for a few minutes before cutting and serving.
Expert Tips & Tricks
- Softened Butter is Key: Make sure your butter is properly softened, but not melted. This will ensure a smooth and creamy base for your bars.
- Don’t Overmix: Overmixing the batter develops the gluten in the flour, leading to a tough crust. Mix until just combined.
- Customize the Filling: Feel free to experiment with other pie fillings, such as apple, blueberry, or peach.
- Add Nuts: Chopped walnuts or pecans add a delightful crunch to these bars. Sprinkle them over the cherry filling before baking.
- Make Ahead: These bars can be made a day ahead of time. Store them, unglazed, in an airtight container at room temperature. Glaze them just before serving.
Serving & Storage Suggestions
These cherry bars are delicious served warm or at room temperature. They pair perfectly with a scoop of vanilla ice cream or a dollop of whipped cream.
- Storage: Store leftover cherry bars in an airtight container at room temperature for up to 3 days or in the refrigerator for up to a week.
- Freezing: For longer storage, freeze the bars in a single layer on a baking sheet until solid, then transfer them to a freezer-safe bag or container. They can be frozen for up to 2 months. Thaw completely before serving.
- Reheating: Reheat individual bars in the microwave for a few seconds or in a preheated oven at 350°F (175°C) for a few minutes until warmed through.
Nutritional Information
| Nutrient | Amount per Serving | % Daily Value |
|---|---|---|
| Calories | 502.1 kcal | N/A |
| Calories from Fat | 156 g | 31% |
| Total Fat | 17.4 g | 26% |
| Saturated Fat | 10.3 g | 51% |
| Cholesterol | 103 mg | 34% |
| Sodium | 363.9 mg | 15% |
| Total Carbohydrate | 81.4 g | 27% |
| Dietary Fiber | 1.1 g | 4% |
| Sugars | 43.3 g | 173% |
| Protein | 5.8 g | 11% |
Note: Nutritional information is an estimate and may vary based on specific ingredients and serving sizes.
Variations & Substitutions
- Dairy-Free: Substitute the butter with a dairy-free butter alternative, and use a plant-based milk, such as almond milk or soy milk, in the glaze.
- Gluten-Free: Use a gluten-free all-purpose flour blend in place of the regular flour. You may need to add a binding agent, such as xanthan gum, to improve the texture.
- Lemon Glaze: Replace the vanilla and almond extract in the glaze with lemon zest and lemon juice for a bright, citrusy twist.
- Chocolate Chips: Add chocolate chips to the batter for a chocolate cherry version.
FAQs (Frequently Asked Questions)
Q: Can I use fresh cherries instead of cherry pie filling?
A: While you can use fresh cherries, you’ll need to pit them, cook them down with sugar and a thickener (like cornstarch) to create a pie filling consistency. Pie filling is easier and faster.
Q: My bars are browning too quickly. What should I do?
A: If your bars are browning too quickly, tent the baking pan with aluminum foil for the last 10-15 minutes of baking.
Q: Can I make these bars without almond extract?
A: Yes, you can omit the almond extract if you prefer. The vanilla extract will still provide a delicious flavor.
Q: How do I know when the bars are done?
A: The bars are done when a toothpick inserted into the center comes out clean or with a few moist crumbs attached.
Q: Can I use a different size baking pan?
A: Yes, you can use a 9×13-inch baking pan, but the baking time may be longer. Start checking for doneness at 35 minutes. The bars will also be thicker.
Final Thoughts
These Cherry Bars are more than just a dessert; they’re a taste of nostalgia, a simple pleasure that brings people together. Whether you’re sharing them with friends, family, or enjoying them all by yourself, I hope they bring a little bit of joy to your day. Don’t be afraid to get creative with the variations and substitutions, and most importantly, have fun in the kitchen! I’d love to hear your feedback and any twists you put on this recipe. Happy baking!