
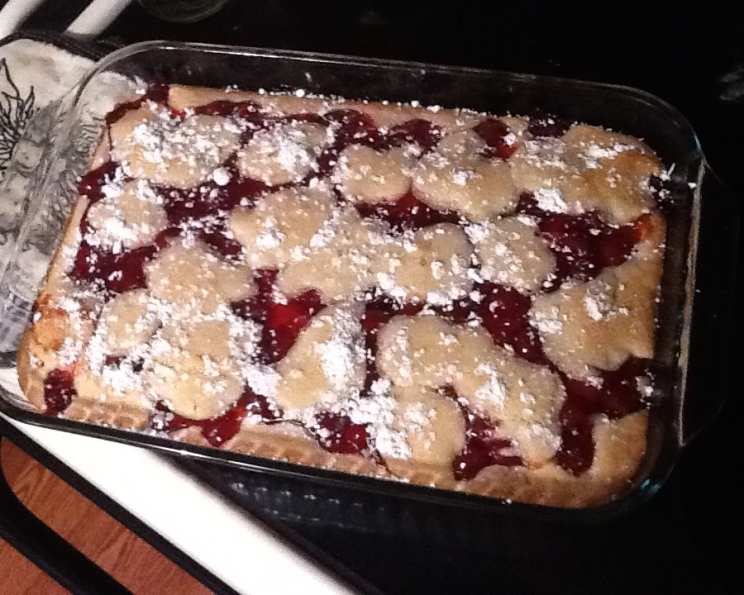
Cherry Bars: A Taste of Nostalgia
Growing up, my grandmother always had a tin of homemade bars on her kitchen counter. While chocolate chip cookies and brownies often stole the spotlight, it was her simple cherry bars that held a special place in my heart. They weren’t fancy, but they were always made with love, and the combination of the buttery base, sweet cherry filling, and dusting of powdered sugar transported me back to her warm kitchen every time. To this day, the scent of baking cherries instantly evokes those cherished memories.
Recipe Overview
- Prep Time: 15 minutes
- Cook Time: 35-45 minutes
- Total Time: 50-60 minutes
- Servings: 12-16
- Yield: 1 (9×13 inch) pan
- Dietary Type: Vegetarian
Ingredients
- 1 cup margarine, softened
- 2 cups granulated sugar
- 4 large eggs
- 3 cups all-purpose flour
- 1 teaspoon vanilla extract
- 1 (21 ounce) can cherry pie filling
- Powdered sugar, for dusting (optional)
Equipment Needed
- 9×13 inch baking pan
- Electric mixer or whisk
- Mixing bowls
- Measuring cups and spoons
- Spatula or wooden spoon
Instructions
-
Preheat your oven to 350°F (175°C). Grease a 9×13 inch baking pan thoroughly. This will prevent the bars from sticking and make them easier to remove after baking.
-
In a large mixing bowl, cream together the softened margarine and granulated sugar using an electric mixer or a sturdy whisk. Beat until the mixture is light and fluffy. This step is crucial for creating a tender and well-textured base.
-
Add the eggs one at a time to the creamed mixture, making sure to stir well after each addition. This ensures that the eggs are fully incorporated and prevents the batter from curdling.
-
Add the flour and vanilla extract to the wet ingredients. Mix until just combined. Be careful not to overmix the batter, as this can result in tough bars. A few streaks of flour are fine at this stage.
-
Spread approximately 3/4 of the batter evenly into the prepared 9×13 inch baking pan. Use a spatula or the back of a spoon to create a smooth, even layer.
-
Pour the entire can of cherry pie filling over the batter in the pan. Spread the cherry filling evenly over the base, ensuring it reaches all edges of the pan.
-
Drop the remaining batter by spoonfuls over the cherry pie filling. Don’t worry about covering the entire surface of the cherries; the batter will spread during baking. This creates a rustic, textured top.
-
Bake in the preheated oven for 35-45 minutes, or until the bars are golden brown and a toothpick inserted into the center (avoiding the cherry filling) comes out clean.
-
Once baked, remove the bars from the oven and let them cool completely in the pan before cutting into squares.
-
While the bars are still slightly warm (optional), sprinkle generously with powdered sugar for a touch of sweetness and visual appeal.
Expert Tips & Tricks
- Softened Margarine is Key: Ensure your margarine is properly softened but not melted. If it’s too soft, the bars may spread too much during baking.
- Don’t Overmix: Overmixing the batter develops the gluten in the flour, resulting in tough bars. Mix until just combined.
- Toothpick Test: When checking for doneness, insert the toothpick into a portion of the batter, avoiding the cherry filling. The cherries will add moisture, making it seem underbaked.
- Even Cherry Distribution: For a more uniform cherry flavor, gently stir the cherry pie filling before pouring it over the batter.
- Make-Ahead Option: The batter can be made a day ahead and stored in the refrigerator. Let it come to room temperature slightly before spreading into the pan.
- Prevent Sticking: For easy removal, line the baking pan with parchment paper, leaving an overhang on the sides. After baking and cooling, lift the bars out using the parchment paper.
- Spice it Up: Add a pinch of cinnamon or nutmeg to the batter for a warm, comforting flavor.
- Nutty Crunch: Sprinkle chopped almonds or walnuts over the cherry filling before baking for added texture and flavor.
Serving & Storage Suggestions
These cherry bars are delicious served warm or at room temperature. They make a wonderful addition to afternoon tea, a potluck dessert, or a simple sweet treat.
- Serving: Serve the bars as is, or pair them with a scoop of vanilla ice cream or a dollop of whipped cream.
- Storage: Store leftover cherry bars in an airtight container at room temperature for up to 3 days. For longer storage, refrigerate them for up to a week.
- Freezing: Cherry bars can be frozen for up to 2 months. Wrap them individually in plastic wrap and then place them in a freezer-safe container. Thaw at room temperature before serving.
- Reheating: If desired, you can warm the bars slightly in the microwave for a few seconds before serving.
Nutritional Information
| Nutrient | Amount per Serving | % Daily Value |
|---|---|---|
| Calories | 390 kcal | 20% |
| Total Fat | 18g | 28% |
| Saturated Fat | 5g | 25% |
| Cholesterol | 70mg | 23% |
| Sodium | 120mg | 5% |
| Total Carbohydrate | 55g | 18% |
| Dietary Fiber | 1g | 4% |
| Sugars | 30g | 60% |
| Protein | 4g | 8% |
Nutritional information is an estimate and may vary based on specific ingredients and portion sizes.
Variations & Substitutions
- Gluten-Free Cherry Bars: Substitute the all-purpose flour with a gluten-free all-purpose flour blend.
- Different Fruit Filling: Use other canned pie fillings like blueberry, apple, or peach.
- Vegan Cherry Bars: Substitute the margarine with a vegan butter alternative, the eggs with applesauce (1/4 cup per egg), and ensure the cherry pie filling is vegan-friendly.
- Citrus Zest: Add lemon or orange zest to the batter for a brighter flavor.
- Chocolate Chips: Stir in chocolate chips to the batter or sprinkle them over the cherry filling for a chocolate cherry delight.
- Almond Extract: Replace the vanilla extract with almond extract for a complementary flavor to the cherries.
FAQs (Frequently Asked Questions)
Q: Can I use fresh cherries instead of canned cherry pie filling?
A: Yes, but you’ll need to prepare the cherries first. Pit and cook fresh cherries with sugar and a thickening agent like cornstarch until they form a pie filling consistency.
Q: Why did my cherry bars turn out dry?
A: Overbaking is the most common cause of dry cherry bars. Be sure to check for doneness regularly and avoid overbaking. Also, ensure your margarine is properly softened and not melted.
Q: Can I use butter instead of margarine?
A: Yes, butter can be used as a substitute for margarine. It will give the bars a richer flavor.
Q: How do I prevent the cherry filling from sinking to the bottom?
A: Ensuring the base layer of batter is thick enough and slightly pre-baking it for a few minutes before adding the cherry filling can help prevent sinking.
Q: Can I add a streusel topping to these bars?
A: Absolutely! A simple streusel topping made with flour, butter, and sugar would add a lovely crunch to these bars.
Final Thoughts
These cherry bars are a testament to the fact that simple recipes can often be the most satisfying. With just a handful of ingredients and a few easy steps, you can create a delicious and comforting treat that’s perfect for any occasion. I encourage you to give this recipe a try and experience the joy of baking (and eating!) these delightful bars. Feel free to experiment with different variations and make them your own. Don’t forget to share your creations and feedback! These bars pair perfectly with a glass of cold milk or a warm cup of coffee. Happy baking!