
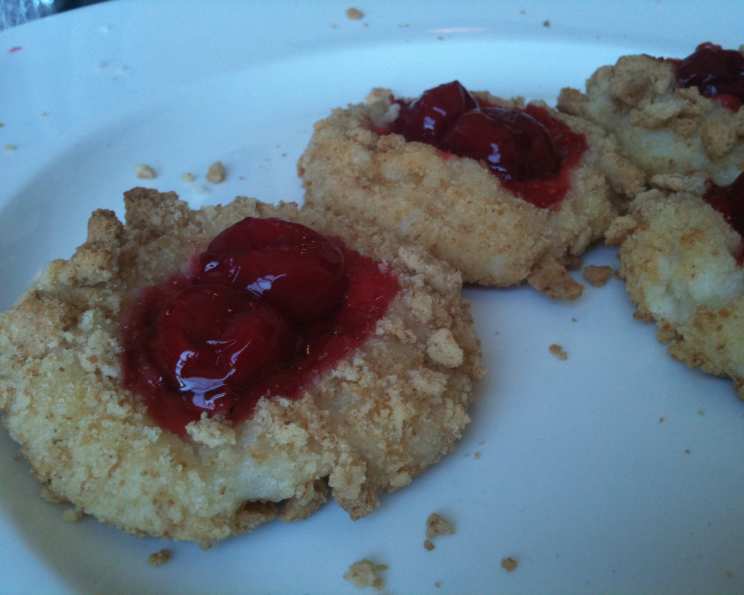
Cherry Cheesecake Cookies: A Taste of Nostalgia
My grandma, Nana Rose, always had a cookie jar overflowing with treats. But the Cherry Cheesecake Cookies were legendary. I remember sneaking into the kitchen as a child, the aroma of vanilla and graham cracker crumbs filling the air. The soft, crumbly texture, the creamy cheesecake tang, and the burst of sweet cherry – it was pure magic. These cookies weren’t just a dessert; they were a symbol of Nana Rose’s love and the warmth of her kitchen. Now, I’m thrilled to share this treasured recipe with you.
Recipe Overview
- Prep Time: 45 minutes
- Cook Time: 12-14 minutes
- Total Time: 57-59 minutes
- Yields: Approximately 54 cookies
- Serves: 54
- Dietary Type: Not specified, contains dairy
Ingredients
- 3 ½ cups all-purpose flour
- 2 teaspoons baking powder
- 1 teaspoon salt
- 2 (8 ounce) packages cream cheese, softened
- 20 tablespoons (2 ½ sticks) unsalted butter, softened
- 1 ½ cups sugar
- 2 large eggs
- 2 teaspoons vanilla extract
- 1 cup graham cracker crumbs (see note below)
- 3 (20 ounce) cans cherry pie filling, drained
Note on Graham Cracker Crumbs: You can buy pre-made graham cracker crumbs, or easily make your own by pulsing graham crackers in a food processor until finely ground. About 12-14 full graham cracker sheets should yield approximately 1 cup of crumbs.
Equipment Needed
- Mixing bowls
- Electric mixer
- Measuring cups and spoons
- Baking sheets
- Parchment paper
- Shallow dish
- Tablespoon
- Wire rack
Instructions
- Prepare the Dough: In a medium-sized bowl, whisk together the all-purpose flour, baking powder, and salt. This ensures the baking powder is evenly distributed for consistent rising.
- Cream the Butter and Cream Cheese: In a large mixing bowl, using an electric mixer on medium-high speed, beat the softened cream cheese, butter, and sugar until the mixture is smooth and creamy. This should take about 2 minutes. Be sure to scrape down the sides of the bowl occasionally to ensure even mixing. Properly creaming these ingredients is crucial for a tender cookie.
- Add Eggs and Vanilla: Add the eggs, one at a time, to the creamed mixture, beating well after each addition. Then, add the vanilla extract and mix until just incorporated. Overmixing at this stage can lead to tougher cookies, so mix only until combined.
- Incorporate Dry Ingredients: Reduce the mixer speed to low. Gradually add the flour mixture to the wet ingredients, mixing until just combined. Be careful not to overmix; a few streaks of flour are okay. Overmixing develops gluten, resulting in a tough cookie.
- Chill the Dough: Cover the dough tightly with plastic wrap and refrigerate until firm, at least 30 minutes. This chilling period allows the gluten to relax, resulting in a more tender cookie. It also makes the dough easier to handle and prevents the cookies from spreading too much during baking.
- Preheat the Oven: Adjust the oven racks to the upper-middle and lower-middle positions. Preheat the oven to 350 degrees Fahrenheit (175 degrees Celsius). Lining two baking sheets with parchment paper will prevent the cookies from sticking and make for easier cleanup.
- Prepare Graham Cracker Crumbs: Place the graham cracker crumbs in a shallow dish. This will be used to coat the cookies, adding a delightful flavor and texture.
- Assemble the Cookies: Roll the chilled dough into 1 ½-inch balls. The size is important for even baking; use a cookie scoop if you want perfectly uniform cookies.
- Coat with Crumbs: Roll each ball in the graham cracker crumbs, ensuring they are evenly coated. The crumbs add a lovely textural contrast and a hint of graham cracker flavor that complements the cheesecake and cherry.
- Arrange on Baking Sheets: Place the crumb-coated balls 2 inches apart on the prepared baking sheets. This spacing prevents the cookies from running together as they bake.
- Create Indentations: Using a tablespoon measure (or your thumb), make an indentation in the center of each ball. This creates a well to hold the cherry pie filling.
- Fill with Cherries: Place 3 drained cherries from the cherry pie filling into each dimple. Draining the cherries is vital to prevent the cookies from becoming soggy.
- Bake the Cookies: Bake the cookies until they are golden around the edges, about 12 to 14 minutes. Switching and rotating the baking sheets halfway through baking ensures even baking and prevents hot spots from burning the cookies.
- Cool and Serve: Cool the cookies on the baking sheets for 5 minutes before transferring them to a wire rack to cool completely. This prevents them from breaking apart while they are still warm and soft.
Expert Tips & Tricks
- Softened Ingredients are Key: Make sure your cream cheese and butter are truly softened. They should be at room temperature and easily pliable. This is crucial for creating a smooth and creamy dough.
- Don’t Overmix: Overmixing the dough will develop the gluten in the flour, leading to tough cookies. Mix until just combined.
- Chilling is Essential: Don’t skip the chilling time! It allows the dough to firm up, making it easier to handle and preventing the cookies from spreading too much in the oven. If you are short on time, 15 minutes in the freezer can help speed up the process.
- Even Baking: To ensure even baking, use an oven thermometer to verify your oven temperature is accurate. Rotating the baking sheets halfway through baking is also crucial.
- Cherry Draining: Thoroughly drain the cherry pie filling before adding it to the cookies. Excess moisture will make the cookies soggy.
- Cookie Scoop: For uniform cookies, use a cookie scoop to portion the dough.
- Freezing Dough: You can freeze the unbaked cookie dough for up to 2 months. Thaw in the refrigerator overnight before baking.
Serving & Storage Suggestions
These Cherry Cheesecake Cookies are best enjoyed slightly cooled, allowing the flavors to meld together. They pair wonderfully with a glass of cold milk or a cup of hot coffee or tea.
- Storage: Store the cookies in an airtight container at room temperature for up to 2 days.
- Refrigeration: For longer storage, refrigerate the cookies in an airtight container for up to 5 days.
- Freezing: To freeze baked cookies, wrap them individually in plastic wrap and then place them in a freezer-safe bag or container. They can be frozen for up to 2 months. Thaw at room temperature before serving. They can also be reheated in a low oven (200°F/95°C) for 5-10 minutes to restore their warm, soft texture.
Nutritional Information
Please note that these values are estimates and can vary based on specific ingredients and portion sizes.
| Nutrient | Amount per Serving | % Daily Value |
|---|---|---|
| Calories | 163.5 kcal | N/A |
| Calories from Fat | N/A | N/A |
| Total Fat | 7.6 g | 11% |
| Saturated Fat | 4.4 g | 22% |
| Cholesterol | 27.4 mg | 9% |
| Sodium | 100 mg | 4% |
| Total Carbohydrate | 22.2 g | 7% |
| Dietary Fiber | 0.5 g | 1% |
| Sugars | 6.3 g | 25% |
| Protein | 1.8 g | 3% |
Variations & Substitutions
- Gluten-Free: Substitute the all-purpose flour with a gluten-free blend. Ensure the blend contains xanthan gum or another binder for proper structure. Also, use gluten-free graham crackers for the crumbs.
- Different Fruit Fillings: Experiment with other pie fillings such as blueberry, raspberry, or apple.
- Lemon Zest: Add 1 teaspoon of lemon zest to the dough for a brighter flavor.
- Chocolate Chips: Add ½ cup of mini chocolate chips to the dough for a chocolatey twist.
- Nut Extracts: Substitute the vanilla extract with almond or butter extract for a different flavor profile.
FAQs (Frequently Asked Questions)
Q: Why are my cookies spreading too much?
A: The most common reasons for cookies spreading too much are the dough not being chilled enough, using too much butter or sugar, or the oven temperature being too low. Make sure to chill the dough thoroughly and double-check your oven temperature.
Q: Can I use low-fat cream cheese?
A: While you can use low-fat cream cheese, the cookies will have a slightly different texture and flavor. Full-fat cream cheese provides the best creamy texture and rich flavor.
Q: Can I make these cookies ahead of time?
A: Yes, you can make the dough ahead of time and store it in the refrigerator for up to 2 days. You can also bake the cookies and store them as described in the “Serving & Storage Suggestions” section.
Q: What if I don’t have graham cracker crumbs?
A: You can substitute the graham cracker crumbs with crushed vanilla wafers or even finely chopped nuts.
Q: How do I know when the cookies are done?
A: The cookies are done when the edges are golden brown and the centers are set but still slightly soft. They will continue to firm up as they cool.
Final Thoughts
These Cherry Cheesecake Cookies are more than just a dessert; they’re a little bite of happiness. Whether you’re baking them for a special occasion or simply craving a sweet treat, I hope this recipe brings you as much joy as it has brought my family for generations. Don’t hesitate to put your own spin on this recipe, trying out different fruit fillings, extracts, or mix-ins! Bake with love, share with joy, and let me know how your cookies turn out!