
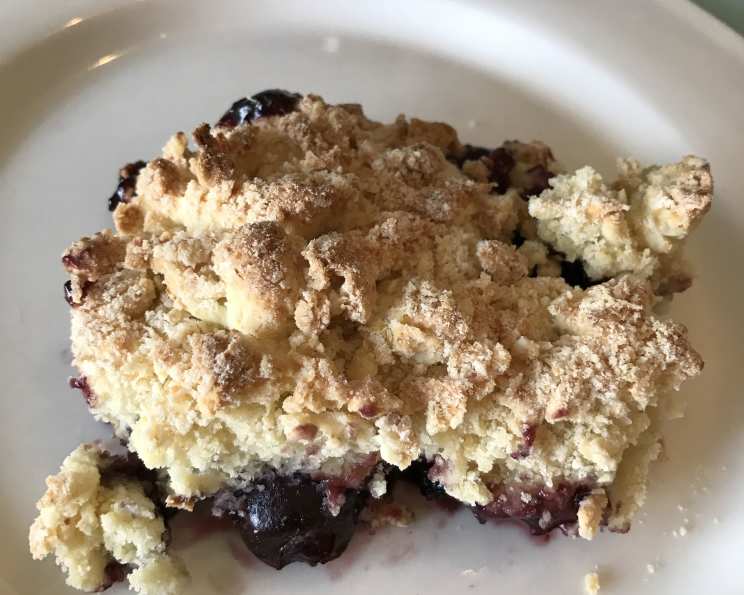
Cherry Cobbler: A Taste of Summer, Anytime
The aroma of warm cherries mingling with a buttery biscuit topping… it takes me back to my grandmother’s kitchen. Every summer, her cherry tree would overflow with fruit, and we’d spend an afternoon pitting cherries, our fingers stained crimson, ready to transform them into a bubbling cobbler. It wasn’t just dessert; it was a shared ritual, a celebration of family and the simple joy of fresh, seasonal ingredients. While those summer days are precious memories, this recipe brings that same comforting feeling to the table, any time of year, with the convenience of frozen cherries.
Recipe Overview
- Prep Time: 15 minutes
- Cook Time: 25-30 minutes
- Total Time: 40-45 minutes
- Servings: 9-inch baking dish
- Yield: 6-8 servings
- Dietary Type: Not specified
Ingredients
FILLING:
- 4 cups frozen dark sweet cherries (can use 1 cup more)
- ½ cup sugar
- 2 tablespoons cornstarch
- ¼ teaspoon cinnamon
- 1 pinch salt
TOPPING:
- 1 ½ cups flour
- 2 tablespoons sugar (can use 1 tablespoon)
- ½ teaspoon baking soda
- ½ teaspoon baking powder
- ¼ teaspoon salt
- ¼ cup cold butter, cut into small pieces (no substitutes)
- ⅔ cup buttermilk
Equipment Needed
- 9-inch glass baking dish
- 2-quart heavy saucepan
- Medium mixing bowl
- Whisk
- Pastry blender or fingertips
- Fork
Instructions
- Preheat your oven to 400 degrees Fahrenheit (200 degrees Celsius). Position the oven rack to the second-lowest position. This ensures the bottom of the cobbler cooks evenly without burning the topping.
- Butter a 9-inch glass baking dish thoroughly. This prevents the cobbler from sticking and helps to create a nice, golden-brown crust.
- Prepare the cherry filling. In a 2-quart heavy saucepan, combine the frozen cherries, sugar, cornstarch, cinnamon, and salt.
- Cook the filling over medium heat, stirring occasionally. Continue stirring until the sugar begins to dissolve, which should take about 3-4 minutes. The mixture will start to thicken slightly.
- Once the sugar is dissolved, remove the saucepan from the heat. Spoon the cherry filling evenly into the prepared baking dish.
- Now, prepare the topping. In a medium bowl, whisk together the flour, sugar, baking soda, baking powder, and salt. Make sure all dry ingredients are well combined.
- Cut in the cold butter. Using your fingertips or a pastry blender, blend the cold butter into the flour mixture until it resembles coarse meal. The key here is to work quickly to prevent the butter from melting, which will result in a flakier topping.
- Add the buttermilk. Stir in the buttermilk with a fork JUST until combined. Be careful not to overmix the dough. Overmixing will develop the gluten in the flour, resulting in a tough topping rather than a tender one. The dough should be slightly shaggy and not perfectly smooth.
- Drop the dough in mounds over the cherry filling, leaving some space between the mounds. This allows the fruit filling to bubble up and create a visually appealing cobbler.
- Lightly sprinkle sugar over the dough mounds. This adds a touch of extra sweetness and helps the topping to brown beautifully in the oven.
- Bake for approximately 25-30 minutes, or until the topping is golden brown and the cherry filling is bubbling. The bubbling fruit is a key indicator that the filling is cooked through.
- Remove the cobbler from the oven and let it cool slightly before serving. This allows the filling to thicken a bit more and prevents it from being too runny.
Expert Tips & Tricks
- Use cold ingredients. Especially for the topping, cold butter is crucial for creating a flaky texture. You can even chill the buttermilk and dry ingredients for a few minutes before starting.
- Don’t overmix the topping. As mentioned earlier, overmixing develops the gluten in the flour, leading to a tough topping. Mix just until the buttermilk is incorporated.
- Adjust sweetness to your liking. If you prefer a less sweet cobbler, you can reduce the amount of sugar in the filling or the topping. However, remember that sugar also contributes to the filling’s thickening process, so reducing it significantly may affect the consistency.
- Prevent a soggy bottom. Using a glass baking dish helps ensure even baking. Positioning the oven rack on the second-lowest level also aids in preventing the bottom from becoming soggy.
- Enhance the flavor. A touch of almond extract or lemon zest in the topping can add a subtle complexity to the flavor profile.
Serving & Storage Suggestions
Serve the cherry cobbler warm, preferably with a scoop of vanilla ice cream or a dollop of whipped cream. The contrast of the warm cobbler and the cold ice cream is simply divine!
Leftover cherry cobbler can be stored at room temperature for up to 2 days, in the refrigerator for up to 4 days, or in the freezer for up to 2 months. To reheat, warm individual portions in the microwave or bake the entire cobbler in a preheated oven at 350 degrees Fahrenheit (175 degrees Celsius) until heated through. If frozen, thaw the cobbler completely before reheating.
Nutritional Information
| Nutrient | Amount per Serving | % Daily Value |
|---|---|---|
| Calories | 656.2 kcal | N/A |
| Calories from Fat | 114 g | 17% |
| Total Fat | 12.7 g | 19% |
| Saturated Fat | 7.7 g | 38% |
| Cholesterol | 32.1 mg | 10% |
| Sodium | 515.4 mg | 21% |
| Total Carbohydrate | 130.8 g | 43% |
| Dietary Fiber | 6.8 g | 27% |
| Sugars | 85.8 g | 343% |
| Protein | 9.3 g | 18% |
Note: Nutritional information is an estimate and may vary based on specific ingredients and portion sizes.
Variations & Substitutions
- Gluten-Free: Use a gluten-free flour blend in the topping. You may need to add a little xanthan gum to help bind the dough.
- Dairy-Free: Substitute the butter with a vegan butter alternative. Use almond milk or soy milk instead of buttermilk. You might add a teaspoon of apple cider vinegar to the non-dairy milk to mimic the acidity of buttermilk.
- Other Fruits: While this recipe is specifically for cherry cobbler, you can experiment with other frozen fruits such as peaches, blueberries, or mixed berries. Adjust the sugar accordingly, as some fruits are naturally sweeter than others.
- Spice it up: Add a pinch of nutmeg or a dash of cardamom to the topping for a warmer, more complex flavor.
- Citrus Burst: Add the zest of one lemon or orange to the cherry filling for a bright, fresh flavor.
FAQs (Frequently Asked Questions)
Q: Can I use fresh cherries instead of frozen?
A: Yes, you can use fresh cherries. You will need to pit them first and may need to adjust the amount of sugar depending on the sweetness of the cherries.
Q: Can I make the cobbler ahead of time?
A: You can prepare the filling and the topping separately ahead of time. Store them in the refrigerator, and then assemble and bake the cobbler just before serving.
Q: My topping is browning too quickly. What should I do?
A: If the topping is browning too quickly, you can tent the cobbler with aluminum foil for the remaining baking time.
Q: The filling is too runny. How can I fix it?
A: If the filling is too runny, you can mix a little more cornstarch with cold water and add it to the filling while it’s still hot from the oven. Alternatively, allow the cobbler to cool completely, as the filling will thicken as it cools.
Q: Can I freeze the baked cobbler?
A: Yes, you can freeze the baked cobbler. Wrap it tightly in plastic wrap and then aluminum foil. Thaw completely before reheating.
Final Thoughts
This cherry cobbler is more than just a dessert; it’s a warm hug in a dish. The combination of sweet, juicy cherries and a buttery, crumbly topping is simply irresistible. Whether you’re craving a taste of summer in the middle of winter or simply looking for a comforting dessert to share with loved ones, this recipe is sure to please. Don’t be afraid to experiment with variations and make it your own. And most importantly, enjoy the process of creating something delicious! Share your feedback and let me know how it turns out. Perhaps pair it with a chilled glass of Moscato for the ultimate indulgence!