
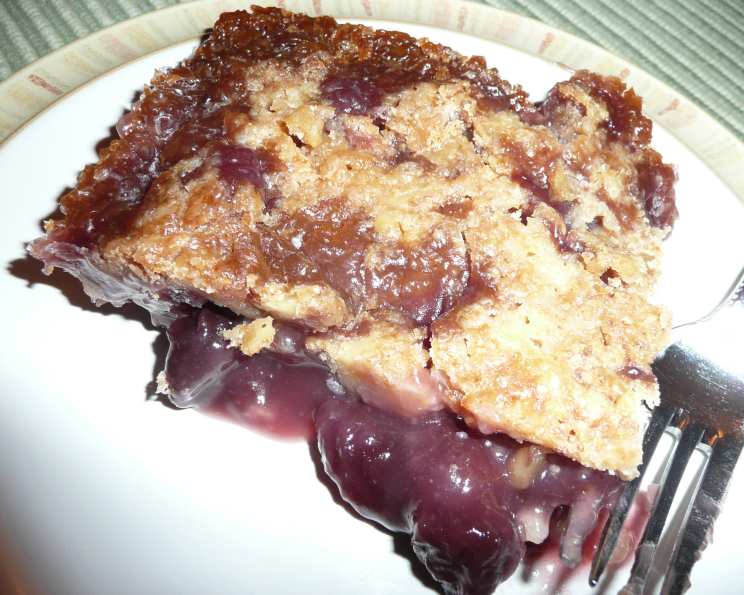
Cherry Crunch Dessert: A Taste of Oklahoma Sunshine
I can still smell the sweet, slightly tart aroma wafting from Aunt Carol’s kitchen every summer. It was the unmistakable scent of her Cherry Crunch, a dessert that seemed to magically appear at every family gathering. As kids, we’d hover impatiently, waiting for the moment she’d finally slice into that golden-brown, bubbly goodness. It wasn’t just dessert; it was a symbol of family, warmth, and carefree summer days spent running barefoot through the Oklahoma countryside. This recipe, passed down from my cousins in Oklahoma years ago, reminds me of those cherished times.
Recipe Overview
- Prep Time: 15 minutes
- Cook Time: 35-40 minutes
- Total Time: 50-55 minutes
- Servings: 20
- Yield: 1 (13×9 inch) pan
- Dietary Type: Vegetarian (easily adaptable to vegan – see variations)
Ingredients
- 2 (20 ounce) cans cherries, in juice (not pie filling)
- 1 cup margarine (or vegan butter alternative)
- 2 cups sugar
- 1 teaspoon almond flavoring
- 1 (18 1/4 ounce) box white cake mix
- 1/2 cup nuts (pecans or walnuts, chopped)
Equipment Needed
- 13 x 9 inch baking pan
- Measuring cups and spoons
- Mixing bowl
- Saucepan (for melting margarine)
Instructions
-
Preheat your oven to 350°F (175°C). This is a crucial step for ensuring even baking and that perfect golden-brown crust.
-
In a large mixing bowl, combine the cherries (including the juice), sugar, and almond flavoring. Gently stir these ingredients together until well combined. Be careful not to crush the cherries too much – you want them to retain their shape and texture.
-
Grease a 13 x 9 inch baking pan thoroughly. This will prevent the Cherry Crunch from sticking and make it easier to serve. I like to use a non-stick cooking spray for extra insurance.
-
Pour the cherry mixture into the greased baking pan, spreading it evenly across the bottom. This forms the base of our delicious dessert.
-
Evenly sprinkle the dry white cake mix over the cherry mixture. Ensure the cake mix covers the entire surface, creating a uniform layer for the topping. Distribute evenly, breaking up any large clumps with your fingers.
-
Sprinkle the chopped nuts (pecans or walnuts) over the cake mix layer. The nuts will add a delightful crunch and nutty flavor to the final product. I prefer pecans for a classic Oklahoma touch, but walnuts work wonderfully too.
-
In a small saucepan, melt the margarine (or vegan butter alternative) over low heat. Be careful not to burn it. Once melted, pour the margarine as evenly as possible over the entire surface of the cake mix and nut mixture. This will help to create the crumbly, crunchy topping. You can use a spoon to gently guide the melted margarine to any dry spots, ensuring even coverage.
-
Bake in the preheated oven for 35-40 minutes, or until the top is golden brown and bubbly. The baking time may vary depending on your oven, so it’s important to keep an eye on it. The Cherry Crunch is done when the topping is nicely browned and the cherry mixture is bubbling around the edges. A toothpick inserted into the center should come out with moist crumbs, not completely dry.
-
Let the Cherry Crunch cool slightly before serving. This allows the flavors to meld together and the topping to set up a bit.
Expert Tips & Tricks
- Don’t overbake: Overbaking can result in a dry, crumbly topping. Check for doneness at the 35-minute mark and adjust the baking time accordingly.
- Evenly distribute the margarine: Pouring the melted margarine evenly is crucial for achieving a uniform crunchy topping. Use a spoon to help spread it if necessary.
- Use quality ingredients: Using high-quality cherries and cake mix will enhance the flavor and texture of the Cherry Crunch.
- Make ahead: You can assemble the Cherry Crunch a day in advance and store it in the refrigerator, unbaked. Add a few minutes to the baking time if baking from cold.
- Toasting the nuts: Toasting the pecans or walnuts before adding them to the topping enhances their flavor and adds an extra layer of crunch. Toast them in a dry skillet over medium heat for 5-7 minutes, or until fragrant.
- Adding spices: For an extra layer of flavor, consider adding a pinch of cinnamon or nutmeg to the cake mix.
Serving & Storage Suggestions
Serve the Cherry Crunch warm, straight from the oven, or at room temperature. It’s delicious on its own, but even better with a scoop of vanilla ice cream or a dollop of whipped cream.
Leftovers can be stored in an airtight container at room temperature for up to 2 days, or in the refrigerator for up to 5 days. To reheat, simply microwave individual portions for a few seconds until warmed through. You can also freeze the Cherry Crunch for longer storage. Wrap it tightly in plastic wrap and then aluminum foil, and it will keep for up to 2 months. Thaw it overnight in the refrigerator before reheating.
Nutritional Information
Please note that this is an estimated nutritional information and may vary based on specific ingredients used.
| Nutrient | Amount per Serving | % Daily Value |
|---|---|---|
| Calories | 326 kcal | – |
| Calories from Fat | 124g | 38% |
| Total Fat | 13.8 g | 21% |
| Saturated Fat | 2.6 g | 12% |
| Cholesterol | 0 mg | 0% |
| Sodium | 302.6 mg | 12% |
| Total Carbohydrate | 50.4 g | 16% |
| Dietary Fiber | 1.7 g | 6% |
| Sugars | 41.6 g | 166% |
| Protein | 2.5 g | 4% |
Variations & Substitutions
- Vegan Cherry Crunch: Substitute the margarine with a vegan butter alternative. Ensure the white cake mix is also vegan-friendly. Many brands offer vegan-friendly options or you can make your own from scratch.
- Gluten-Free Cherry Crunch: Use a gluten-free white cake mix. Be sure to check all other ingredients for gluten as well.
- Different Fruits: Experiment with other canned fruits, such as peaches, apples, or blueberries. Adjust the amount of sugar as needed, depending on the sweetness of the fruit.
- Spice it up: Add a dash of cinnamon, nutmeg, or ginger to the cake mix for a warm, comforting flavor.
- Add some zest: A little lemon or orange zest adds a bright, citrusy note to the dessert.
- Nut-free: Omit the nuts or substitute with seeds like sunflower or pumpkin seeds for a nut-free version.
FAQs (Frequently Asked Questions)
Q: Can I use cherry pie filling instead of cherries in juice?
A: While you could, the result will be much sweeter and less nuanced in flavor. Using cherries in juice allows you to control the sweetness and maintain a more delicate balance.
Q: Can I use a different flavor of cake mix?
A: Yes! Yellow cake mix is a popular alternative, but you can experiment with other flavors like chocolate or spice cake mix for a unique twist.
Q: Do I need to drain the cherries before mixing them with the sugar and almond flavoring?
A: No, do not drain the cherries. The juice is essential for creating the moist base of the Cherry Crunch.
Q: Can I freeze the Cherry Crunch?
A: Yes, you can freeze it after it’s baked and cooled. Wrap it tightly in plastic wrap and then aluminum foil to prevent freezer burn.
Q: How do I know when the Cherry Crunch is done?
A: The top should be golden brown and bubbly, and a toothpick inserted into the center should come out with moist crumbs, not completely dry.
Final Thoughts
I hope this Cherry Crunch recipe brings as much joy to your kitchen as it has to mine. It’s a simple, comforting dessert that’s perfect for any occasion. Don’t be afraid to experiment with different variations and make it your own. Share it with your loved ones and enjoy the warmth and sweetness it brings. And if you happen to be in Oklahoma, look me up – we’ll bake one together!