
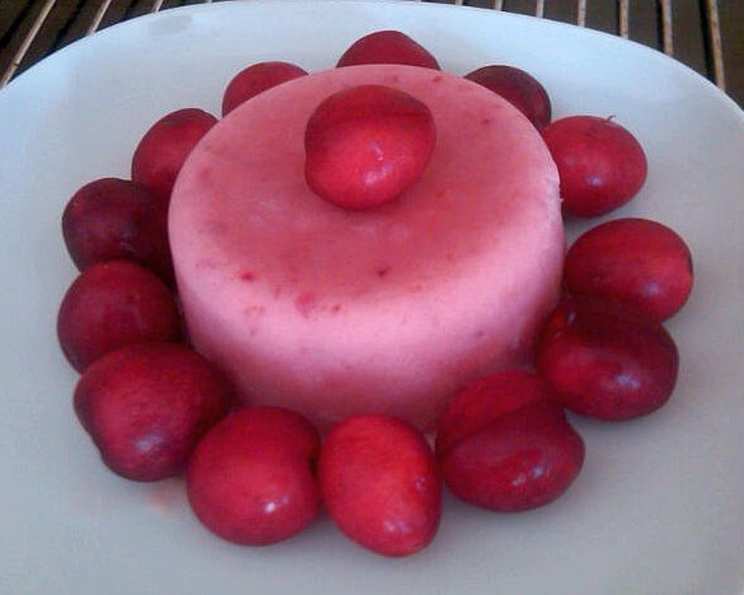
Cherry Ice Cream: A Sweet Summer Escape
I’ll never forget the summer I spent working on my grandfather’s cherry farm. The days were long and hot, but the reward was the incredible bounty of plump, ruby-red cherries we harvested each evening. The sweet, slightly tart scent filled the air, and we’d often sneak a handful straight from the bucket. My grandmother always used some of those cherries to make the most incredible homemade ice cream, the kind that dripped down your chin and stained your fingers a delightful shade of pink. This recipe attempts to recapture that pure, unadulterated joy, bringing the taste of summer right to your spoon.
Recipe Overview
- Prep Time: 20 minutes
- Cook Time: 0 minutes (plus freezing time)
- Total Time: 2 hours 20 minutes
- Servings: 4
- Yield: Approximately 700ml ice cream
- Dietary Type: Vegan
Ingredients
- 200 g cherries (pitted)
- 100 g unbleached cane sugar
- 250 ml soy cream
- 200 ml soymilk
- 5 g citric acid
- 8 g vanilla sugar
- 1 pinch salt
- Cinnamon (to taste)
Equipment Needed
- Blender or food processor
- Mixing bowl
- Whisk
- Freezer-safe container
Instructions
- Begin by thoroughly washing the cherries. Ensure they are completely clean to remove any dirt or residue.
- Carefully pit all 200 grams of the cherries. This is crucial for a smooth ice cream texture. A cherry pitter makes this task easier, but you can also use a paring knife.
- Place the pitted cherries in a mixing bowl and add the 100 grams of unbleached cane sugar.
- Let the cherries and sugar rest for about an hour. This allows the sugar to draw out the natural juices from the cherries, creating a delicious syrup. This process, called maceration, enhances the cherry flavor in the final ice cream.
- After an hour, purée the cherry mixture using a blender or food processor until completely smooth. Ensure no large chunks of cherries remain.
- In a large mixing bowl, combine the puréed cherries with 250 ml of soy cream, 200 ml of soymilk, 5 grams of citric acid, 8 grams of vanilla sugar, and a pinch of salt. The citric acid helps to brighten the cherry flavor and prevent the ice cream from becoming too icy.
- Mix all the ingredients together thoroughly with a whisk until well combined.
- Add cinnamon to taste. Start with a small amount, about 1/4 teaspoon, and adjust according to your preference. Cinnamon complements the cherry flavor beautifully.
- Place the mixture in the freezer. Once the mass is frozen a few inches around the edge (usually after about 45 minutes to an hour), take it out of the freezer.
- Stir the partially frozen mixture vigorously with a whisk. This breaks up the ice crystals and creates a smoother, creamier texture.
- Put the mixture back in the freezer and repeat the stirring process every 20-30 minutes, 2-3 times. This is crucial for achieving a creamy, scoopable ice cream. The more you stir, the finer the ice crystals will be.
- Once the ice cream has reached your desired consistency, pour it into a storable container. A freezer-safe container with a tight-fitting lid is ideal.
- You can eat the ice cream immediately for a softer serve texture, or freeze it for a longer period for a firmer consistency.
Expert Tips & Tricks
- For an even smoother texture, consider using an ice cream maker. Follow the manufacturer’s instructions for your specific model.
- If you don’t have vanilla sugar, you can substitute it with regular sugar and a splash of vanilla extract.
- The key to creamy homemade ice cream is preventing large ice crystals from forming. The repeated stirring process is essential.
- If your ice cream freezes too hard, let it sit at room temperature for a few minutes before scooping.
- To prevent ice crystals from forming on the surface during long-term storage, press a piece of plastic wrap directly onto the surface of the ice cream before sealing the container.
Serving & Storage Suggestions
Serve your homemade cherry ice cream in a bowl or cone. It pairs perfectly with fresh cherries, chocolate shavings, or a drizzle of cherry syrup. For a more decadent treat, try it with a warm brownie or a slice of cherry pie.
Store leftover ice cream in the freezer in an airtight container. It will keep for up to 2 weeks, although the texture may degrade slightly over time. Avoid storing it near strong-smelling foods, as ice cream can easily absorb odors. This ice cream is best consumed within this time frame to fully enjoy the flavors.
Nutritional Information
(Please note: These values are approximate and will vary depending on the specific ingredients used.)
| Nutrient | Amount per Serving | % Daily Value |
|---|---|---|
| Calories | 220 kcal | 11% |
| Total Fat | 8 g | 10% |
| Saturated Fat | 1 g | 5% |
| Cholesterol | 0 mg | 0% |
| Sodium | 30 mg | 1% |
| Total Carbohydrate | 35 g | 13% |
| Dietary Fiber | 2 g | 7% |
| Sugars | 25 g | – |
| Protein | 4 g | 8% |
Variations & Substitutions
- For a richer flavor, try using full-fat coconut milk instead of soymilk and soy cream.
- Experiment with different extracts, such as almond or cherry extract, to enhance the flavor.
- Add a splash of kirsch (cherry brandy) for an adult twist.
- Fold in chopped dark chocolate or toasted almonds for added texture and flavor.
- If you can’t find unbleached cane sugar, regular granulated sugar will work just fine.
- For a tangier flavor, increase the amount of citric acid slightly.
- If you like a chunky ice cream, reserve some chopped cherries and fold them in after the final stir.
FAQs (Frequently Asked Questions)
Q: Can I use frozen cherries instead of fresh cherries?
A: Yes, frozen cherries can be used. Make sure to thaw them completely and drain any excess liquid before puréeing.
Q: Why is my ice cream icy instead of creamy?
A: The most common reason for icy ice cream is the formation of large ice crystals. Make sure to stir the mixture frequently during the freezing process to break up these crystals.
Q: Can I use a different type of non-dairy milk?
A: Yes, almond milk, oat milk, or cashew milk can be used as substitutes. Keep in mind that the flavor and texture of the ice cream may be slightly different.
Q: How long does the ice cream need to freeze before it’s ready to eat?
A: It typically takes about 2-3 hours for the ice cream to freeze to a scoopable consistency, but this can vary depending on your freezer.
Q: Can I add alcohol to this recipe?
A: Yes, adding a small amount of alcohol, such as kirsch, can enhance the flavor and improve the texture of the ice cream. However, be careful not to add too much, as it can prevent the ice cream from freezing properly. A tablespoon or two should be sufficient.
Final Thoughts
This Cherry Ice Cream is more than just a dessert; it’s a nostalgic journey back to sun-drenched summer days and the simple pleasures of homemade goodness. I encourage you to try this recipe and experience the joy of creating something delicious from scratch. Feel free to experiment with different variations and flavor combinations to make it your own. And most importantly, don’t forget to share your creations with friends and family. I’d love to hear your feedback and any creative twists you add to this recipe. Enjoy!