
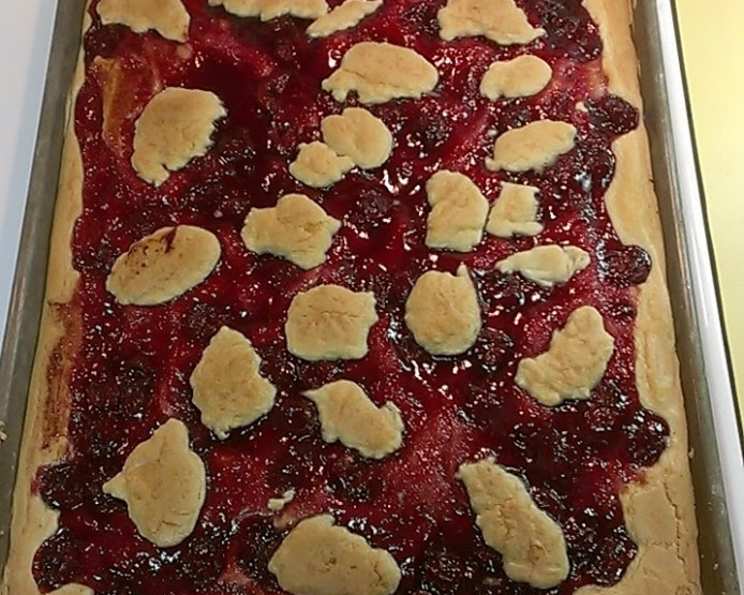
Cherry Slice Delight: A Nostalgic Treat
The aroma of cherry pie always transports me back to my grandmother’s kitchen. I can almost feel the warmth of her ancient oven, hear the gentle hum of conversation, and taste the sweet, tart burst of cherries enveloped in a buttery crust. She always had a slice ready for us grandchildren, a perfect square of comfort and love. This recipe for Cherry Slices captures that same comforting essence, offering a convenient and equally delicious alternative to a full pie, perfect for sharing or savoring a quiet moment.
Recipe Overview
- Prep Time: 20 minutes
- Cook Time: 45 minutes
- Total Time: 1 hour 5 minutes
- Servings: 16
- Yield: 1 large pan of slices
- Dietary Type: Not specified (can be adapted)
Ingredients
- 1 cup unsalted butter
- 3 cups flour
- 4 eggs
- ½ teaspoon salt
- Powdered sugar, for dusting
- 1 ¾ cups sugar
- 1 teaspoon vanilla extract
- 1 ½ teaspoons baking powder
- 1 (21 ounce) can cherry pie filling
- ½ teaspoon almond extract
Equipment Needed
- Large 11×17 inch baking pan
- Mixer (stand or hand mixer)
- Measuring cups and spoons
- Sifter
- Rubber spatula or wooden spoon
Instructions
- Begin by thoroughly creaming the unsalted butter in a large mixing bowl using a mixer. It should be soft and pliable, allowing it to incorporate smoothly with the other ingredients.
- Gradually add the sugar to the creamed butter and beat well until the mixture is light and fluffy. This step is crucial for creating a tender slice.
- Incorporate the eggs one at a time, ensuring each egg is fully mixed in before adding the next. Stir in the vanilla extract.
- In a separate bowl, sift together the flour, baking powder, and salt. Sifting is essential to remove any lumps and ensure the dry ingredients are evenly distributed throughout the batter.
- Gradually add the sifted dry ingredients to the wet ingredients, beating well after each addition. Be careful not to overmix the batter, as this can result in a tough slice.
- Grease a large 11×17 inch baking pan thoroughly. This will prevent the slices from sticking and ensure easy removal.
- Spread most of the batter into the prepared pan, reserving a little more than a cup of batter on the side. This reserved batter will be used for the topping.
- In a separate bowl, add the almond extract to the cherry pie filling and stir to combine. The almond extract enhances the cherry flavor and adds a subtle depth.
- Carefully spread the cherry pie filling evenly over the batter in the pan, leaving about half an inch of space from the edges of the pan. This prevents the filling from bubbling over during baking.
- Place the remaining dough by spoonfuls over the cherry pie filling. This creates a rustic, textured topping.
- Bake in a preheated oven at 350 degrees Fahrenheit (175 degrees Celsius) for approximately 45 minutes, or until the top is golden brown and a toothpick inserted into the center comes out clean. Baking times may vary depending on your oven, so keep a close eye on it.
- Let cool completely in the pan before cutting into slices or squares.
- Once cooled, sprinkle generously with powdered sugar for a sweet and elegant finishing touch.
Expert Tips & Tricks
- For a richer flavor, consider using brown butter instead of regular melted butter. To make brown butter, melt the butter in a saucepan over medium heat, swirling occasionally, until the butter turns a nutty brown color and has a fragrant aroma. Let it cool slightly before using.
- To prevent the cherry pie filling from making the crust soggy, you can lightly coat the bottom layer of batter with a thin layer of breadcrumbs or crushed graham crackers before adding the filling.
- If you don’t have almond extract on hand, you can substitute it with a few drops of amaretto liqueur or simply omit it.
- For a crispier crust, try docking the bottom layer of batter with a fork before adding the cherry pie filling. This will help release steam and prevent the crust from becoming soggy.
Serving & Storage Suggestions
These Cherry Slices are best served at room temperature. The dusting of powdered sugar adds a touch of elegance, but you can also serve them with a dollop of whipped cream or a scoop of vanilla ice cream for an extra-special treat.
Store any leftover slices in an airtight container at room temperature for up to 2 days, or in the refrigerator for up to 5 days. You can also freeze them for longer storage; wrap individual slices tightly in plastic wrap and then place them in a freezer-safe bag or container. They can be thawed at room temperature or in the refrigerator.
Nutritional Information
| Nutrient | Amount per Serving | % Daily Value |
|---|---|---|
| Calories | 333.7 kcal | N/A |
| Calories from Fat | N/A | N/A |
| Total Fat | 12.9 g | 19% |
| Saturated Fat | 7.7 g | 38% |
| Cholesterol | 77 mg | 25% |
| Sodium | 133.4 mg | 5% |
| Total Carbohydrate | 50.4 g | 16% |
| Dietary Fiber | 0.9 g | 3% |
| Sugars | 22 g | N/A |
| Protein | 4.2 g | 8% |
Note: Nutritional information is an estimate and may vary based on specific ingredients and preparation methods.
Variations & Substitutions
- Gluten-Free: Substitute the all-purpose flour with a gluten-free blend. Ensure the blend contains xanthan gum for binding.
- Vegan: Replace the butter with a vegan butter alternative, and the eggs with a commercial egg replacer or a flax egg (1 tablespoon ground flaxseed mixed with 3 tablespoons water per egg).
- Different Filling: Experiment with other pie fillings, such as apple, blueberry, or peach. Adjust the extract accordingly (e.g., cinnamon extract for apple pie filling).
- Citrus Zest: Add a tablespoon of lemon or orange zest to the batter for a brighter flavor.
- Nuts: Incorporate chopped nuts, such as almonds or pecans, into the topping for added texture and flavor.
FAQs (Frequently Asked Questions)
Q: Can I use frozen cherries instead of canned cherry pie filling?
A: Yes, you can! Simply thaw the frozen cherries and combine them with sugar, cornstarch, and almond extract to create your own filling. Adjust the sugar and cornstarch to your taste.
Q: How do I prevent the crust from burning?
A: If you notice the crust is browning too quickly, tent the pan with aluminum foil during the last 15-20 minutes of baking.
Q: Can I make this ahead of time?
A: Absolutely! These cherry slices can be made a day or two in advance and stored in an airtight container at room temperature or in the refrigerator.
Q: What if my batter is too thick?
A: If your batter seems too thick, add a tablespoon or two of milk or water until it reaches a spreadable consistency.
Q: Can I use a different size pan?
A: While an 11×17 inch pan is recommended, you can use a slightly smaller or larger pan. Adjust the baking time accordingly, as the slices will be thicker or thinner.
Final Thoughts
These Cherry Slices are a delightful and versatile treat that’s perfect for any occasion. Whether you’re looking for a comforting dessert to share with loved ones or a simple yet satisfying treat for yourself, this recipe is sure to please. Don’t be afraid to experiment with different fillings and flavors to create your own unique version. I encourage you to try this recipe and share your feedback – I’d love to hear about your baking adventures! Pair it with a cup of hot coffee or a glass of chilled milk for the ultimate indulgence. Happy baking!