
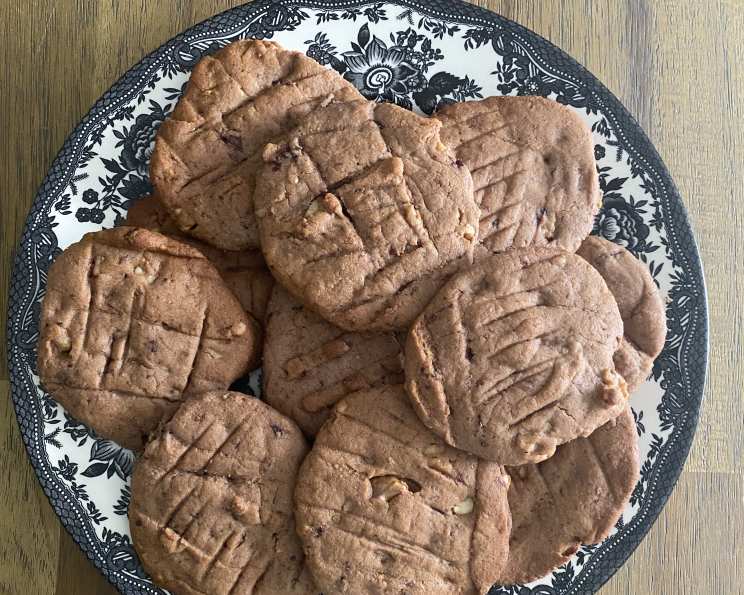
Cherry Walnut Cookies: A Timeless Delight
My grandmother, Nana Rose, had a cookie tin. Not one of those fancy, decorative ones, mind you, but a dented, well-loved tin that once held Christmas popcorn. Every year, that tin reappeared, filled with her homemade treasures. Among the gingerbread men and peanut butter kisses, there were always these delicate, jewel-toned cookies studded with candied cherries and walnuts. They were the first to disappear, and even now, the scent of them baking instantly transports me back to her cozy kitchen, filled with laughter and warmth.
Recipe Overview
- Prep Time: 20 minutes (plus 3 hours chilling)
- Cook Time: 8-10 minutes
- Total Time: 3 hours 30 minutes
- Yields: Approximately 12 dozen cookies
- Dietary Type: Not specified (contains dairy and eggs)
Ingredients
- 1 cup butter, softened
- 1 cup icing sugar
- 1 egg
- 1 teaspoon vanilla extract
- 2 1/4 cups all-purpose flour
- 1/4 teaspoon salt
- 2 cups candied red cherries, cut in half
- 1 cup walnut halves, chopped
Equipment Needed
- Mixing bowl
- Electric mixer
- Measuring cups and spoons
- Plastic wrap
- Baking sheets
- Parchment paper
- Sharp knife
- Wire rack
Instructions
-
In a large mixing bowl, cream together the softened butter and icing sugar using an electric mixer until light and fluffy. This step is crucial for creating a tender cookie, so don’t rush it. Aim for a pale, whipped consistency.
-
Beat in the egg and vanilla extract until well combined. Make sure the egg is fully incorporated to prevent any separation later.
-
In a separate bowl, whisk together the all-purpose flour and salt. This ensures the salt is evenly distributed throughout the dough.
-
Gradually add the dry ingredients to the wet ingredients, mixing on low speed until just combined. Be careful not to overmix, as this can develop the gluten in the flour and result in tough cookies.
-
Gently fold in the candied red cherries and chopped walnuts. Distribute them evenly throughout the dough. If you want to use red and green cherries, do not mix the cherries in the same batch; they look better if made separately.
-
Divide the dough into thirds. On a lightly floured surface, shape each portion into a log approximately 10 inches (25 cm) long.
-
Wrap each log tightly in plastic wrap and chill in the refrigerator for at least 3 hours, or preferably overnight. This chilling period is essential for firming up the dough, which makes it easier to slice and prevents the cookies from spreading too much during baking.
-
Preheat your oven to 325°F (160°C). Line baking sheets with parchment paper. This will prevent the cookies from sticking and make cleanup a breeze.
-
Remove one log of dough from the refrigerator at a time. Using a sharp knife, cut the log into 1/8-inch (3 mm) thick rounds. Try to slice them evenly for uniform baking.
-
Place the cookie rounds about 1 inch (2.5 cm) apart on the prepared baking sheets. This allows for adequate air circulation and prevents the cookies from sticking together as they bake.
-
Bake in the top and bottom thirds of the preheated oven, rotating and switching the pans halfway through, until the edges just begin to color, about 8-10 minutes. These cookies brown even faster than shortbreads, so keep a close eye on them! Start checking early; they’re usually done around the 8-minute mark.
-
Let the cookies cool on the baking sheets for 5 minutes before transferring them to a wire rack to cool completely. This allows them to firm up slightly, preventing them from breaking during transfer.
-
Once the cookies are completely cool, store them layered with waxed paper in an airtight container for up to 2 weeks, or freeze them for up to one month.
Expert Tips & Tricks
- Softened Butter is Key: Ensure your butter is truly softened, not melted. It should be pliable enough to easily indent with your finger.
- Don’t Overmix: Overmixing the dough develops the gluten and results in tough cookies. Mix just until the ingredients are combined.
- Chill Time is Crucial: Don’t skip the chilling step! It prevents the cookies from spreading and makes them easier to slice.
- Even Slicing: Aim for even slices to ensure uniform baking. A slightly warm knife can help with this.
- Watch Carefully: These cookies brown quickly, so keep a close eye on them in the oven. Err on the side of underbaking for a softer cookie.
- Freezing Dough: The dough logs can be frozen for up to 3 months. Thaw in the refrigerator overnight before slicing and baking.
Serving & Storage Suggestions
These Cherry Walnut Cookies are perfect enjoyed with a cup of tea or coffee. They also make a delightful addition to any holiday cookie tray. Store cooled cookies in an airtight container at room temperature for up to 2 weeks. For longer storage, freeze them for up to 1 month. Thaw frozen cookies at room temperature before serving.
Nutritional Information
| Nutrient | Amount per Serving | % Daily Value |
|---|---|---|
| Calories | 330.7 kcal | N/A |
| Calories from Fat | 201 g | 61% |
| Total Fat | 22.4 g | 34% |
| Saturated Fat | 10.5 g | 52% |
| Cholesterol | 58.3 mg | 19% |
| Sodium | 164 mg | 6% |
| Total Carbohydrate | 29.3 g | 9% |
| Dietary Fiber | 1.3 g | 5% |
| Sugars | 10.2 g | 40% |
| Protein | 4.6 g | 9% |
Note: Nutritional information is an estimate and may vary based on specific ingredients and preparation methods.
Variations & Substitutions
- Different Nuts: Feel free to substitute other nuts for the walnuts, such as pecans, almonds, or macadamia nuts.
- Dried Fruit: Experiment with other dried fruits, such as cranberries, apricots, or raisins.
- Extracts: Add a different extract, such as almond or lemon, for a unique flavor.
- Citrus Zest: A little orange or lemon zest can brighten up the flavor of the cookies.
- Chocolate Chips: Add a handful of mini chocolate chips for a chocolatey twist.
FAQs (Frequently Asked Questions)
Q: Can I use fresh cherries instead of candied cherries?
A: While you could, the texture and sweetness will be different. Candied cherries provide a distinct, chewy texture and concentrated sweetness that is characteristic of this cookie.
Q: What if my dough is too soft to slice?
A: If your dough is too soft, simply return it to the refrigerator for a longer chilling period. It needs to be firm enough to hold its shape when sliced.
Q: My cookies are browning too quickly. What should I do?
A: If your cookies are browning too quickly, lower the oven temperature by 25 degrees Fahrenheit and continue baking. You can also cover the baking sheet loosely with aluminum foil.
Q: Can I make these cookies gluten-free?
A: Yes, you can substitute a gluten-free all-purpose flour blend for the regular all-purpose flour. However, be sure to use a blend that contains xanthan gum, as this will help to bind the ingredients together.
Q: How do I prevent the cherries from sinking to the bottom of the cookies?
A: Ensure that the cherries are evenly distributed throughout the dough. Also, chilling the dough properly helps to prevent them from sinking.
Final Thoughts
These Cherry Walnut Cookies are more than just a recipe; they’re a tradition. They’re a taste of nostalgia, a reminder of simpler times, and a symbol of love and sharing. I encourage you to try this recipe and create your own memories with these delightful treats. Don’t be afraid to experiment with variations and make them your own. And most importantly, share them with someone you love. Happy baking!