
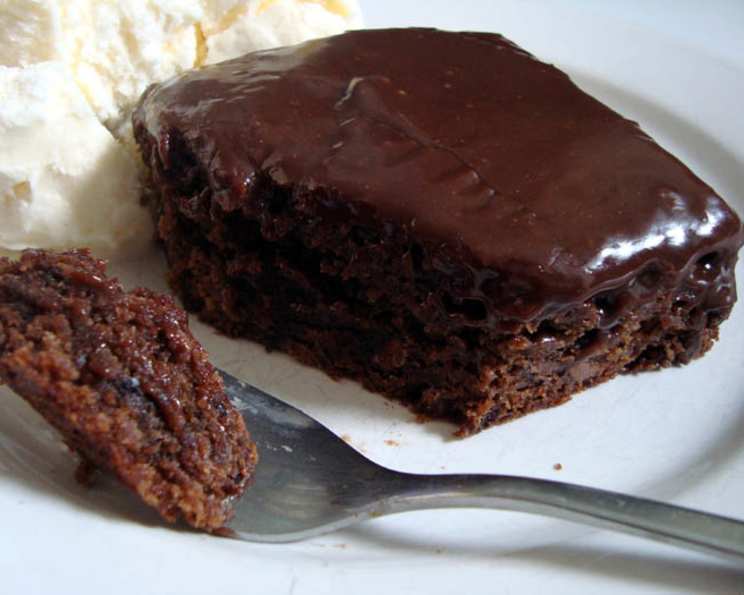
Milk Chocolate Dream Brownies: A Chewy, Fudgy Delight
The scent of baking brownies is, for me, a time machine. It instantly transports me back to my grandmother’s kitchen, where the aroma of chocolate and vanilla would envelop me in a warm, comforting hug. While she was a master of the classic dark chocolate brownie, these milk chocolate versions hold a special place in my heart. They’re a little lighter, a touch sweeter, and utterly irresistible – a perfect treat for sharing (or not!) and reliving those cherished childhood memories.
Recipe Overview
- Prep Time: 15 minutes
- Cook Time: 40-50 minutes
- Total Time: 55-65 minutes
- Servings: 24
- Yield: 24 brownies
- Dietary Type: Not specified
Ingredients
- 11 ½ ounces milk chocolate pieces (give or take)
- 14 tablespoons unsalted butter, cut into chunks
- 4 large eggs
- 1 teaspoon pure vanilla extract
- 1 ¾ cups all-purpose flour (245 gms)
- 2 cups sugar (400 gms)
- ¾ teaspoon salt
- ¼ teaspoon baking powder
- 1 ½ cups toasted nuts, finely chopped (171 gms) (optional)
- 1 cup any flavor chocolate chips (170 gms or more) (optional)
- ½ cup toffee pieces (75 gms or more) (optional)
Equipment Needed
- 13×9 inch baking pan (metal preferred)
- Foil or parchment paper
- Medium microwave-safe bowl
- Small bowl
- Heavy-duty plastic bag (or bowl)
- Rolling pin (if crushing nuts in a bag)
- Angled spatula or large spoon
- Cooling rack
Instructions
- Preheat your oven to 350 degrees Fahrenheit (175 degrees Celsius).
- Toast the nuts (if using) on a foil-lined sheet pan until fragrant, about 7-9 minutes. Keep a close watch, as they can burn quickly. Remove from oven and let cool slightly.
- While the nuts are toasting, break the milk chocolate into small pieces and place in a medium microwave-safe bowl with the butter cut into chunks.
- Melt the butter and chocolate in the microwave. Begin with about 2 minutes at 50% power.
- Stir the mixture and continue to microwave at 50% power as required, stirring every 60 seconds. Be patient; you want a smooth, melted consistency without scorching the chocolate.
- Alternatively, melt the butter and chocolate over a double boiler, stirring frequently, until smooth.
- Allow the melted chocolate mixture and toasted nuts to cool slightly. You don’t want them to be piping hot when you add them to the eggs.
- In a small bowl, lightly beat the eggs and vanilla extract. Set aside.
- Prepare a 13×9 inch pan (metal is preferred for even baking) by lining it with foil (or parchment paper) and grease the lining.
- Leave enough overhang on the lining to easily lift the brownies out of the pan once they are baked and cooled. This is a crucial step for easy removal and clean cuts!
- In a heavy-duty plastic bag, smash the cooled toasted nuts with a rolling pin until well crushed. Alternatively, you can finely chop them with a knife.
- Add the flour, sugar, salt, baking powder, crushed nuts, and any optional ingredients (chocolate chips, toffee pieces) to the bag.
- Shake the bag vigorously to combine all the dry ingredients. Alternatively, you can mix the dry ingredients in a bowl.
- Slowly pour the egg mixture into the cooled melted chocolate mixture while stirring gently. The mixture will thicken slightly as the eggs are incorporated.
- Add the dry ingredients to the chocolate mixture in three batches, fully incorporating each addition as you go. Be careful not to overmix; just stir until the flour disappears. Overmixing develops the gluten in the flour, resulting in tough brownies.
- Spread the brownie batter evenly into the prepared pan using an angled spatula or a large spoon.
- Bake for 40-50 minutes, or until a toothpick inserted in the center of the pan comes out just slightly moist. Remember that baking times can vary greatly depending on your oven and pan.
- Cooking time varies depending on the type of pan and your oven. Dark pans will bake faster, so keep that in mind.
- For consistent baking, use natural aluminum pans, have a calibrated oven thermometer, and keep a pizza stone in the oven.
- Start checking for doneness when they start to smell like brownies! This is the best indicator.
- You can rotate the pan halfway through the cooking process to even things out if desired, especially if your oven has hot spots.
- Cool the brownies completely in the pan on a wire rack. This is important for firming up the texture and preventing them from crumbling when you cut them.
- Once cooled, remove the brownies from the pan by lifting the liner. Place them on a cutting board and cut into squares. Use a sharp knife and wipe it clean between cuts for neat edges.
Expert Tips & Tricks
- Bloom the chocolate’s flavor: Use high-quality milk chocolate for the best flavor.
- Don’t overbake: Slightly underbaked brownies are far better than overbaked ones! They will continue to set as they cool.
- Room temperature ingredients: While the melted chocolate mixture needs to cool, the eggs work best when close to room temperature.
- Upgrade your nuts: Toasting nuts beforehand brings out their flavor. Try walnuts, pecans, or even macadamia nuts.
- Flavor variations: Add a pinch of espresso powder to enhance the chocolate flavor, or a dash of cinnamon for a warm, comforting twist.
- Fudgy texture: Adding a tablespoon of cornstarch to the dry ingredients can contribute to a chewier, fudgier texture.
Serving & Storage Suggestions
These milk chocolate brownies are delicious served warm or at room temperature. For an extra indulgent treat, serve them with a scoop of vanilla ice cream and a drizzle of chocolate sauce.
Store leftover brownies in an airtight container at room temperature for up to 3 days. For longer storage, keep them in the refrigerator for up to a week or freeze them for up to 3 months. To freeze, wrap individual brownies tightly in plastic wrap and then place them in a freezer-safe bag.
To reheat frozen brownies, thaw them at room temperature for a few hours or microwave them for a few seconds until warmed through.
Nutritional Information
| Nutrient | Amount per Serving | % Daily Value |
|---|---|---|
| Calories | 242.5 kcal | N/A |
| Calories from Fat | 105 g | 43% |
| Total Fat | 11.7 g | 17% |
| Saturated Fat | 6.5 g | 32% |
| Cholesterol | 56.2 mg | 18% |
| Sodium | 100 mg | 4% |
| Total Carbohydrate | 31.8 g | 10% |
| Dietary Fiber | 0.7 g | 2% |
| Sugars | 23.8 g | 95% |
| Protein | 3.1 g | 6% |
Note: Nutritional information is an estimate and may vary based on specific ingredients and portion sizes.
Variations & Substitutions
- Dark Chocolate Delight: Substitute the milk chocolate with dark chocolate for a richer, more intense flavor.
- Gluten-Free Option: Use a gluten-free all-purpose flour blend instead of regular flour. Be sure to check the label to ensure it contains xanthan gum for binding.
- Nut-Free Brownies: Omit the nuts altogether or replace them with sunflower seeds or pepitas.
- Peanut Butter Swirl: Swirl peanut butter into the brownie batter before baking for a delicious peanut butter and chocolate combination.
- Mint Chocolate Chip: Add mint extract and mint chocolate chips to the batter.
- Caramel Brownies: Drizzle caramel sauce over the baked brownies and sprinkle with sea salt.
FAQs (Frequently Asked Questions)
Q: Can I use salted butter instead of unsalted butter?
A: Yes, you can, but reduce the amount of salt added to the dry ingredients to 1/4 teaspoon to avoid overly salty brownies.
Q: Can I make these brownies ahead of time?
A: Absolutely! Brownies are a great make-ahead dessert. Just store them in an airtight container at room temperature for up to 3 days.
Q: My brownies are always dry. What am I doing wrong?
A: Overbaking is the most common cause of dry brownies. Make sure to check for doneness frequently and remove them from the oven when a toothpick inserted in the center comes out just slightly moist.
Q: Can I add other types of chocolate chips?
A: Of course! Feel free to experiment with different types of chocolate chips, such as dark chocolate, white chocolate, or even butterscotch chips.
Q: What is the best way to cut brownies neatly?
A: Let the brownies cool completely before cutting them. Use a sharp knife and wipe it clean between each cut. You can also run the knife under hot water for even cleaner cuts.
Final Thoughts
Now, go forth and bake these Milk Chocolate Dream Brownies! They’re the perfect treat for satisfying your chocolate cravings, sharing with loved ones, or simply indulging in a little bit of happiness. Don’t be afraid to experiment with different variations and make them your own. And most importantly, enjoy the process! Let me know how they turn out – I’d love to hear your feedback. Perhaps pair them with a cold glass of milk or a warm cup of coffee for the ultimate comfort experience. Happy baking!