
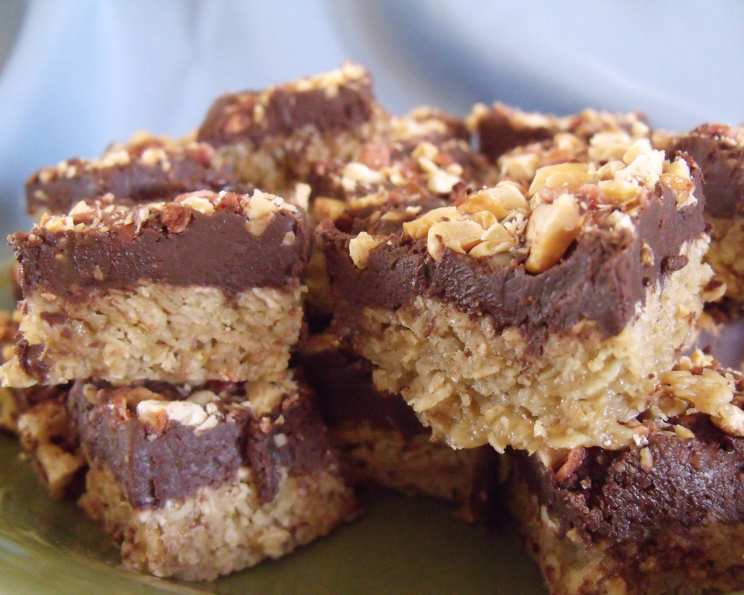
Chewy Chocolate Peanut Butter Bars: An Irresistible Treat
My earliest memory of these bars involves a church potluck, a sticky plate, and the absolute delight of biting into something so perfectly balanced between sweet, salty, and chewy. Mrs. Henderson, a woman known for her spectacular baking, brought them every year. I’d strategically position myself near the dessert table, hoping to snag an extra piece (or two!) before they vanished. Those bars weren’t just dessert; they were a symbol of community, comfort, and pure, unadulterated joy. I’ve tweaked her recipe over the years, but the essence remains the same: a celebration of simple flavors that come together in perfect harmony.
Recipe Overview
- Prep Time: 20 minutes
- Cook Time: 15 minutes
- Total Time: 1 hour 35 minutes (includes chilling time)
- Yields: 24 bars
- Serves: 24
- Dietary Type: Not easily adaptable for specific diets (contains gluten, dairy, sugar, nuts)
Ingredients
- 1 cup packed brown sugar
- 2/3 cup butter, softened
- 1/3 cup light corn syrup
- 1 teaspoon vanilla
- 4 cups quick oats
- 12 ounces semisweet chocolate morsels, divided
- 2/3 cup peanut butter
- 1/2 cup chopped nuts (optional, such as peanuts, pecans, or walnuts)
Equipment Needed
- Large mixing bowl
- Electric mixer
- Measuring cups and spoons
- Greased 13 x 9 inch baking pan
- Small, heavy saucepan
- Spatula
Instructions
-
Preheat your oven to 350 degrees Fahrenheit (175 degrees Celsius). Ensuring the oven is fully preheated is crucial for even baking.
-
In a large mixing bowl, beat together the packed brown sugar and softened butter using an electric mixer until the mixture is light and creamy. This step is essential for creating a tender and cohesive base.
-
Beat in the light corn syrup and vanilla. Mix until well combined. The corn syrup contributes to the chewy texture, so don’t skip it!
-
Stir in the quick oats. Make sure the oats are evenly distributed throughout the mixture. This forms the structure of the crust.
-
Press the oat mixture firmly into the greased 13 x 9 inch baking pan. Use your fingers or the back of a spoon to create an even layer. This will be the foundation of your bars.
-
Bake for 15 minutes. The crust should be lightly golden brown. Avoid overbaking, as this can make the bars dry.
-
Cool the base slightly. A few minutes of cooling allows the crust to firm up a bit before adding the topping.
-
While the base is cooling, melt 1 cup of the semisweet chocolate morsels and the peanut butter in a small, heavy saucepan over the lowest heat possible. Stir constantly until smooth. Using low heat is key to preventing the chocolate from seizing or burning. You can also use a double boiler if you prefer.
-
Spread the melted chocolate peanut butter mixture evenly over the cooled base. Ensure the entire surface is covered.
-
Sprinkle the remaining chocolate chips and the chopped nuts (if using) over the top.
-
Gently press the toppings down slightly into the melted chocolate. This helps them adhere to the bars as they cool.
-
Chill in the refrigerator for at least 1 hour, or until firm. This step is crucial for setting the chocolate and making the bars easy to cut.
-
Once chilled, cut into bars and serve.
Expert Tips & Tricks
- Softened Butter is Key: Make sure your butter is truly softened, not melted. It should be soft enough to easily press a finger into, but still hold its shape. This ensures a creamy base.
- Prevent Chocolate Seizing: If your chocolate starts to seize while melting, try adding a teaspoon of vegetable oil. This can help to loosen it up and restore its smooth consistency.
- Line the Pan with Parchment Paper: For easier removal, line your baking pan with parchment paper, leaving an overhang on the sides. Once the bars are chilled, you can simply lift them out of the pan.
- Salted vs. Unsalted Butter: If you’re using salted butter, you may want to reduce the amount of salt in the recipe slightly, especially if you’re adding salted nuts.
- Make Ahead: These bars can be made a day or two in advance. Just store them in an airtight container in the refrigerator.
Serving & Storage Suggestions
Serve these Chewy Chocolate Peanut Butter Bars chilled or at room temperature. They are perfect as an afternoon treat, a dessert for parties, or a sweet addition to a lunchbox. To store, place the bars in an airtight container. They will last for up to 3 days at room temperature, up to a week in the refrigerator, or up to 2 months in the freezer. If freezing, wrap the bars individually in plastic wrap before placing them in a freezer-safe container. To reheat from frozen, let them thaw at room temperature for about 30 minutes.
Nutritional Information
| Nutrient | Amount per Serving | % Daily Value |
|---|---|---|
| Calories | 260.2 kcal | N/A |
| Calories from Fat | N/A | 46% |
| Total Fat | 13.3 g | 20% |
| Saturated Fat | 6.3 g | 31% |
| Cholesterol | 14 mg | 4% |
| Sodium | 84.6 mg | 3% |
| Total Carbohydrate | 32.5 g | 10% |
| Dietary Fiber | 2.7 g | 10% |
| Sugars | 18.5 g | 73% |
| Protein | 4.3 g | 8% |
Note: Nutritional information is an estimate and may vary based on specific ingredients and portion sizes.
Variations & Substitutions
- Gluten-Free Option: Use certified gluten-free quick oats to make these bars gluten-free. Be sure to check the labels of all your ingredients.
- Nut-Free Option: Substitute the peanut butter with sunflower seed butter (sunbutter) or tahini. Omit the chopped nuts or replace them with seeds like pumpkin or sunflower seeds.
- Dark Chocolate: Use dark chocolate morsels instead of semisweet for a richer, more intense chocolate flavor.
- White Chocolate: Drizzle melted white chocolate over the chilled bars for a decorative touch and added sweetness.
- Different Nuts: Experiment with different types of nuts such as almonds, cashews, or macadamia nuts.
- Spice it Up: Add a pinch of cinnamon or a dash of cayenne pepper to the chocolate peanut butter mixture for a hint of warmth and spice.
FAQs (Frequently Asked Questions)
Q: Can I use regular rolled oats instead of quick oats?
A: While you can use rolled oats, the texture will be different. Quick oats create a more cohesive and slightly finer crumb in the base. If using rolled oats, you might want to pulse them in a food processor a few times to break them down slightly.
Q: Why are my bars crumbly?
A: This is often due to not pressing the oat mixture firmly enough into the baking pan, or overbaking the crust. Make sure to really pack the oat mixture in, and keep a close eye on the oven.
Q: Can I melt the chocolate and peanut butter in the microwave?
A: Yes, you can. Use a microwave-safe bowl and heat in 30-second intervals, stirring in between, until melted and smooth. Be careful not to overheat.
Q: How do I cut the bars neatly?
A: Run a large knife under hot water and dry it before each cut. This will help the knife glide through the chocolate smoothly.
Q: My chocolate is too thick to spread. What can I do?
A: Add a teaspoon of vegetable oil or shortening to the chocolate peanut butter mixture and stir until smooth. This will thin it out and make it easier to spread.
Final Thoughts
These Chewy Chocolate Peanut Butter Bars are more than just a recipe; they’re a taste of nostalgia, a celebration of simple pleasures, and a reminder that the best things in life are often the easiest to make. So, gather your ingredients, preheat your oven, and prepare to indulge in a truly irresistible treat. I encourage you to try this recipe and share the joy with your friends and family. Feel free to experiment with variations and make it your own. And don’t hesitate to let me know what you think! What’s your favorite memory involving peanut butter and chocolate?