
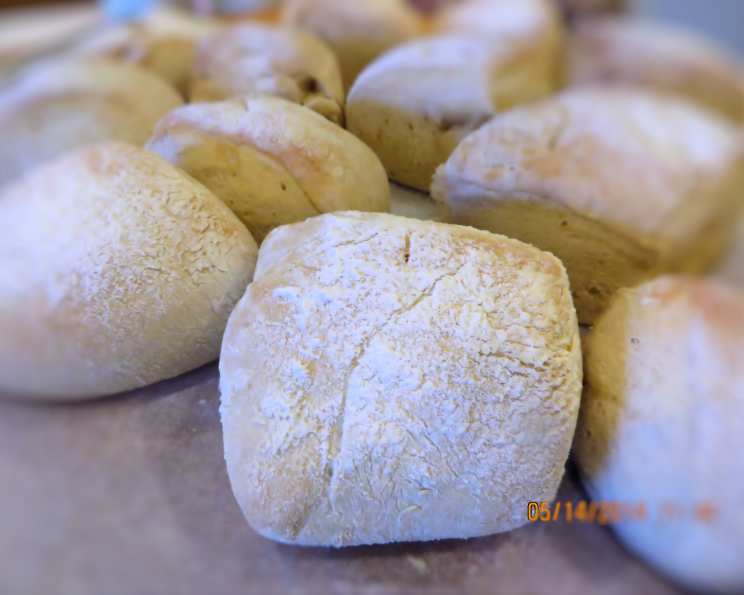
Mastering Chewy Italian Rolls: A Baker’s Journey
The scent of baking bread has always been my Proustian madeleine, instantly transporting me back to my grandmother’s sun-drenched kitchen in Tuscany. Every Sunday, nonna would be at her weathered wooden table, sleeves rolled up, coaxing life from flour, water, and yeast. While these Chewy Italian Rolls aren’t exactly her recipe (hers was a closely guarded secret!), they evoke that same comforting feeling – the slight tang, the satisfying chew, and the simple pleasure of tearing into a warm, freshly baked roll. These rolls are my little slice of Italy right here in my kitchen.
Recipe Overview
- Prep Time: 30 minutes
- Rise Time: Approximately 2-3 hours (includes biga fermentation)
- Cook Time: 13-15 minutes
- Total Time: 3 hours 15 minutes to 4 hours
- Yield: 8 Rolls
- Dietary Type: Vegetarian
Ingredients
For the Biga (Starter):
- 1 1/2 cups unbleached all-purpose flour
- 1/4 cup white whole wheat flour
- 1 cup water
- 1/8 teaspoon instant yeast
For the Dough:
- 2 1/2 cups unbleached all-purpose flour
- 1/2 cup water
- 2 teaspoons salt
- 1/2 teaspoon instant yeast
Equipment Needed
- Mixing bowls
- Electric mixer (stand or hand mixer)
- Measuring cups and spoons
- Plastic wrap or damp towel
- Bench knife or pizza wheel
- Parchment paper
- Baking stone (optional, but recommended)
- Cooling rack
Instructions
- Prepare the Biga: In a mixing bowl, combine the unbleached all-purpose flour, white whole wheat flour, water, and instant yeast. Mix until just blended; the mixture will be shaggy.
- Ferment the Biga: Cover the bowl tightly with plastic wrap or a damp towel. Let it rest at room temperature for 12 to 20 hours, or until very bubbly and almost doubled in size. This fermentation process develops the complex flavors that make these rolls so delicious.
- Combine Biga and Dough Ingredients: In the bowl of your electric mixer, combine the fermented biga with the remaining dough ingredients: unbleached all-purpose flour, water, salt, and instant yeast.
- Mix the Dough: Using the mixer set on low speed, mix the ingredients for 2 to 4 minutes, until they are roughly combined. Increase the mixer speed to medium and continue mixing for about 4 minutes. The dough will be soft and slightly sticky. Don’t be tempted to add too much flour at this stage; a slightly sticky dough results in a more tender crumb.
- Adjust Consistency (if needed): If the dough seems excessively dry, add water, 1 tablespoon at a time, until it comes together. If it is too wet and soupy, add flour, 1 tablespoon at a time. You want a dough that is manageable but still soft.
- First Rise (Bulk Fermentation): Lightly grease a large bowl with oil or cooking spray. Place the dough in the bowl, turning to coat all sides. Cover the bowl with plastic wrap or a damp towel. Let the dough rise in a warm place for 1 to 2 hours, or until it is very puffy and almost doubled in size.
- Shape the Rolls: Gently turn the risen dough out onto a well-floured surface. Using a rolling pin or your hands, shape it into a 6″ x 12″ rectangle.
- Cut the Rolls: Using a bench knife or pizza wheel, cut the rectangle into eight 3″ square rolls. Try to make the cuts as clean and even as possible.
- Second Rise (Proofing): Place the rolls, floured side up, onto a baking sheet lined with parchment paper. This prevents sticking and helps create a crisp crust.
- Proof the Rolls: Cover the rolls loosely with plastic wrap or a damp towel. Let them rise for 45 minutes to 1 hour, or until they are puffy and have almost doubled in size. This final rise is crucial for achieving a light and airy texture.
- Preheat the Oven: Place a baking stone in the top third of your oven (if using; this helps create a super crispy crust). Preheat the oven to 450°F (232°C). If you don’t have a baking stone, you can bake the rolls directly on the parchment-lined baking sheet.
- Bake the Rolls: Bake the rolls for 13 to 15 minutes, or until they are golden brown on top. Keep a close eye on them during the last few minutes of baking to prevent burning.
- Cool and Enjoy: Remove the rolls from the oven and transfer them to a cooling rack. Let them cool for at least 10 minutes before serving. This allows the internal structure to set and prevents a gummy texture.
Expert Tips & Tricks
- Biga Timing: Don’t rush the biga fermentation. The longer it ferments (up to 20 hours), the more complex the flavor will be.
- Dough Hydration: This dough is meant to be quite soft. Resist the urge to add too much flour. A slightly sticky dough will result in a more tender roll.
- Baking Stone Advantage: If you have a baking stone, preheating it in the oven will give you a crispier crust, similar to a professional bakery oven.
- Steam for Crust: For an even chewier crust, try adding a cup of hot water to a pan on the bottom rack of the oven when you put the rolls in. The steam helps develop a thicker, chewier crust. Remove the pan after the first 10 minutes of baking.
- Scoring: For a more rustic look and to control expansion, you can score the tops of the rolls with a sharp knife or razor blade just before baking. Make a shallow “X” or a single slash across the top.
Serving & Storage Suggestions
Serve these Chewy Italian Rolls warm, straight from the oven. They are perfect alongside a hearty bowl of soup, as a side to your favorite Italian pasta dish, or simply spread with butter or olive oil.
- Storage: Store leftover rolls in an airtight container at room temperature for up to 2 days. For longer storage, freeze them in a freezer-safe bag.
- Reheating: To reheat, wrap the rolls in foil and bake them in a 350°F (175°C) oven for 5-10 minutes, or until warmed through. You can also microwave them for a few seconds, but they will be softer rather than crispy. To revive frozen rolls, let them thaw completely before reheating.
Nutritional Information
(Estimated per roll)
| Nutrient | Amount per Serving | % Daily Value |
|---|---|---|
| Calories | 250 kcal | 13% |
| Total Fat | 1.5g | 2% |
| Saturated Fat | 0.2g | 1% |
| Cholesterol | 0mg | 0% |
| Sodium | 600mg | 26% |
| Total Carbohydrate | 52g | 19% |
| Dietary Fiber | 2.5g | 9% |
| Sugars | 0.5g | 1% |
| Protein | 7.5g | 15% |
Variations & Substitutions
- Herb Infusion: Add 1-2 tablespoons of chopped fresh herbs like rosemary, thyme, or oregano to the dough for an extra layer of flavor.
- Cheese Please: Incorporate 1/2 cup of grated Parmesan or Asiago cheese into the dough.
- Garlic Goodness: Mix 1-2 teaspoons of minced garlic or garlic powder into the dough.
- Whole Wheat Boost: Substitute up to half of the all-purpose flour with whole wheat flour for a nuttier flavor and added fiber.
- Seed Sensation: Sprinkle the tops of the rolls with sesame seeds, poppy seeds, or everything bagel seasoning before baking.
FAQs (Frequently Asked Questions)
Q: Can I use active dry yeast instead of instant yeast?
A: Yes, but you’ll need to proof the active dry yeast first. Dissolve it in warm water with a pinch of sugar and let it sit for 5-10 minutes until foamy before adding it to the flour.
Q: Can I make the dough ahead of time and refrigerate it?
A: Yes, you can retard the dough in the refrigerator after the first rise. Punch it down gently, wrap it tightly, and refrigerate for up to 24 hours. Let it come to room temperature for about 30 minutes before shaping and baking.
Q: My rolls are dense. What did I do wrong?
A: Likely, your dough was under-proofed. Ensure you give the dough enough time to rise in both the first and second proofing stages. Also, avoid over-mixing the dough, as this can develop too much gluten and result in a tough texture.
Q: Can I freeze the baked rolls?
A: Absolutely! Wrap the cooled rolls individually in plastic wrap and then place them in a freezer bag. They can be frozen for up to 2 months.
Q: How do I get a really shiny crust?
A: Brush the tops of the rolls with an egg wash (1 egg beaten with 1 tablespoon of water) just before baking. This will give them a beautiful golden sheen.
Final Thoughts
Baking these Chewy Italian Rolls is more than just following a recipe; it’s about connecting with the simple joys of baking and creating something delicious to share with loved ones. Don’t be intimidated by the process – even if they don’t turn out perfectly the first time, they will still be delicious! So go ahead, preheat your oven, and fill your kitchen with the irresistible aroma of freshly baked bread. And don’t forget to share your baking triumphs (and learning experiences!) with your friends. Buon appetito!