
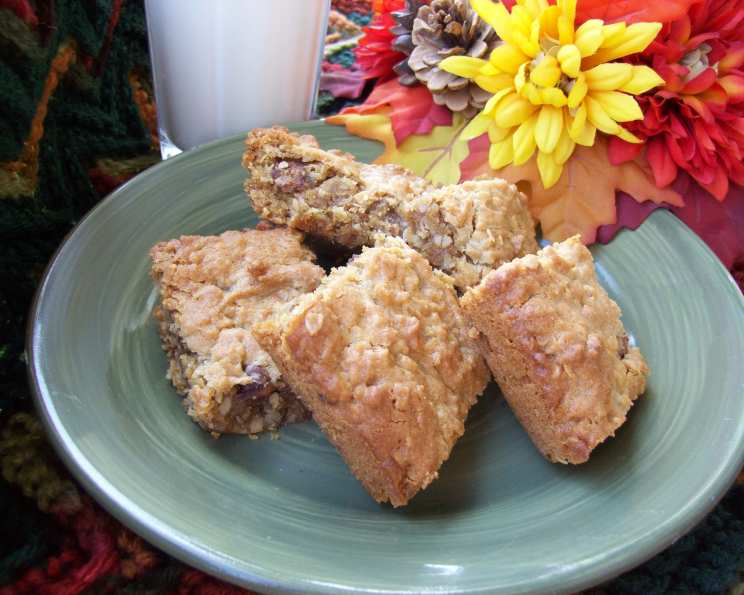
Chewy Peanut Butter Bars: A Taste of Childhood Nostalgia
Every time I bite into a chewy peanut butter bar, I’m transported back to my grandmother’s sunny kitchen. The aroma of baking peanut butter, a hint of vanilla, and the comforting presence of warm spices always filled her home. These weren’t just cookies; they were edible hugs, little rectangles of love and memories that I can still taste so vividly. I’m excited to share this recipe with you, hoping it brings the same joy and comfort it has always brought to me.
Recipe Overview
- Prep Time: 10 minutes
- Cook Time: 30 minutes
- Total Time: 40 minutes
- Yields: 24 bars
- Dietary Type: Vegetarian
Ingredients
- 1/2 cup butter, softened
- 1/2 cup white sugar
- 1/4 cup brown sugar
- 1 egg
- 1/3 cup peanut butter (creamy or chunky, your preference!)
- 1 teaspoon vanilla
- 1/2 teaspoon baking soda
- 1/4 teaspoon salt
- 1 cup plain flour
- 1 cup quick-cooking oats
- 3/4 cup raisins (or chocolate chips)
Equipment Needed
- 9×9 inch baking pan
- Mixing bowls
- Electric mixer (optional)
- Measuring cups and spoons
- Rubber spatula
Instructions
- Preheat your oven to 350°F (175°C). Grease a 9×9 inch baking pan thoroughly. This will prevent the bars from sticking and make them easier to remove.
- In a large mixing bowl, cream together the 1/2 cup of softened butter, 1/2 cup of white sugar, and 1/4 cup of brown sugar until the mixture is light and fluffy. An electric mixer makes this process easier, but you can certainly do it by hand. Ensure the butter is properly softened for the best results.
- Beat the 1 egg in a separate small bowl. Then, blend the beaten egg, 1/3 cup of peanut butter, and 1 teaspoon of vanilla into the creamed butter and sugar mixture until well combined. The batter should be smooth and consistent.
- In another bowl, whisk together 1/2 teaspoon of baking soda, 1/4 teaspoon of salt, and 1 cup of plain flour.
- Gradually add the dry ingredients to the wet ingredients, mixing until just combined. Be careful not to overmix, as this can result in tough bars.
- Mix in 1 cup of quick-cooking oats.
- Fold in 3/4 cup of raisins (or chocolate chips, if you prefer) evenly throughout the batter. If using raisins, consider soaking them in warm water for a few minutes to plump them up before adding them to the batter.
- Spread the batter evenly into the prepared greased 9×9 inch baking pan.
- Bake in the preheated oven for 30 minutes, or until the edges are golden brown and a toothpick inserted into the center comes out clean. Keep a close eye on them during the last few minutes of baking to prevent them from burning.
- Cool completely in the pan before cutting into bars. This is important because the bars will continue to set as they cool. Cutting them while they are still warm can result in them crumbling.
- Once cooled, cut into 24 bars.
Expert Tips & Tricks
- For a richer peanut butter flavor, use natural peanut butter. Be sure to stir it well before measuring, as the oil tends to separate.
- If you like a crunchier texture, try using chunky peanut butter instead of creamy.
- To prevent the bars from becoming too dry, avoid overbaking. They should be slightly soft in the center when you remove them from the oven.
- If you want to add a little extra flair, drizzle melted chocolate over the cooled bars.
- Line the pan with parchment paper, leaving an overhang. This makes it incredibly easy to lift the entire batch of bars out of the pan for neat cutting.
- For a fun twist, use different types of chocolate chips, such as milk chocolate, dark chocolate, or white chocolate.
- If you don’t have brown sugar on hand, you can make your own by mixing 1 tablespoon of molasses with 1/4 cup of white sugar.
Serving & Storage Suggestions
These chewy peanut butter bars are perfect as a midday snack, an after-dinner treat, or a lunchbox addition. Serve them with a cold glass of milk, a cup of coffee, or a scoop of vanilla ice cream.
Store leftover bars in an airtight container at room temperature for up to 3 days, in the refrigerator for up to a week, or in the freezer for up to 2 months. To freeze, wrap the bars individually in plastic wrap and then place them in a freezer-safe bag or container. Thaw at room temperature before serving.
Nutritional Information
| Nutrient | Amount per Serving | % Daily Value |
|---|---|---|
| Calories | 128.8 kcal | N/A |
| Calories from Fat | 55 g | 43% |
| Total Fat | 6.1 g | 9% |
| Saturated Fat | 2.9 g | 14% |
| Cholesterol | 19 mg | 6% |
| Sodium | 98.7 mg | 4% |
| Total Carbohydrate | 17 g | 5% |
| Dietary Fiber | 0.8 g | 3% |
| Sugars | 9.5 g | 37% |
| Protein | 2.4 g | 4% |
Note: Nutritional information is an estimate and can vary based on specific ingredients and portion sizes.
Variations & Substitutions
- Gluten-Free: Substitute the plain flour with a gluten-free all-purpose flour blend. Ensure that the oat flour is certified gluten-free.
- Dairy-Free: Use a dairy-free butter substitute, such as coconut oil or vegan butter sticks.
- Nut-Free: Replace the peanut butter with sunflower seed butter (sunbutter) or tahini for a nut-free alternative.
- Spice it Up: Add 1/2 teaspoon of ground cinnamon or nutmeg to the dry ingredients for a warm, spiced flavor.
- Chocolate Lovers: Increase the amount of chocolate chips to 1 cup or add a layer of chocolate ganache on top of the cooled bars.
- Dried Fruit Medley: Instead of raisins, use a mix of dried cranberries, chopped dried apricots, or chopped dates.
FAQs (Frequently Asked Questions)
Q: Can I use crunchy peanut butter instead of creamy?
A: Absolutely! Crunchy peanut butter will add a nice texture to the bars. Just make sure to stir it well before measuring.
Q: What if I don’t have brown sugar?
A: You can make your own brown sugar by mixing 1 tablespoon of molasses with 1/4 cup of white sugar.
Q: Can I freeze these peanut butter bars?
A: Yes, you can! Wrap the bars individually in plastic wrap and then place them in a freezer-safe bag or container. They can be frozen for up to 2 months.
Q: The edges of my bars are getting too brown while baking. What should I do?
A: Tent the pan with aluminum foil during the last few minutes of baking to prevent the edges from burning.
Q: Can I use steel-cut oats instead of quick-cooking oats?
A: No, steel-cut oats are not recommended for this recipe. Quick-cooking oats are more finely processed and will blend better into the batter.
Final Thoughts
I truly hope you enjoy making these chewy peanut butter bars as much as I do. They are a simple yet incredibly satisfying treat that is sure to become a family favorite. Feel free to experiment with different variations and substitutions to create your own signature version. And most importantly, don’t forget to share your creations with loved ones – because nothing tastes better than a homemade treat shared with good company!