
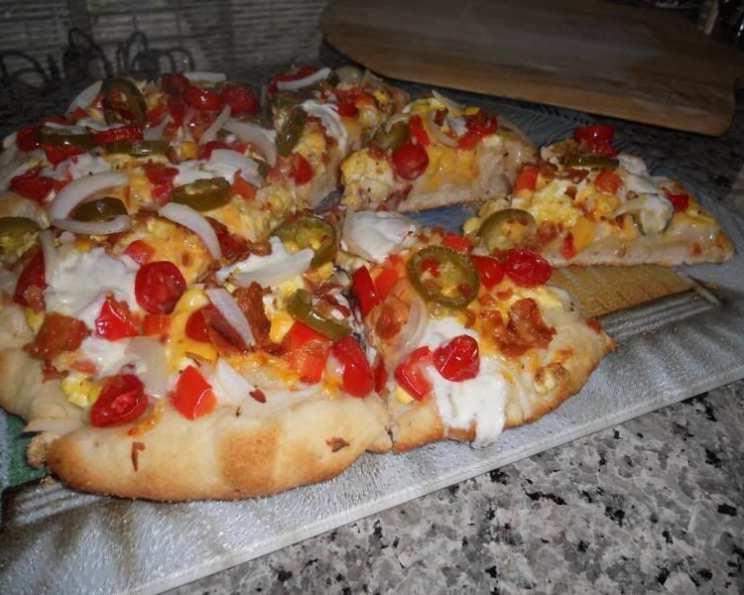
Chewy Sourdough Pizza Crust: The Ultimate Guide
My earliest memories of pizza aren’t of delivery boxes or frozen pies. They’re of standing in my grandmother’s kitchen, the air thick with the yeasty aroma of her sourdough starter. She’d let me “help” by poking holes in the dough with a fork, a task I took with utmost seriousness. The best part? The chewy, slightly tangy crust, the perfect canvas for her garden-fresh tomatoes and basil. This recipe aims to recapture that magic, offering a crust that’s both satisfyingly chewy and bursting with sourdough flavor.
Recipe Overview
- Prep Time: 15 minutes
- Cook Time: 20-25 minutes
- Total Time: 1 hour 5 minutes (includes proofing)
- Servings: 4
- Yield: 4 12-inch pizzas
- Dietary Type: Vegetarian
Ingredients
- 2 cups proofed sourdough starter
- 1 teaspoon salt
- ½ cup water
- 2 tablespoons oil (olive or vegetable)
- 3 cups white bread flour, plus more for dusting
- Cornmeal, for dusting
Equipment Needed
- Bread machine
- Rolling pin
- Baking peel or thin baking sheet
- Baking stone (optional)
- Pizza pan (optional)
Instructions
- Add all ingredients except cornmeal to the bread machine pan in the order recommended by the manufacturer. Generally, liquids first, followed by dry ingredients.
- Select the dough cycle and start the bread machine. This cycle will mix and knead the dough, and then allow it to rise.
- Once the dough cycle is complete, gently remove the dough from the bread machine pan and place it on a lightly floured surface.
- Divide the dough into 4 equal portions.
- Form each portion into a smooth ball. This helps create a uniform crust.
- With a rolling pin, flatten each ball into a 12- to 13-inch round, about ⅛ inch thick. Aim for a consistent thickness to ensure even baking.
- Fold each round in half and transfer it to a baker’s peel or a thin baking sheet that has been generously sprinkled with cornmeal. The cornmeal acts as a non-stick agent and also adds a pleasant texture to the bottom of the crust.
- Cover the rounds loosely with plastic wrap or a clean kitchen towel.
- Proof the covered dough for about 45 minutes at 85 degrees F. A warm environment encourages the dough to rise further, resulting in a lighter and airier crust. If you don’t have a proofing setting on your oven, you can create a warm environment by placing the dough in a turned-off oven with a bowl of hot water.
- Place a baking stone in a cold oven. This is crucial for achieving a crispy bottom crust.
- Preheat the oven for at least 15 minutes at 450 to 500 degrees F. The baking stone needs time to heat up thoroughly.
- Add your desired toppings to the rounds of dough. Be careful not to overload the pizza, as this can make the crust soggy.
- Carefully transfer the pizzas to the hot baking stone. This step requires practice. A quick, confident movement is key to prevent the pizza from sticking or tearing.
- Bake for 20 to 25 minutes, or until the crust is golden brown and the toppings are cooked through. The exact baking time may vary depending on your oven. Keep a close eye on the pizzas and adjust the baking time as needed.
- Remove the pizzas from the oven with a baker’s peel.
- If you find transferring the pizza to the stone too difficult, you can bake the pizza on a traditional pizza pan sprinkled with cornmeal.
Expert Tips & Tricks
- Sourdough Starter Strength: The strength of your sourdough starter significantly impacts the final texture and flavor. A more active starter will result in a lighter, tangier crust. If your starter is less active, you may need to proof the dough for a longer period.
- Dough Hydration: The amount of water in the dough affects its stickiness and the final texture. This recipe uses a relatively low hydration dough, which makes it easier to handle. However, if you prefer a more open and airy crumb, you can increase the amount of water slightly.
- Kneading: Proper kneading is essential for developing gluten, which gives the crust its chewy texture. If you don’t have a bread machine, you can knead the dough by hand for about 8-10 minutes.
- Baking Stone Alternative: If you don’t have a baking stone, you can use a baking sheet. However, the crust will not be as crispy. You can also try preheating the baking sheet in the oven before placing the pizza on it.
- Par-Baking: For a crisper crust, consider par-baking the crust for a few minutes before adding toppings. This helps to set the crust and prevent it from becoming soggy.
- Cheese Placement: Layering a thin layer of cheese directly on the crust will create a barrier and prevent the sauce from soaking in.
Serving & Storage Suggestions
Serve the pizza immediately after baking for the best flavor and texture. Garnish with fresh basil, a drizzle of olive oil, or a sprinkle of Parmesan cheese.
Leftover pizza can be stored in the refrigerator for up to 3 days. Reheat in a preheated oven at 350 degrees F until warmed through and the crust is crispy, or in a skillet over medium heat for a crispier bottom. You can also reheat it in the microwave, but the crust will be softer.
For longer storage, wrap individual slices tightly in plastic wrap and freeze for up to 2 months. Thaw overnight in the refrigerator before reheating.
Nutritional Information
| Nutrient | Amount per Serving | % Daily Value |
|---|---|---|
| Calories | 401.4 kcal | N/A |
| Calories from Fat | 69 kcal | N/A |
| Total Fat | 7.7 g | 11% |
| Saturated Fat | 1 g | 5% |
| Cholesterol | 0 mg | 0% |
| Sodium | 584.1 mg | 24% |
| Total Carbohydrate | 71.5 g | 23% |
| Dietary Fiber | 2.5 g | 10% |
| Sugars | 0.2 g | 1% |
| Protein | 9.7 g | 19% |
Note: Nutritional information is an estimate and may vary depending on specific ingredients and portion sizes.
Variations & Substitutions
- Gluten-Free: Substitute the white bread flour with a gluten-free flour blend designed for bread making. You may need to adjust the amount of water depending on the blend.
- Whole Wheat: Replace half of the white bread flour with whole wheat flour for a nuttier flavor and added fiber.
- Herb-Infused Crust: Add dried herbs like oregano, basil, or rosemary to the dough for a more aromatic crust.
- Spicy Crust: Add a pinch of red pepper flakes to the dough for a subtle kick.
- Vegan Pizza: Use vegan cheese and toppings to create a completely plant-based pizza.
FAQs (Frequently Asked Questions)
Q: Can I make the dough ahead of time?
A: Yes, you can prepare the dough up to 24 hours in advance. After dividing the dough into portions, wrap each ball tightly in plastic wrap and store in the refrigerator. Allow the dough to come to room temperature for about 30 minutes before rolling it out.
Q: My dough is too sticky. What should I do?
A: Add a tablespoon of flour at a time until the dough becomes easier to handle. Be careful not to add too much flour, as this can make the crust tough.
Q: Can I freeze the dough?
A: Yes, you can freeze the dough for up to 2 months. Wrap each ball tightly in plastic wrap and store in a freezer-safe bag. Thaw overnight in the refrigerator before using.
Q: How do I prevent the pizza from sticking to the baking stone?
A: Make sure the baking stone is preheated thoroughly and that the pizza peel is generously sprinkled with cornmeal. A quick, confident transfer is key.
Q: What temperature should my sourdough starter be for optimal results?
A: A sourdough starter at room temperature (around 70-75°F or 21-24°C) is ideal for this recipe. This temperature encourages healthy yeast activity, leading to a well-risen and flavorful crust.
Final Thoughts
This chewy sourdough pizza crust is more than just a recipe; it’s an invitation to create memories in your own kitchen. Don’t be afraid to experiment with different toppings and flavors to create your perfect pizza. The slight tang from the sourdough and the chewy texture will make your pizza night unforgettable. Share your creations and let the aroma of freshly baked sourdough pizza fill your home! Bon appétit!