
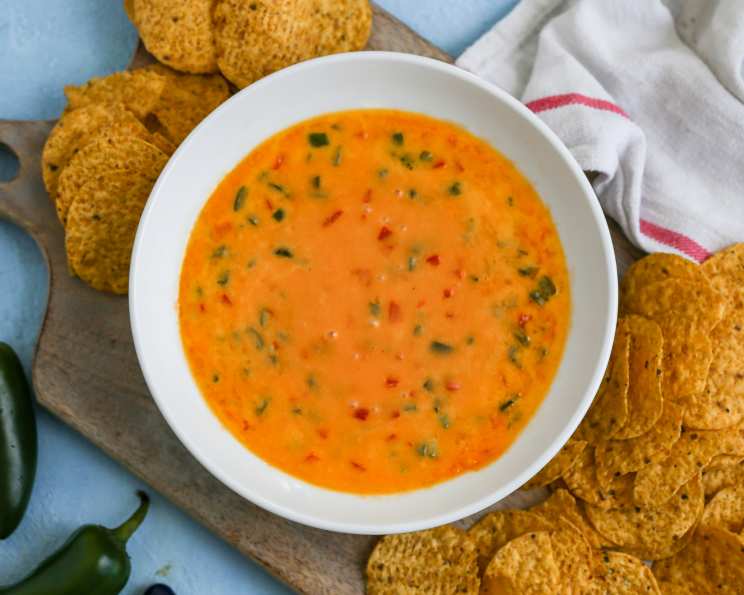
Chi-Chi’s Chile Con Queso: A Restaurant Favorite Recreated
The aroma alone takes me back. It’s Friday night, circa 1995, and my family is crammed into a booth at Chi-Chi’s. The air buzzes with laughter and the clinking of silverware. But the real star of the show? The Chile Con Queso. That velvety smooth, cheesy, slightly spicy dip was pure magic, a communal experience that always started with a race to get the first chip in. When Chi-Chi’s closed its doors, a little piece of my childhood went with it. But fear not, queso lovers! I’ve managed to get my hands on a recipe that tastes just like the real deal, allowing us to relive those nostalgic flavors.
Recipe Overview
- Prep Time: 5 minutes
- Cook Time: 11 minutes
- Total Time: 16 minutes
- Yields: 1 5/8 Pounds
- Serves: 4
- Dietary Type: Vegetarian (can be adapted to vegan)
Ingredients
- 1 lb processed cheese (Velveeta works well)
- ¾ teaspoon granulated garlic
- 4 ½ ounces canned diced green chilies, drained
- ¾ ounce canned diced jalapeno, drained
- ¾ ounce fresh diced green pepper
- 2 ¾ ounces canned diced red peppers, drained
Equipment Needed
- Microwave-safe dish
- Microwave-safe plastic lid
- Spoon for stirring
Instructions
-
Begin by preparing the processed cheese. Cut it into pieces no more than 1 inch thick. This ensures even melting and prevents scorching.
-
Spread the cheese pieces evenly in the bottom of a microwavable dish large enough to accommodate all the ingredients. A shallow bowl or casserole dish works best.
-
Evenly distribute the remaining ingredients – the granulated garlic, drained green chilies, drained jalapeno, fresh diced green pepper, and drained diced red peppers – over the top of the processed cheese. Ensure they are spread out to promote even heating and flavor distribution.
-
Cover the dish with a microwavable plastic lid. This will trap steam and help the cheese melt quickly and evenly. Be sure the lid is vented or slightly ajar to prevent pressure build-up.
-
Microwave on high for 2 minutes. Microwaves vary, so keep a close eye on it.
-
Remove from the microwave and stir thoroughly. Use a sturdy spoon to ensure the melted cheese and other ingredients are well combined. Scrape the bottom and sides of the dish to incorporate any unmelted cheese.
-
Repeat the microwaving process and stirring process until the cheese is completely melted and the mixture is heated to a temperature of 150°F. Check the temperature with a food thermometer for accuracy. This usually takes several more microwave intervals of about 1-2 minutes each, with stirring in between. If the mixture starts to bubble too vigorously, reduce the microwave power to 50%.
-
Serve immediately with your favorite tortilla chips.
Expert Tips & Tricks
- Cheese Selection: While Velveeta is the classic choice, other processed cheeses will work. Experiment to find your favorite flavor and melting point. Avoid using natural cheeses, as they don’t melt as smoothly and can become stringy.
- Spice Level Adjustment: This recipe has a mild kick. For a spicier queso, add more diced jalapeno or a pinch of cayenne pepper. For a milder version, reduce the amount of jalapeno or omit it altogether.
- Fresh vs. Canned Peppers: While canned peppers are convenient, using freshly roasted and diced poblano peppers can add a smoky, nuanced flavor. Be sure to remove the skins after roasting.
- Microwave Power: All microwaves are different. If you find your queso is scorching, reduce the microwave power to 50% and increase the cooking time slightly.
- Preventing Separation: To prevent the queso from separating, stir it frequently while microwaving. Adding a tablespoon of cornstarch mixed with a tablespoon of cold water to the mixture before microwaving can also help stabilize it.
- Make-Ahead Tip: You can prepare all the ingredients in advance by chopping the vegetables and measuring out the spices. Store them in a sealed container in the refrigerator until ready to cook. The queso itself is best served fresh.
Serving & Storage Suggestions
Serve the Chile Con Queso hot with a generous bowl of tortilla chips. Consider adding accompaniments like pico de gallo, guacamole, sour cream, or a squeeze of lime juice for extra flavor and texture.
Leftover queso can be stored in an airtight container in the refrigerator for up to 3 days. To reheat, microwave in short intervals (30 seconds each), stirring in between, until heated through. You may need to add a splash of milk or water to restore its creamy consistency.
While not recommended, you can freeze leftover queso, though the texture may change slightly upon thawing. Thaw it in the refrigerator overnight and reheat as described above.
Do not leave the queso at room temperature for more than 2 hours due to potential bacterial growth.
Nutritional Information
| Nutrient | Amount per Serving | % Daily Value |
|---|---|---|
| Calories | 391.2 kcal | N/A |
| Calories from Fat | 253 kcal | N/A |
| Total Fat | 28.2 g | 43% |
| Saturated Fat | 17.6 g | 88% |
| Cholesterol | 72.9 mg | 24% |
| Sodium | 2197.2 mg | 91% |
| Total Carbohydrate | 12.2 g | 4% |
| Dietary Fiber | 1.1 g | 4% |
| Sugars | 10.7 g | N/A |
| Protein | 23 g | 46% |
Note: Nutritional information is an estimate and may vary depending on specific ingredients used.
Variations & Substitutions
- Vegan Queso: For a vegan version, substitute the Velveeta with a plant-based cheese alternative designed for melting, such as Daiya or Miyoko’s Kitchen Cultured Vegan Mozzarella. Add a tablespoon of nutritional yeast for a cheesy flavor boost.
- Spicy Chorizo Queso: Brown 4 ounces of Mexican chorizo sausage in a skillet, drain off any excess grease, and add it to the queso mixture before microwaving.
- Spinach Artichoke Queso: Add 1/2 cup of chopped frozen spinach (thawed and squeezed dry) and 1/4 cup of chopped artichoke hearts to the queso mixture.
- Black Bean and Corn Queso: Stir in 1/2 cup of drained and rinsed black beans and 1/2 cup of corn kernels (fresh, frozen, or canned) after the queso is melted.
- Smoked Queso: Use smoked paprika instead of granulated garlic for a smoky flavor profile.
- Beer Queso: Substitute 1/4 cup of the processed cheese with a Mexican-style beer (like Corona or Modelo) for a tangy and slightly bitter flavor. Add the beer to the dish before microwaving.
FAQs (Frequently Asked Questions)
Q: Can I make this in a slow cooker?
A: Yes, you can! Combine all the ingredients in a slow cooker and cook on low for 1-2 hours, stirring occasionally, until the cheese is melted and smooth.
Q: Can I use fresh chilies instead of canned?
A: Absolutely! Roast fresh poblano or Anaheim peppers, peel off the skins, remove the seeds, and dice them before adding them to the queso. Adjust the quantity to your spice preference.
Q: My queso is too thick. How can I thin it out?
A: Add a tablespoon of milk or water at a time, stirring until you reach the desired consistency.
Q: Can I add other vegetables?
A: Of course! Diced tomatoes, onions, or even roasted corn can add extra flavor and texture to the queso.
Q: What kind of chips are best for dipping?
A: Sturdy tortilla chips are the classic choice, but you can also use pita chips, vegetable sticks, or even toasted baguette slices.
Final Thoughts
This Chile Con Queso recipe is more than just a snack; it’s a trip down memory lane. It’s a chance to recreate a beloved restaurant favorite in the comfort of your own home, sharing it with friends and family and making new memories along the way. So, gather your ingredients, grab a bag of chips, and prepare to be transported back to the good old days of Chi-Chi’s. And be sure to let me know what you think! I’m confident this queso will become a staple in your kitchen, just like it was in mine. Pair it with a refreshing margarita and enjoy!