
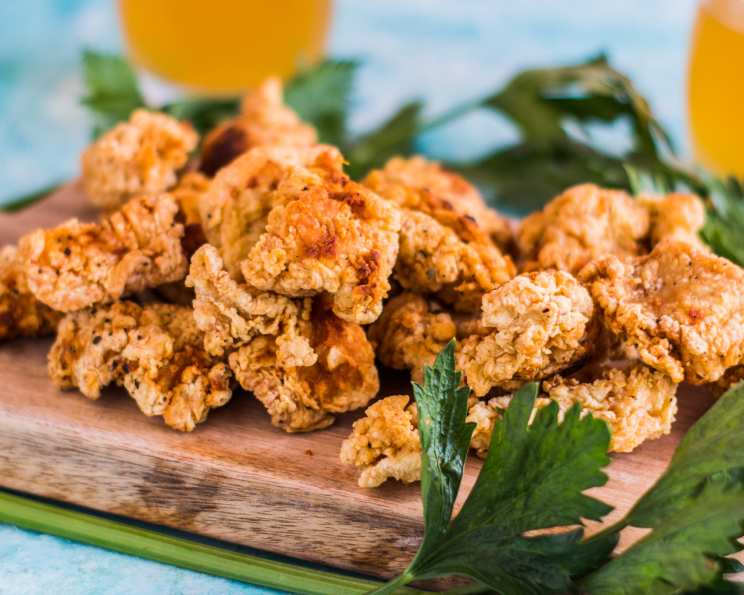
Chick-Fil-A Chicken (And Nuggets) Copycat
There’s something magical about the first bite of a Chick-Fil-A sandwich. It takes me back to childhood road trips, eagerly anticipating that first glimpse of the red and white sign. The juicy, perfectly seasoned chicken, the slightly sweet bun, and of course, the waffle fries – pure comfort food bliss. Determined to recreate that experience at home, I embarked on a culinary quest, and after much experimentation, I’m thrilled to share my version of this iconic dish!
Recipe Overview
- Prep Time: 20 minutes
- Cook Time: 15 minutes
- Total Time: 35 minutes
- Servings: 4
- Yield: 4 Sandwiches
- Dietary Type: Not Gluten-Free
Ingredients
- 4 chicken breasts
- 1 cup pickle juice (use dill pickles, great way to use up that empty jar!)
- 2 eggs
- 1 cup flour
- 2 tablespoons sugar
- 1 teaspoon salt
- 1 teaspoon paprika
- ½ teaspoon pepper
- ½ teaspoon MSG (Accent, leave it out if you prefer)
- ½ teaspoon oregano
- ½ teaspoon basil
- ¼ teaspoon garlic powder
- ¼ teaspoon onion powder
- Peanut oil
Equipment Needed
- Large Plastic Bag
- Shallow Bowls
- Meat Mallet (optional)
- Frying Pan or Deep Fryer
- Tongs
- Paper Towels
Instructions
-
Begin by preparing the chicken breasts. Place them between sheets of plastic wrap and pound them with a meat mallet until they reach your desired thickness. Many chicken breasts are quite thick, making them less ideal for sandwiches, so pounding helps create a more even thickness for cooking. If you’re making nuggets, simply cut the chicken breasts into bite-sized chunks instead.
-
Next, prepare the pickle juice marinade. Place the chicken in a large plastic bag and pour in the pickle juice. Seal the bag tightly, removing any excess air, and massage the pickle juice into the chicken. Marinate in the refrigerator for at least one hour, or preferably overnight, to allow the flavors to fully penetrate the chicken.
-
While the chicken is marinating, prepare the egg wash and flour mixture. In a shallow bowl, whisk together the eggs until well combined. In another shallow bowl, combine the flour, sugar, salt, paprika, pepper, MSG (if using), oregano, basil, garlic powder, and onion powder. Whisk these dry ingredients together to ensure they are evenly distributed.
-
Remove the chicken from the pickle juice marinade and drain it thoroughly. Pat the chicken dry with paper towels to remove excess moisture. This will help the coating adhere better and prevent the chicken from becoming soggy during frying.
-
Dip each piece of chicken into the egg wash, ensuring it is fully coated. Then, dredge the chicken in the flour mixture, pressing firmly to ensure the coating sticks. Shake off any excess flour to prevent the oil from becoming too dirty during frying.
-
Heat peanut oil in a frying pan or deep fryer to 325-350°F (160-175°C). The oil should be deep enough to fully submerge the chicken for even cooking.
-
Carefully add the coated chicken to the hot oil, ensuring not to overcrowd the pan. Overcrowding can lower the oil temperature and result in greasy chicken. Fry the chicken for approximately 6-8 minutes per side, or until it is golden brown and cooked through. The internal temperature of the chicken should reach 165°F (74°C).
-
Remove the fried chicken from the oil and place it on a wire rack lined with paper towels to drain excess oil. This will help keep the chicken crispy.
-
Serve immediately on toasted buns, if desired, along with your favorite condiments and sides.
Expert Tips & Tricks
- Pounding the chicken: Don’t skip pounding the chicken! This not only tenderizes the meat but also ensures even cooking. It’s a crucial step for achieving that perfect sandwich texture.
- Pickle Juice is Key: The pickle juice is the secret ingredient! It tenderizes the chicken and imparts that signature tang. Don’t be tempted to skip it.
- MSG – To Use or Not to Use: While MSG gets a bad rap, it really does enhance the savory flavor. If you’re sensitive to it, feel free to omit it, but for the most authentic flavor, a pinch adds a lot.
- Fry Smart: Maintaining the correct oil temperature is critical. Too low, and the chicken will be greasy; too high, and the outside will burn before the inside is cooked. Use a thermometer to monitor the oil temperature.
Serving & Storage Suggestions
Serve your homemade Chick-Fil-A chicken immediately while it’s hot and crispy. For a classic sandwich, place the chicken on a toasted bun with dill pickle slices and your favorite sauce. Alternatively, serve the nuggets with an array of dipping sauces like honey mustard, barbecue, or Chick-Fil-A sauce.
Leftovers can be stored in an airtight container in the refrigerator for up to 3-4 days. To reheat, bake in a preheated oven at 350°F (175°C) for 10-15 minutes, or until heated through. You can also reheat in an air fryer for a crispier result. Microwaving is not recommended, as it can make the chicken soggy.
Nutritional Information
Note: Nutritional information is an estimate and can vary based on specific ingredients and cooking methods.
| Nutrient | Amount per Serving | % Daily Value |
|---|---|---|
| Calories | 450 kcal | 23% |
| Total Fat | 25g | 38% |
| Saturated Fat | 5g | 25% |
| Cholesterol | 150mg | 50% |
| Sodium | 800mg | 33% |
| Total Carbohydrate | 30g | 10% |
| Dietary Fiber | 2g | 8% |
| Sugars | 7g | |
| Protein | 30g | 60% |
Variations & Substitutions
- Gluten-Free: Substitute the all-purpose flour with a gluten-free blend for a gluten-free version. Ensure all other ingredients are also gluten-free.
- Spicy Chicken: Add a dash of cayenne pepper or hot sauce to the flour mixture for a spicy kick.
- Air Fryer Version: For a healthier option, you can air fry the chicken instead of deep frying. Preheat your air fryer to 375°F (190°C) and cook for 12-15 minutes, flipping halfway through, until golden brown and cooked through.
- Sweet and Savory: Add a pinch of cinnamon to the flour mixture for a subtle sweet and savory flavor.
FAQs (Frequently Asked Questions)
Q: Why is pickle juice used in the marinade?
A: Pickle juice tenderizes the chicken and imparts a subtle tang that is characteristic of Chick-Fil-A’s chicken. The acidity helps break down the proteins, resulting in a more tender and flavorful final product.
Q: Can I marinate the chicken for longer than overnight?
A: While you can marinate the chicken for longer, be careful not to over-marinate it. Marinating for more than 24 hours can cause the chicken to become too soft.
Q: What kind of oil is best for frying?
A: Peanut oil is traditionally used for frying Chick-Fil-A chicken, but you can also use other high-heat oils like canola oil or vegetable oil.
Q: How do I keep the chicken crispy after frying?
A: Place the fried chicken on a wire rack lined with paper towels to allow excess oil to drain. Avoid stacking the chicken, as this can cause it to become soggy.
Q: Can I bake the chicken instead of frying?
A: While frying provides the most authentic texture and flavor, you can bake the chicken for a healthier alternative. Bake in a preheated oven at 400°F (200°C) for 20-25 minutes, or until cooked through.
Final Thoughts
Recreating iconic dishes at home is a culinary adventure, and this Chick-Fil-A chicken copycat is no exception. The combination of pickle juice marinade, seasoned breading, and perfectly fried chicken truly captures the essence of the original. I encourage you to try this recipe and share your feedback! Pair it with waffle fries and your favorite dipping sauce for the ultimate Chick-Fil-A experience, all from the comfort of your own kitchen.