
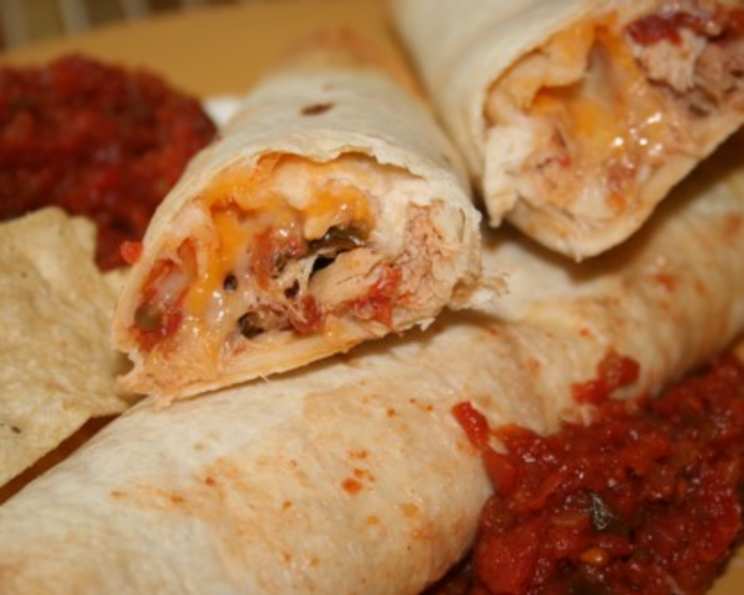
Chicken Cheese Wraps: A Culinary Throwback
The aroma of sizzling tortillas and melted cheese instantly transports me back to my college days. Late-night study sessions were fueled by these incredibly easy and satisfying Chicken Cheese Wraps. We’d gather in the dorm kitchen, cans of chicken and jars of salsa in hand, creating assembly-line perfection. The slightly charred tortillas, the gooey cheese, and the communal spirit of sharing a simple, delicious meal – it’s a memory I cherish, and a flavor I still crave.
Recipe Overview
- Prep Time: 10 minutes
- Cook Time: 5-10 minutes
- Total Time: 15-20 minutes
- Servings: 8
- Yield: 8 wraps
- Dietary Type: Adaptable (see Variations)
Ingredients
- 3 (8 ounce) cans chicken breasts
- 2/3 cup salsa or 2/3 cup picante sauce
- 2 cups shredded Velveeta cheese
- 1 (16 ounce) package flour tortillas (8 count burrito size)
- 1 (16 ounce) container sour cream (for dipping)
- Additional salsa (for dipping)
Equipment Needed
- Large bowl
- Spoon or fork
- George Foreman-type grill or skillet or oven
Instructions
-
In a large bowl, combine the drained chicken breasts and salsa (or picante sauce). Mix thoroughly, breaking up any large chunks of chicken with a spoon or fork until it’s well incorporated with the salsa.
-
Lay out one flour tortilla on a flat surface.
-
Place a large spoonful of the chicken and salsa mixture in the center of the tortilla.
-
Sprinkle approximately 1/4 cup of shredded Velveeta cheese over the chicken mixture.
-
Spread the chicken and cheese evenly, being careful to avoid getting too close to the edges of the tortilla. This will prevent the filling from spilling out during cooking.
-
You have a few cooking options at this point:
- Grilling: Fold the tortilla in half and grill on a George Foreman-type grill for about 4-5 minutes, or until the tortilla is golden brown and the cheese is melted and gooey. Ensure the grill is preheated before adding the wrap.
- Pan-Frying: Roll up the tortilla tightly. Heat a lightly oiled skillet over medium heat. Fry the rolled wrap for several minutes on each side until golden brown and crispy, ensuring the seam is facing down first to seal it.
- Baking: Roll up the tortilla tightly. Preheat oven to 350°F (175°C). Place the wraps seam-side down on a baking sheet. Bake for 10-15 minutes, or until the tortillas are golden brown and the cheese is melted. For extra crispiness, lightly brush the tortillas with oil before baking.
-
Serve immediately with sour cream and additional salsa for dipping.
Expert Tips & Tricks
- Spice Level: Adjust the amount of salsa or use a hotter variety of picante sauce to control the spice level. You can also add a pinch of cayenne pepper to the chicken mixture for extra heat.
- Cheese Choices: While Velveeta melts beautifully, you can substitute with other shredded cheeses like Monterey Jack, cheddar, or a Mexican cheese blend. For a sharper flavor, try pepper jack.
- Preventing Soggy Wraps: If baking, placing the wraps on a wire rack inside the baking sheet can help prevent the bottoms from becoming soggy.
- Make-Ahead Tip: The chicken and salsa mixture can be prepared a day in advance and stored in the refrigerator. This allows the flavors to meld together for a richer taste.
- Even Cooking: Whether grilling, frying, or baking, ensure even heat distribution for consistent cooking and melting of the cheese.
- Crispy Tortillas: For extra crispy baked tortillas, brush them lightly with melted butter or olive oil before baking.
- Ingredient Quality: Using high quality salsa will greatly enhance the final flavor.
Serving & Storage Suggestions
Serve the Chicken Cheese Wraps immediately while they are hot and the cheese is melted and gooey. A dollop of sour cream and a side of fresh salsa are the perfect accompaniments. You can also add a side of guacamole or a simple salad for a more complete meal.
Leftovers can be stored in an airtight container in the refrigerator for up to 3 days. To reheat, you can microwave them (though the tortillas may become slightly soft), bake them in a preheated oven at 350°F (175°C) for about 5-10 minutes, or pan-fry them until heated through and crispy. Freezing is not recommended as the texture of the tortillas may change upon thawing.
Nutritional Information
| Nutrient | Amount per Serving | % Daily Value |
|---|---|---|
| Calories | 609.3 kcal | N/A |
| Calories from Fat | 297 g | 49 % |
| Total Fat | 33.1 g | 50 % |
| Saturated Fat | 14.8 g | 74 % |
| Cholesterol | 107.7 mg | 35 % |
| Sodium | 767.3 mg | 31 % |
| Total Carbohydrate | 44 g | 14 % |
| Dietary Fiber | 2.8 g | 11 % |
| Sugars | 2.5 g | N/A |
| Protein | 32.9 g | 65 % |
Note: Nutritional information is an estimate and may vary based on specific ingredients and preparation methods.
Variations & Substitutions
- Spicy Chicken Wraps: Add diced jalapeños, a dash of hot sauce, or use a spicy salsa to the chicken mixture for a fiery kick.
- Vegetarian Wraps: Substitute the chicken with black beans, pinto beans, or seasoned tofu. Add some corn for sweetness.
- Gluten-Free Wraps: Use gluten-free tortillas.
- Healthier Wraps: Use whole wheat tortillas, reduced-fat cheese, and grilled chicken breasts instead of canned. Add vegetables like bell peppers and onions to the filling.
- Creamy Chicken Wraps: Mix a tablespoon or two of cream cheese or Greek yogurt into the chicken mixture for added creaminess.
- Deluxe Wraps: Add cooked bacon crumbles, chopped avocado, or diced tomatoes to the wraps before cooking.
- Southwestern Style: Add black beans, corn, diced bell peppers, and a sprinkle of chili powder to the chicken mixture.
FAQs (Frequently Asked Questions)
Q: Can I use rotisserie chicken instead of canned chicken?
A: Absolutely! Rotisserie chicken is a great alternative. Shred it and mix it with the salsa as directed.
Q: Can I freeze these wraps for later?
A: While freezing is possible, the texture of the tortillas may change. If you do freeze them, wrap them individually in plastic wrap and then place them in a freezer-safe bag. Reheat in the oven for best results.
Q: How can I make these wraps lower in sodium?
A: Use low-sodium canned chicken or fresh chicken that you season yourself. Also, choose a low-sodium salsa.
Q: What if I don’t have a George Foreman grill?
A: You can use a regular skillet or bake the wraps in the oven as described in the instructions.
Q: Can I add vegetables to these wraps?
A: Yes! Diced bell peppers, onions, and corn are great additions. Sauté them lightly before adding them to the chicken mixture.
Final Thoughts
Chicken Cheese Wraps are more than just a quick meal; they are a testament to the deliciousness of simplicity and the joy of shared culinary experiences. Whether you’re a seasoned chef or a beginner cook, this recipe offers endless possibilities for customization and a guaranteed crowd-pleaser. Gather your ingredients, fire up the grill (or oven!), and create your own memories with these irresistible wraps. And don’t hesitate to experiment with different flavors and fillings to make them your own! I’d love to hear about your variations and any fun additions you discover!