
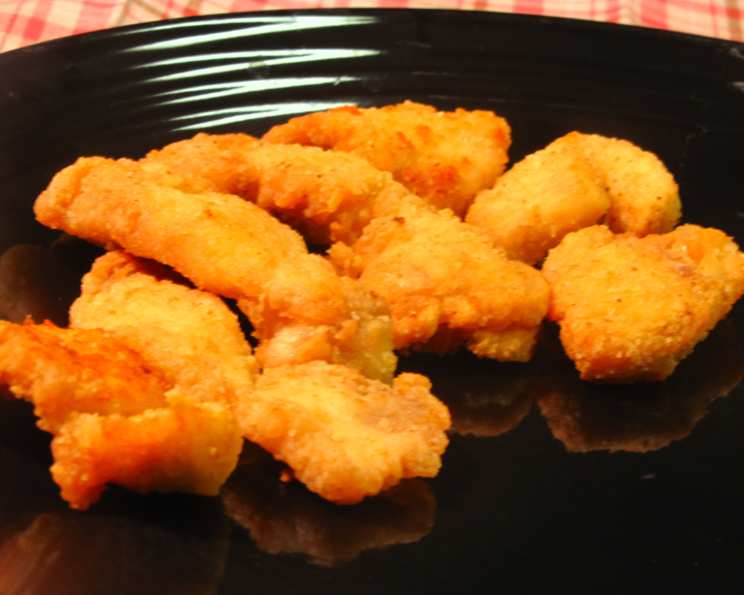
Crispy Chicken Chips: A Deliciously Simple Recipe
My fondest childhood memories often revolve around simple, comforting meals shared with family. I remember one particular rainy afternoon when my grandmother, a wizard in the kitchen, transformed a handful of leftover chicken into the most delightful crispy “chips.” It wasn’t just the taste; it was the magic of turning something ordinary into something extraordinary. These chicken chips are a culinary adventure, offering a satisfying crunch and a burst of flavor that transports me back to those cherished moments.
Recipe Overview
Here’s a quick look at what you need to know before diving into this recipe:
- Prep Time: 10 minutes
- Cook Time: 20-30 minutes
- Total Time: 30-40 minutes
- Servings: 2-3
- Yield: Varies depending on chicken size
- Dietary Type: Varies (can be gluten-free with appropriate flour)
Ingredients
Here’s what you’ll need to make these irresistible chicken chips:
- 2 boneless, skinless chicken breasts
- 1 cup water
- 1 1/2 cups seasoned flour (Kentucky Kernel or similar, adjust quantity if needed)
- 1 cup olive oil (for frying)
Equipment Needed
- Medium-sized frying pan
- Zip-lock bag
- Plate
- Paper towels
- Knife
- Cutting board
Instructions
Follow these steps carefully to create perfectly crispy chicken chips:
-
Begin by preparing your dredging station. Pour the seasoned flour into a zip-lock bag. Ensure the bag is large enough to comfortably coat the chicken pieces.
-
Next, prepare your frying setup. Pour the olive oil into a medium-sized frying pan. Place the pan on the stovetop and set the heat to medium-low. Allowing the oil to heat gradually is key to even cooking and preventing burning. Aim for an oil temperature of about 325-350°F (160-175°C). If you have a thermometer, use it to monitor the temperature.
-
Now comes the chicken preparation. Slice the chicken breasts into pieces approximately 1/4 inch thick. Uniform thickness is crucial for even cooking and consistent crispiness. Think of creating “chips” rather than chunks. The thinner the slice, the crispier the result.
-
In a shallow bowl, pour the water. Dip each chicken slice into the water to moisten it. This helps the seasoned flour adhere properly.
-
Place the moistened chicken slices on a plate that is lined with paper towels. This helps to remove excess moisture, ensuring a crispier outcome.
-
Once all the chicken is sliced and moistened, it’s time to coat them. Place a quarter of the sliced chicken into the zip-lock bag containing the seasoned flour. Seal the bag tightly and shake vigorously to coat each piece thoroughly. Ensure that every surface of the chicken is covered with flour.
-
Carefully remove the coated chicken from the bag and gently shake off any excess flour.
-
Once the olive oil is heated, carefully place the flour-coated chicken into the hot oil. Avoid overcrowding the pan, as this can lower the oil temperature and result in soggy chips. Work in batches if necessary.
-
Allow the chicken chips to cook for approximately 10-15 minutes on each side, or until they reach a beautiful golden-brown color. Keep a close eye on them to prevent burning. The exact cooking time will depend on the thickness of the chicken slices and the heat of your stove.
-
Once the chicken chips are golden brown and cooked through, remove them from the frying pan and place them on a clean plate lined with paper towels to drain excess oil.
-
Repeat steps 6-10 until all the sliced chicken is cooked.
Expert Tips & Tricks
-
For an extra crispy result, consider double-dredging the chicken. After the initial flour coating, dip the chicken back into the water and then back into the flour before frying.
-
If you want to add a little heat, mix a pinch of cayenne pepper or chili powder into the seasoned flour.
-
Don’t overcrowd the pan! Cooking in batches helps maintain the oil temperature, ensuring crispy chips.
-
Monitor the oil temperature carefully. If it gets too hot, the flour will burn before the chicken is cooked through. If it’s not hot enough, the chips will absorb too much oil and become soggy.
-
To keep the finished chicken chips warm while you cook the remaining batches, place them on a baking sheet in a preheated oven at 200°F (95°C).
Serving & Storage Suggestions
Serve these delightful chicken chips hot, straight from the frying pan! They make a fantastic appetizer or snack. Consider pairing them with your favorite dipping sauces, such as ranch dressing, honey mustard, or barbecue sauce.
Leftover chicken chips can be stored in an airtight container in the refrigerator for up to 3 days. To reheat, bake them in a preheated oven at 350°F (175°C) for about 5-10 minutes, or until heated through and crispy. You can also reheat them in an air fryer for a similar result. Reheating in the microwave is not recommended as it can make them soggy.
Nutritional Information
Here’s an estimate of the nutritional content per serving (based on 3 servings, may vary):
| Nutrient | Amount per Serving | % Daily Value |
|---|---|---|
| Calories | 477 kcal | 24% |
| Total Fat | 37g | 57% |
| Saturated Fat | 5.3g | 27% |
| Cholesterol | 25mg | 8% |
| Sodium | 48mg | 2% |
| Total Carbohydrate | 24g | 8% |
| Dietary Fiber | 0.8g | 3% |
| Sugars | 0.1g | 0% |
| Protein | 11.6g | 23% |
Variations & Substitutions
- Gluten-Free Chicken Chips: Substitute the seasoned flour with a gluten-free flour blend suitable for frying. Ensure the seasoning blend is also gluten-free.
- Spice it Up: Add a dash of cayenne pepper, smoked paprika, or chili powder to the seasoned flour for a spicy kick.
- Herb-Infused: Mix dried herbs like thyme, rosemary, or oregano into the seasoned flour for an herbaceous flavor.
- Air Fryer Chicken Chips: Instead of frying, you can cook these in an air fryer for a healthier option. Preheat your air fryer to 400°F (200°C) and cook for about 10-12 minutes, flipping halfway through, until golden brown and crispy.
- Different Oils: While olive oil is used here, you could substitute it for vegetable oil, canola oil, or peanut oil. Each will lend a slightly different flavor to the finished product.
FAQs (Frequently Asked Questions)
Q: Can I use other cuts of chicken?
A: While boneless, skinless chicken breasts work best, you can use boneless, skinless chicken thighs. Keep in mind that thighs will have a slightly different texture and may require a longer cooking time.
Q: Can I prepare the chicken chips ahead of time?
A: You can slice and coat the chicken ahead of time and store it in the refrigerator for a few hours. However, it’s best to fry them just before serving for optimal crispiness.
Q: How do I know when the chicken chips are cooked through?
A: The chicken chips are cooked through when they are golden brown and crispy on both sides, and the internal temperature reaches 165°F (74°C).
Q: What if my chicken chips are soggy?
A: Soggy chicken chips are usually caused by overcrowding the pan or not having the oil hot enough. Ensure you cook in batches and monitor the oil temperature closely.
Q: Can I bake these instead of frying?
A: While baking is an option, the texture will be different. For baked chicken chips, preheat your oven to 400°F (200°C), place the coated chicken on a baking sheet, and bake for about 20-25 minutes, flipping halfway through. They will not be as crispy as the fried version.
Final Thoughts
These crispy chicken chips are a testament to the fact that simple ingredients, when prepared with love and care, can create truly extraordinary dishes. Don’t be afraid to experiment with different seasonings and dipping sauces to create your own signature version. So, gather your ingredients, put on your apron, and get ready to enjoy a delicious and satisfying snack that’s sure to become a family favorite. Happy cooking!