
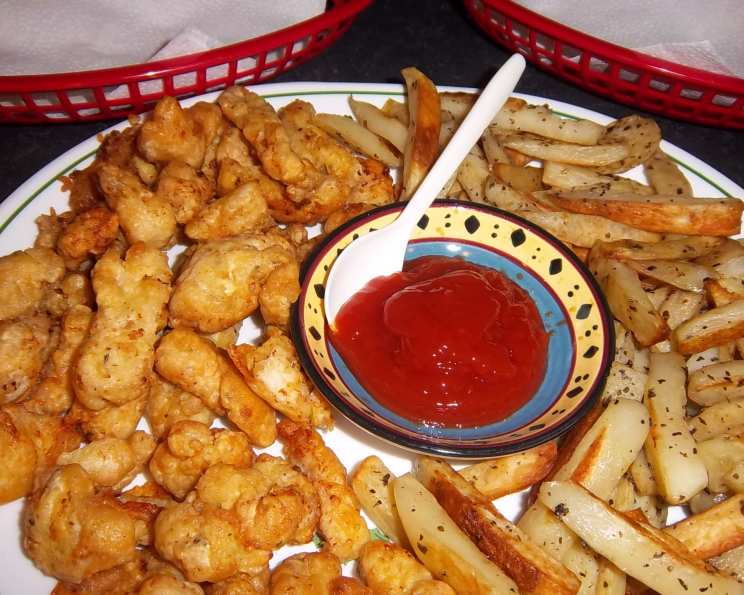
Crispy Chicken Fingers and Golden Fries: A Culinary Classic Elevated
I still remember the excitement of Friday nights as a kid. My parents, worn out from the week, would declare it “kitchen’s closed” night, and that meant one thing: chicken fingers and fries! The simple joy of dipping those crispy, golden strips into ketchup, the satisfying crunch of the perfectly salted fries – it was pure, unadulterated comfort. While those were often from a local fast-food joint, I’ve since perfected my own version, one that’s just as delicious but made with fresh ingredients and a little extra love.
Recipe Overview
- Prep Time: 20 minutes
- Cook Time: 45 minutes
- Total Time: 1 hour 5 minutes (includes marinating time)
- Servings: 2
- Dietary Type: Not Gluten-Free
Ingredients
- 6 ounces chicken breasts (boneless, skinless)
- 1 tablespoon oyster sauce
- 4 white potatoes
- 1 tablespoon olive oil
- 1 teaspoon basil
- 1⁄2 teaspoon garlic salt
- 1⁄4 teaspoon cayenne pepper
- 2 eggs
- 1⁄4 cup skim milk
- 1⁄2 cup flour
- 1 tablespoon cornstarch
- 1⁄2 teaspoon salt
- 1⁄2 teaspoon basil
- 1⁄4 teaspoon black pepper
- 1⁄4 cup olive oil (plus more for frying, if needed)
Equipment Needed
- French fry cutter (optional, but recommended)
- Cookie sheet
- Shallow bowls or dishes for breading
- Large skillet or frying pan
- Paper towels
- Meat tenderizer
Instructions
- Begin by preparing the chicken. First, tenderize the chicken breasts using a meat mallet or rolling pin until they are about 1/2 inch thick. This ensures even cooking and maximum tenderness.
- Next, marinate the tenderized chicken in oyster sauce overnight in the refrigerator. This step infuses the chicken with a savory umami flavor. If you’re short on time, a minimum of 30 minutes will still provide a noticeable difference.
- Now, prepare the fries. Peel the potatoes and cut them into french fry shapes using a french fry cutter for uniformity, or simply cut them by hand into roughly equal sizes.
- In a bowl, toss the cut potatoes with 1 tablespoon of olive oil, ensuring they are evenly coated. This helps them crisp up beautifully in the oven.
- Spread the coated potatoes in a single layer on a cookie sheet. Avoid overcrowding, as this will steam the potatoes instead of roasting them. You may need two cookie sheets depending on the size of your potatoes.
- Bake the fries in a preheated oven at 350 degrees Fahrenheit (175 degrees Celsius) for 30 minutes. Then, turn all the fries and bake for another 10 minutes, or until they are golden brown and crispy. Keep a close eye on them to prevent burning.
- While the fries are baking, prepare the chicken fingers. In a shallow bowl, stir together the flour, cornstarch, salt, 1/2 teaspoon basil, garlic salt, 1/4 teaspoon black pepper, and cayenne pepper. The cornstarch helps to create a light and crispy coating.
- Cut the marinated chicken breasts into 1/2-inch strips.
- In another shallow bowl, soak the chicken strips in skim milk. This helps the flour mixture adhere to the chicken.
- Next, coat the milk-soaked chicken strips completely with the flour mixture, pressing lightly to ensure even coverage.
- In a separate bowl, beat the eggs well.
- Coat the floured chicken strips in the beaten egg, allowing any excess to drip off.
- In a large skillet or frying pan, heat 1/4 cup olive oil over medium-high heat. You may need to add more oil during the cooking process if the pan becomes dry.
- Fry the chicken fingers in the hot olive oil for approximately 15 minutes, turning them regularly, until all sides are golden brown and the chicken is cooked through. The internal temperature of the chicken should reach 165 degrees Fahrenheit (74 degrees Celsius). Avoid overcrowding the pan, as this will lower the oil temperature and result in soggy chicken fingers. Work in batches if necessary.
- Remove the fried chicken fingers from the pan and drain them on paper towels to remove excess oil.
- Serve the chicken fingers immediately with the freshly baked fries. Ketchup is a classic accompaniment, but feel free to experiment with other dipping sauces like honey mustard, BBQ sauce, or ranch dressing.
Expert Tips & Tricks
- For extra crispy fries, try soaking the cut potatoes in cold water for at least 30 minutes before tossing them with olive oil. This helps remove excess starch, resulting in a crispier exterior.
- If you prefer a thicker coating on your chicken fingers, double-dip them in the flour mixture and egg before frying.
- To prevent the chicken fingers from sticking to the pan, make sure the oil is hot enough before adding them. You can test the oil by dropping a small piece of flour into it. If it sizzles immediately, the oil is ready.
- For a healthier alternative, you can bake the chicken fingers instead of frying them. Place the breaded chicken fingers on a baking sheet lined with parchment paper and bake at 400 degrees Fahrenheit (200 degrees Celsius) for 20-25 minutes, or until golden brown and cooked through, flipping halfway through.
Serving & Storage Suggestions
Serve the chicken fingers and fries immediately while they are hot and crispy. These are best enjoyed fresh!
Leftovers can be stored in an airtight container in the refrigerator for up to 3 days. To reheat, bake the chicken fingers and fries in a preheated oven at 350 degrees Fahrenheit (175 degrees Celsius) until heated through and crispy, or use an air fryer for even better results. Avoid microwaving, as this will make them soggy.
Nutritional Information
| Nutrient | Amount per Serving | % Daily Value |
|---|---|---|
| Calories | 903 kcal | N/A |
| Calories from Fat | 423 kcal | N/A |
| Total Fat | 47.1 g | 72% |
| Saturated Fat | 8.7 g | 43% |
| Cholesterol | 241.1 mg | 80% |
| Sodium | 1625.1 mg | 67% |
| Total Carbohydrate | 86.2 g | 28% |
| Dietary Fiber | 6.6 g | 26% |
| Sugars | 2.7 g | N/A |
| Protein | 33.9 g | 67% |
Note: Nutritional information is an estimate and may vary based on specific ingredients and portion sizes.
Variations & Substitutions
- Gluten-Free: Use gluten-free flour blend instead of all-purpose flour. Ensure your oyster sauce is also gluten-free, as some brands contain wheat.
- Spicy Chicken Fingers: Increase the amount of cayenne pepper or add a pinch of red pepper flakes to the flour mixture for a spicier kick.
- Different Dipping Sauces: Experiment with different dipping sauces such as honey mustard, BBQ sauce, ranch dressing, sriracha mayo, or a homemade sweet and sour sauce.
- Sweet Potato Fries: Substitute the white potatoes with sweet potatoes for a sweeter and more nutritious alternative. Adjust baking time as needed.
- Herb-Infused Fries: Add other herbs such as rosemary, thyme, or oregano to the olive oil when tossing the potatoes for a more complex flavor.
FAQs (Frequently Asked Questions)
Q: Can I use chicken thighs instead of chicken breasts?
A: Yes, you can use boneless, skinless chicken thighs. They will be more tender and flavorful but may require slightly longer cooking time. Ensure they reach an internal temperature of 165°F (74°C).
Q: What is the best way to keep the chicken fingers warm while frying in batches?
A: Place the cooked chicken fingers on a wire rack in a preheated oven at 200°F (93°C) to keep them warm and crispy while you finish frying the remaining batches.
Q: Can I prepare the chicken fingers ahead of time?
A: You can prepare the chicken fingers up to the point of frying and store them in the refrigerator for up to 24 hours. Fry them just before serving for the best results.
Q: What if I don’t have oyster sauce?
A: If you don’t have oyster sauce, you can substitute it with a mixture of soy sauce, brown sugar, and a touch of rice vinegar to achieve a similar umami flavor.
Q: My fries are not getting crispy enough. What can I do?
A: Make sure the potatoes are spread in a single layer on the cookie sheet and that the oven temperature is accurate. If needed, increase the oven temperature slightly and bake for a few more minutes, keeping a close eye on them to prevent burning.
Final Thoughts
These crispy chicken fingers and golden fries are more than just a meal; they’re a nostalgic trip back to simpler times, elevated with fresh ingredients and a touch of culinary finesse. I urge you to try this recipe and create your own cherished memories. Don’t be afraid to experiment with different dipping sauces or spice levels to suit your taste. Share your creations with friends and family, and let me know what you think! Perhaps a side of coleslaw and a frosty glass of lemonade would complete the picture? Enjoy!