
Chicken Fingers With Plum Dipping Sauce: A Crunchy, Savory Delight
I remember my first time making chicken fingers. It was a rainy Saturday afternoon, and my grandmother, Nana Rose, decided we needed a culinary adventure. She pulled out a well-worn cookbook, its pages speckled with memories of family meals past, and we embarked on creating these seemingly simple, yet utterly satisfying, chicken fingers. The sweet and tangy aroma of the plum dipping sauce, mingled with the crispy, savory chicken, filled the kitchen, creating a memory that still brings a smile to my face – proof that the most comforting meals are often the easiest to make.
Recipe Overview
- Prep Time: 10 minutes
- Cook Time: 27 minutes
- Total Time: 37 minutes
- Yields: 20 fingers
- Serves: 5
Ingredients
For the Fingers:
- 1 1⁄2 cups soda crackers, finely crushed
- 1⁄3 cup mayonnaise
- 4 boneless skinless chicken breasts
For the Dipping Sauce:
- 6 tablespoons ketchup
- 6 tablespoons plum sauce
- 2 teaspoons soy sauce
Equipment Needed
- Rimmed baking sheet
- Shallow dish
- Small bowl
- Small serving bowl
Instructions
-
Preheat your oven to 400°F (200°C). Grease a rimmed baking sheet well to prevent sticking.
-
Cut each chicken breast crosswise into 4 or 5 strips. Pat the chicken strips dry with paper towels. This helps the mayonnaise adhere and ensures the crackers create a crispy coating.
-
Place the crushed soda crackers in a shallow dish. In a separate small bowl, place the mayonnaise.
-
Add the chicken strips to the bowl with the mayonnaise. Turn the strips to coat them completely. Ensure each strip is evenly coated; this is your “glue” for the cracker crumbs.
-
Transfer the chicken strips, one at a time, to the dish of cracker crumbs, patting the crumbs all over the chicken strip. Press gently but firmly to make sure the crumbs adhere well. This is how you get that golden, satisfying crunch.
-
Arrange the coated chicken strips in a single layer on the prepared baking sheet. Avoid overcrowding the pan; this will ensure they bake evenly and become crispy.
-
Bake for 15 minutes.
-
Turn the chicken strips over and bake for another 10 to 12 minutes, or until they are golden brown and no longer pink inside. The internal temperature of the chicken should reach 165°F (74°C).
-
While the chicken fingers are baking, prepare the dipping sauce. In a small serving bowl, stir together the ketchup, plum sauce, and soy sauce until well combined.
-
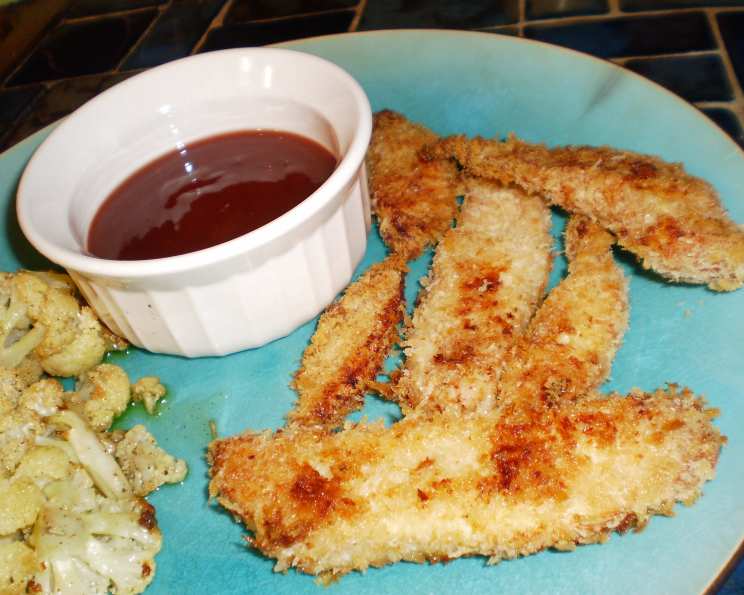
Place the dipping sauce in the center of a serving platter. When the chicken fingers are baked, arrange them artfully around the bowl. Serve immediately and enjoy!
Expert Tips & Tricks
- Cracker Crushing: For the finest coating, use a food processor to crush the soda crackers into very fine crumbs. If you don’t have a food processor, place the crackers in a resealable bag and crush them with a rolling pin.
- Spice It Up: Add a dash of cayenne pepper or smoked paprika to the cracker crumbs for a subtle kick.
- Extra Crispy: For extra crispy chicken fingers, place the baking sheet on the top rack of the oven during the last few minutes of cooking, watching carefully to prevent burning.
- Make-Ahead Prep: You can coat the chicken fingers in the cracker crumbs ahead of time and store them in the refrigerator for up to 2 hours before baking. This is a great way to save time on busy weeknights.
- Doneness Check: Always check the internal temperature of the chicken to ensure it is fully cooked. Use a meat thermometer inserted into the thickest part of a chicken finger to ensure it reaches 165°F (74°C).
Serving & Storage Suggestions
Serve the chicken fingers immediately while they are hot and crispy. The plum dipping sauce provides a sweet and savory counterpoint to the savory chicken. You can also serve them with a side of fries, coleslaw, or a simple green salad for a complete meal.
Storage:
- Room Temperature: Do not leave cooked chicken fingers at room temperature for more than 2 hours.
- Refrigerator: Store leftover chicken fingers in an airtight container in the refrigerator for up to 3 days.
- Freezer: For longer storage, freeze the cooked chicken fingers in a single layer on a baking sheet until solid, then transfer them to a freezer-safe bag or container. They can be frozen for up to 2 months.
Reheating:
- Oven: Reheat the chicken fingers in a preheated oven at 350°F (175°C) for 10-15 minutes, or until heated through.
- Air Fryer: For the crispiest results, reheat the chicken fingers in an air fryer at 350°F (175°C) for 5-7 minutes.
- Microwave: While not ideal for retaining crispness, you can reheat the chicken fingers in the microwave on medium power for 1-2 minutes.
Nutritional Information
| Nutrient | Amount per Serving | % Daily Value |
|---|---|---|
| Calories | 315.6 kcal | N/A |
| Calories from Fat | 81 g | 26% |
| Total Fat | 9.1 g | 13% |
| Saturated Fat | 1.5 g | 7% |
| Cholesterol | 58.8 mg | 19% |
| Sodium | 855 mg | 35% |
| Total Carbohydrate | 33 g | 11% |
| Dietary Fiber | 0.9 g | 3% |
| Sugars | 5.2 g | N/A |
| Protein | 24.6 g | 49% |
Note: Nutritional information is an estimate and may vary based on specific ingredients and portion sizes.
Variations & Substitutions
- Gluten-Free: Use gluten-free soda crackers or crushed gluten-free pretzels as a substitute for the soda crackers. Ensure the plum sauce and soy sauce are also gluten-free.
- Spicy Fingers: Add a pinch of cayenne pepper or a dash of hot sauce to the mayonnaise before coating the chicken.
- Herb-Infused: Mix dried herbs like thyme, rosemary, or oregano into the cracker crumbs for an herbaceous twist.
- Parmesan Crust: Add grated Parmesan cheese to the cracker crumbs for a cheesy and savory crust.
- Alternative Dipping Sauces: Try serving the chicken fingers with honey mustard, ranch dressing, or a spicy sriracha mayo.
FAQs (Frequently Asked Questions)
Q: Can I use chicken tenders instead of cutting chicken breasts?
A: Absolutely! Chicken tenders are a great alternative. Just adjust the baking time as needed, since they may cook faster.
Q: What if I don’t have soda crackers? Can I use another type of cracker?
A: Yes, you can substitute with Ritz crackers or any other similar buttery cracker. The flavor will be slightly different, but still delicious.
Q: Can I prepare the dipping sauce in advance?
A: Definitely! The dipping sauce can be made up to 2 days in advance and stored in an airtight container in the refrigerator.
Q: How do I keep the chicken fingers crispy after baking?
A: Place the baked chicken fingers on a wire rack instead of a plate to prevent them from steaming and becoming soggy.
Q: Can I bake these from frozen?
A: It’s best to thaw them completely before baking for even cooking. If baking from frozen, increase the baking time and ensure the internal temperature reaches 165°F (74°C).
Final Thoughts
These Chicken Fingers with Plum Dipping Sauce are a guaranteed crowd-pleaser, perfect for a weeknight dinner, a party appetizer, or a fun weekend snack. The combination of crispy, savory chicken and sweet, tangy dipping sauce is simply irresistible. Don’t hesitate to get creative with variations and substitutions to personalize the recipe to your taste. So, gather your ingredients, preheat your oven, and get ready to enjoy a batch of these delightful chicken fingers! Share your creations and feedback – I’m always eager to see your culinary masterpieces! Consider pairing these with a crisp, light salad or some roasted vegetables for a balanced and satisfying meal.