
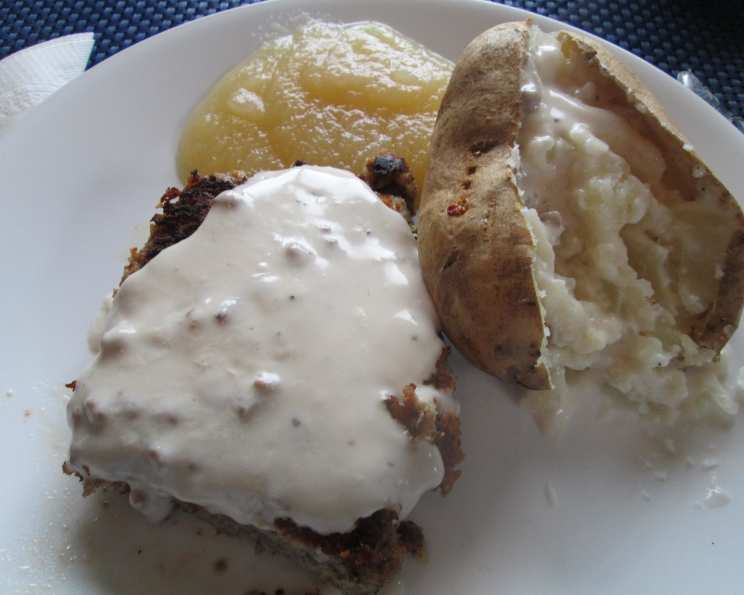
Chicken-Fried Steak with Creamy Gravy: A Taste of Home
There’s a certain magic to simple, honest cooking. For me, this recipe for Chicken-Fried Steak isn’t just a meal; it’s a vivid snapshot of my childhood. I remember standing on a wobbly stool in my grandmother’s kitchen, mesmerized as she transformed humble chicken breasts into golden-brown perfection. The aroma of frying chicken mingled with the creamy scent of gravy simmering on the stove, creating an atmosphere of warmth and anticipation that I still cherish. Now, it’s my turn to share that legacy with you.
Recipe Overview
- Prep Time: 15 minutes
- Cook Time: 15 minutes
- Total Time: 30 minutes
- Servings: 4
- Dietary Type: Comfort Food
Ingredients
- 4 small boneless, skinless chicken breasts, pounded to about 1/2-inch thick
- Black pepper, to taste
- 38 saltine crackers, crushed (about 1 sleeve)
- 1 cup all-purpose flour
- 1 teaspoon seasoning salt
- 1 pinch cayenne pepper (optional, or adjust to heat level)
- 1/2 teaspoon garlic powder (garlic lovers may use 1 teaspoon)
- 1/2 teaspoon baking powder
- 3/4 cup milk
- 2 large eggs
- 1 1/2 cups vegetable oil
Creamed Gravy
- 3 – 4 cups half-and-half cream (use 4 cups for a thinner gravy)
- 1/4 cup all-purpose flour
- 1 teaspoon seasoning salt or 1/2 teaspoon white salt
- 1 teaspoon black pepper (can reduce if desired)
Equipment Needed
- Large skillet (cast iron recommended)
- Shallow dishes (3)
- Whisk
- Wire rack
Instructions
- Begin by seasoning the chicken breasts generously with black pepper. Don’t be shy!
- In a shallow dish, create the breading. Combine the crushed cracker crumbs with the flour, 1 teaspoon seasoning salt, 1/2 teaspoon black pepper, cayenne pepper (if using), garlic powder and baking powder. Make sure everything is well distributed. Remember not to crush the crackers to a fine powder, some texture is good.
- In another shallow dish, whisk together the eggs and milk until fully combined.
- Now, it’s time to bread the chicken. Dredge each chicken breast thoroughly in the cracker mixture, ensuring it’s fully coated. Then, dip it into the egg/milk mixture, letting the excess drip off. Finally, dredge the chicken again in the cracker mixture, pressing it on gently to make sure it adheres. This double-coating is key to that crispy, satisfying crust.
- Pour the vegetable oil into a large skillet – a cast-iron skillet is ideal for even heat distribution. Heat the oil over medium-high heat until it reaches 360 degrees F (182 degrees C). A thermometer is your best friend here, but if you don’t have one, you can test the oil by dropping a small piece of breading into it. It should sizzle and turn golden brown in about 30 seconds.
- Carefully place the breaded chicken breasts into the hot oil, being careful not to overcrowd the pan. Fry for about 3-4 minutes on each side, or until they are golden brown and cooked through. The internal temperature should reach 165 degrees F (74 degrees C).
- Remove the fried chicken breasts from the skillet and place them on a wire rack to drain excess oil. Cover them lightly with foil to keep them warm while you prepare the gravy.
- Now, for the gravy! Carefully drain most of the oil from the skillet, but leave the browned bits and drippings in the bottom – these are the flavor bombs that will make your gravy sing. Leave a couple of tablespoons of the oil in the pan.
- In a bowl, whisk together the half-and-half cream, flour, 1 teaspoon seasoning salt (or 1/2 teaspoon white salt), and 1 teaspoon black pepper. Whisk until smooth, ensuring there are no lumps.
- Pour the cream mixture into the skillet with the reserved drippings. Cook, whisking constantly, over medium-high heat for about 10 minutes, or until the gravy has thickened to your desired consistency. The constant whisking prevents lumps from forming and ensures a smooth, velvety gravy.
- Serve the creamy gravy generously over the golden-brown chicken-fried steak.
Expert Tips & Tricks
- Pounding the Chicken: Pounding the chicken to an even thickness ensures it cooks evenly and quickly. Place the chicken between two sheets of plastic wrap or in a ziplock bag before pounding.
- Temperature Control: Maintaining the correct oil temperature is crucial. If the oil is too cold, the chicken will absorb too much oil and become greasy. If it’s too hot, the outside will burn before the inside is cooked.
- Don’t Overcrowd: Frying the chicken in batches prevents the oil temperature from dropping too much, ensuring a crispy crust.
- Gravy Consistency: Adjust the amount of flour in the gravy to achieve your desired thickness. For a thinner gravy, use slightly less flour; for a thicker gravy, use slightly more.
- Spice it Up: For an extra kick, add a pinch of red pepper flakes to the gravy or the breading.
Serving & Storage Suggestions
Serve your Chicken-Fried Steak immediately while it’s hot and crispy. This dish pairs perfectly with creamy mashed potatoes, crispy french fries, or fluffy biscuits. A side of green beans or coleslaw adds a refreshing contrast.
Leftovers can be stored in an airtight container in the refrigerator for up to 3 days. To reheat, bake in a preheated oven at 350°F (175°C) for about 15-20 minutes, or until heated through. Reheating in the oven will help to maintain the crispiness of the chicken. Microwaving is not recommended, as it can make the chicken soggy. The gravy can be reheated gently on the stovetop, adding a little milk or half-and-half if it becomes too thick.
Nutritional Information
| Nutrient | Amount per Serving | % Daily Value |
|---|---|---|
| Calories | 1423.5 kcal | N/A |
| Calories from Fat | 1013 g | 71% |
| Total Fat | 112.7 g | 173% |
| Saturated Fat | 26.7 g | 133% |
| Cholesterol | 242.1 mg | 80% |
| Sodium | 633.8 mg | 26% |
| Total Carbohydrate | 61.9 g | 20% |
| Dietary Fiber | 2.1 g | 8% |
| Sugars | 1.1 g | 4% |
| Protein | 41.9 g | 83% |
Note: Nutritional information is an estimate and may vary based on specific ingredients and cooking methods.
Variations & Substitutions
- Gluten-Free: Use gluten-free all-purpose flour and gluten-free crackers for a gluten-free version.
- Spicier Kick: Add more cayenne pepper or a dash of hot sauce to the breading or gravy for extra heat.
- Different Protein: While this recipe uses chicken, you can easily substitute thin-cut beef steak (like cube steak) for a more traditional Chicken-Fried Steak experience.
- Herbed Crust: Mix dried herbs like thyme, rosemary, or oregano into the cracker mixture for a more complex flavor.
FAQs (Frequently Asked Questions)
Q: Can I use a different type of cracker?
A: While saltines are classic, you can experiment with other crackers like Ritz or Club crackers for a slightly different flavor profile. Just be sure to adjust the seasoning accordingly.
Q: How do I keep the breading from falling off the chicken?
A: The double-dredging technique is key to ensuring the breading adheres properly. Also, make sure the egg mixture coats the chicken thoroughly before the second dredging.
Q: My gravy is too thin. How can I thicken it?
A: Mix 1 tablespoon of cornstarch with 2 tablespoons of cold water to create a slurry. Whisk the slurry into the gravy and cook for a few minutes until it thickens.
Q: Can I make this ahead of time?
A: You can bread the chicken breasts ahead of time and store them in the refrigerator for up to 24 hours. However, it’s best to fry them right before serving to ensure they are crispy. The gravy is best made fresh.
Q: What’s the best way to clean up the oil after frying?
A: Let the oil cool completely, then strain it through a fine-mesh sieve lined with cheesecloth. Store the used oil in a sealed container and dispose of it properly. Do not pour oil down the drain.
Final Thoughts
This Chicken-Fried Steak with Creamy Gravy is more than just a recipe; it’s a taste of comfort, a reminder of simpler times, and a celebration of home cooking. I encourage you to try it, adapt it to your own tastes, and share it with the people you love. Don’t be afraid to experiment with different spices and seasonings to create your own unique version. And most importantly, enjoy the process! Let the aromas fill your kitchen, and let the flavors transport you back to your own cherished memories. Now, go forth and create a little magic in your kitchen!