
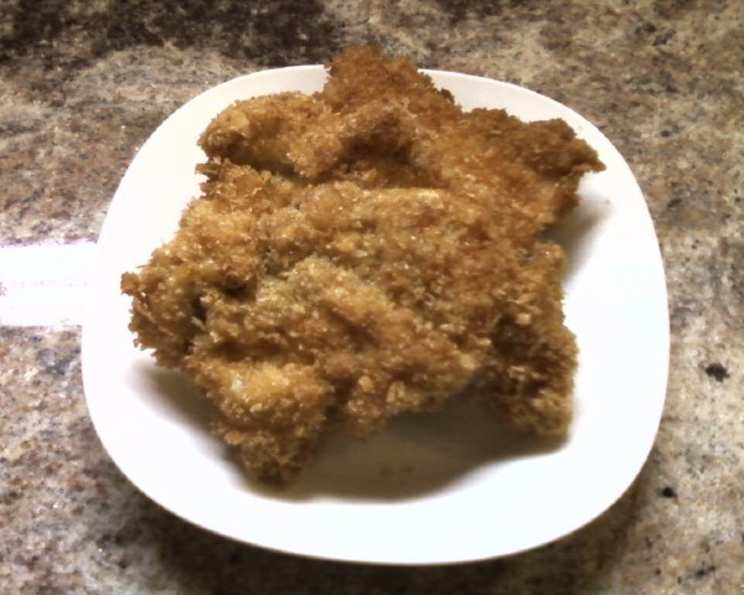
Chicken Katsu: Crispy Japanese Comfort Food
My earliest memory of Chicken Katsu isn’t from a fancy restaurant, but from a bustling food stall during a summer festival. The air was thick with the aroma of sizzling oil and savory spices, and the golden-brown cutlets, piled high, beckoned with irresistible promise. Biting into that first piece – the satisfying crunch of the panko giving way to tender, juicy chicken – was a revelation. It was a flavor explosion that imprinted itself on my culinary soul, a simple yet profound dish that I’ve been chasing ever since.
Recipe Overview
- Prep Time: 10 minutes
- Cook Time: 10 minutes
- Total Time: 20 minutes
- Servings: 4
- Yields: 4 chicken breast halves
- Dietary Type: Varies (can be gluten-free with substitutions)
Ingredients
- 4 boneless, skinless chicken breast halves, pounded to ½ inch thickness
- Salt, to taste
- Pepper, to taste
- 2 tablespoons all-purpose flour
- 1 egg, beaten
- 1 cup panko breadcrumbs
- Oil, for frying (vegetable, canola, or peanut oil work well)
Equipment Needed
- Large skillet or deep fryer
- Shallow dishes or plates (3)
- Meat mallet or rolling pin
- Paper towels
Instructions
- Begin by preparing the chicken. Place each chicken breast half between two sheets of plastic wrap or in a zip-top bag. Use a meat mallet or rolling pin to pound the chicken to an even ½-inch thickness. This ensures even cooking and tenderizes the meat.
- Season the flattened chicken breasts generously on both sides with salt and pepper. Don’t be shy; this is your opportunity to build flavor into the chicken itself.
- Set up your breading station. In three separate shallow dishes or plates, place the flour, the beaten egg, and the panko breadcrumbs.
- Coat each chicken breast methodically. First, dredge the chicken in the flour, making sure to coat it evenly. Shake off any excess flour. This helps the egg adhere properly.
- Next, dip the floured chicken into the beaten egg, ensuring it is fully submerged. Allow any excess egg to drip off.
- Finally, press the egg-dipped chicken into the panko breadcrumbs, pressing firmly to ensure the crumbs adhere well on both sides. The chicken should be completely coated in a thick layer of panko.
- Heat approximately ¼ inch of oil in a large skillet over medium-high heat. The oil should be hot enough to sizzle when a panko crumb is dropped in, but not smoking. A temperature of around 350°F (175°C) is ideal if you have a thermometer.
- Carefully place the breaded chicken breasts in the hot oil. Do not overcrowd the pan; work in batches if necessary to maintain the oil temperature.
- Cook the chicken for approximately 3 to 4 minutes per side, or until golden brown and cooked through. The internal temperature of the chicken should reach 165°F (74°C).
- Once cooked, remove the chicken katsu from the skillet and place it on a plate lined with paper towels to drain any excess oil.
- Serve immediately.
Expert Tips & Tricks
- Pounding the Chicken: Even thickness is crucial for even cooking. Avoid tearing the chicken by using a gentle, even hand when pounding.
- Breadcrumb Adhesion: For extra crispy katsu, try refrigerating the breaded chicken for about 15-20 minutes before frying. This helps the panko adhere better and prevents it from falling off during cooking.
- Oil Temperature: Maintaining the correct oil temperature is key to preventing soggy katsu. If the oil is too cool, the chicken will absorb too much oil. If it’s too hot, the panko will burn before the chicken is cooked through.
- Don’t Overcrowd the Pan: Overcrowding lowers the oil temperature, resulting in greasy katsu. Fry in batches to maintain optimal cooking conditions.
- Make-Ahead Tip: You can bread the chicken ahead of time and store it in the refrigerator for up to 24 hours before frying. Just make sure to keep it well covered to prevent the panko from drying out.
Serving & Storage Suggestions
Chicken Katsu is traditionally served with steamed rice, shredded cabbage, and Katsu sauce. Tonkatsu sauce also works well. A side of miso soup is a welcome addition. For a lighter meal, serve it with a fresh salad.
Leftover Chicken Katsu can be stored in an airtight container in the refrigerator for up to 3 days. To reheat, bake in a preheated oven at 350°F (175°C) for 10-15 minutes, or until heated through. Alternatively, you can reheat it in a skillet over medium heat. Reheating in the microwave is not recommended, as it can make the katsu soggy.
Freezing is not ideal, as it affects the crispness of the panko, but if necessary, wrap the katsu tightly in plastic wrap and then in aluminum foil. Freeze for up to 1 month. Thaw completely in the refrigerator before reheating.
Nutritional Information
| Nutrient | Amount per Serving | % Daily Value |
|---|---|---|
| Calories | 268.5 kcal | N/A |
| Calories from Fat | 37 g | 14% |
| Total Fat | 4.2 g | 6% |
| Saturated Fat | 1.1 g | 5% |
| Cholesterol | 121.3 mg | 40% |
| Sodium | 291.9 mg | 12% |
| Total Carbohydrate | 22.4 g | 7% |
| Dietary Fiber | 1.3 g | 5% |
| Sugars | 1.8 g | N/A |
| Protein | 32.8 g | 65% |
Note: Nutritional information is an estimate and may vary based on specific ingredients and preparation methods.
Variations & Substitutions
- Gluten-Free Katsu: Use gluten-free flour and gluten-free panko breadcrumbs.
- Spicy Katsu: Add a pinch of cayenne pepper or chili flakes to the flour or panko breadcrumbs for a kick.
- Herb-Infused Katsu: Mix dried herbs like thyme, rosemary, or oregano into the panko breadcrumbs for added flavor.
- Baked Katsu: For a healthier alternative, bake the breaded chicken in a preheated oven at 400°F (200°C) for 20-25 minutes, or until golden brown and cooked through. Spray the katsu with cooking oil before baking to help it crisp up.
- Pork Katsu (Tonkatsu): Substitute the chicken breasts with pork cutlets.
FAQs (Frequently Asked Questions)
Q: What is panko, and why is it used for Chicken Katsu?
A: Panko is a type of Japanese breadcrumb that is made from crustless white bread. It has a larger, flakier texture than regular breadcrumbs, which results in a crispier coating when fried.
Q: Can I use regular breadcrumbs instead of panko?
A: While you can, the result won’t be the same. Panko provides a much lighter and crispier texture. If using regular breadcrumbs, opt for a coarser variety and consider toasting them lightly beforehand.
Q: How do I keep the panko from falling off during frying?
A: Make sure to thoroughly coat the chicken in flour and egg before pressing it into the panko. Refrigerating the breaded chicken for a short period before frying also helps the panko adhere better.
Q: How can I tell if the chicken is cooked through?
A: The internal temperature of the chicken should reach 165°F (74°C). Use a meat thermometer to check the temperature at the thickest part of the chicken.
Q: My Chicken Katsu is greasy. What did I do wrong?
A: The most likely cause is that the oil temperature was too low. Make sure the oil is hot enough before adding the chicken, and avoid overcrowding the pan, which can lower the oil temperature.
Final Thoughts
Chicken Katsu is more than just fried chicken; it’s a culinary experience that combines satisfying textures and savory flavors. Whether you’re a seasoned cook or a beginner, this recipe is easy to follow and yields delicious results every time. So, gather your ingredients, put on your apron, and prepare to be transported to a summer festival with every crispy, golden bite. Don’t forget to share your katsu creations with friends and family – and let me know what you think! Consider pairing it with a chilled Japanese beer or a refreshing glass of iced green tea for the ultimate dining experience.