
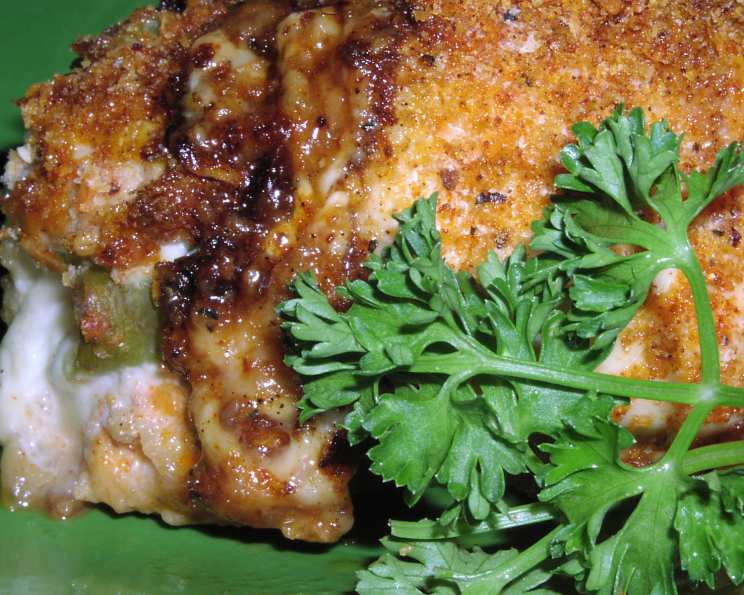
Chicken Kiev Ole’: A Southwestern Twist on a Classic
The aroma always takes me back. I can almost feel the sticky vinyl of my grandmother’s kitchen table beneath my elbows as she pulled a bubbling casserole from the oven. It wasn’t Chicken Kiev in the traditional sense, but her “Chicken Surprise,” as she called it, always had that same satisfyingly crispy exterior giving way to a molten, cheesy center. This Chicken Kiev Ole’ is my homage to her, blending that childhood comfort with a lively kick of Southwestern flair. It’s a dish that promises both nostalgia and a vibrant new flavor experience.
Recipe Overview
- Prep Time: 20 minutes
- Cook Time: 30-45 minutes
- Total Time: 50-65 minutes
- Servings: 4
- Yield: 4 Chicken Breasts
- Dietary Type: Not Gluten-Free
Ingredients
- 4 boneless, skinless chicken breasts
- 1 (4 1/2 ounce) can green chilies
- 2 ounces Monterey Jack cheese or 2 ounces jalapeño Jack cheese, cut into 4 strips
- 1/4 cup breadcrumbs
- 1/4 cup Parmesan cheese or 1/4 cup Romano cheese, grated
- 1/2 tablespoon chili powder
- 1/4 teaspoon cumin
- 1/4 teaspoon salt
- Dash of pepper (to taste)
- 3 tablespoons butter or 3 tablespoons margarine, melted
- Salsa, for serving
Equipment Needed
- Ziploc bag
- Meat mallet or rolling pin
- 9×9 inch baking dish
- Toothpicks
Instructions
-
Prepare the Chicken: Place each chicken breast inside a Ziploc bag. Using a meat mallet or rolling pin, flatten the chicken to an even thickness, about 1/4 to 1/2 inch. This ensures even cooking and makes it easier to roll.
-
Assemble the Filling: Open the can of green chilies. Place a portion of the green chilies and a strip of Monterey Jack or jalapeño Jack cheese in the center of each flattened chicken breast.
-
Roll and Secure: Starting from the short end of the chicken breast, carefully roll it up, enclosing the chili and cheese filling. Secure each roll with toothpicks to prevent them from unraveling during cooking.
-
Prepare the Breadcrumb Mixture: In a shallow bowl, combine the breadcrumbs, Parmesan or Romano cheese, chili powder, cumin, salt, and pepper. Mix well to ensure all ingredients are evenly distributed.
-
Coat the Chicken: Pour the melted butter or margarine into another shallow bowl. Dip each chicken roll into the melted butter, ensuring it’s fully coated. Then, dredge the buttered chicken in the breadcrumb mixture, pressing gently to help the crumbs adhere.
-
Chill: Place the breaded chicken rolls in a greased 9×9 inch baking dish. Cover the dish tightly with plastic wrap or aluminum foil and chill in the refrigerator for at least 8 hours. This allows the flavors to meld and the chicken to firm up, preventing the cheese from leaking out excessively during baking.
-
Bake: Preheat your oven to 400°F (200°C). Remove the baking dish from the refrigerator and bake, covered, for 20 minutes. Then, remove the cover and bake for an additional 10-25 minutes, or until the chicken is cooked through. The internal temperature of the chicken should reach 165°F (74°C).
-
Final Touches: Once the chicken is cooked, remove it from the oven and let it rest for a few minutes before serving. Carefully remove and discard the toothpicks before serving.
-
Serve: Serve the Chicken Kiev Ole’ hot, with a generous dollop of your favorite salsa on top.
Expert Tips & Tricks
- Pounding Perfection: Evenly pounded chicken cooks more evenly. Don’t overdo it, though – you want it thin enough to roll, but not so thin that it tears.
- Cheese Considerations: Jalapeño Jack adds a significant kick. If you prefer a milder flavor, stick with Monterey Jack, or even a mild cheddar.
- Breadcrumb Boost: For an extra crispy crust, try using panko breadcrumbs instead of regular ones.
- Chilling is Key: Don’t skip the chilling step! It really helps the flavors combine and prevents the cheese from oozing out too much during baking.
- Doneness Check: Always use a meat thermometer to ensure the chicken is fully cooked. Insert the thermometer into the thickest part of the chicken roll, avoiding the cheese filling.
- Prevent Soggy Bottoms: Place the baking dish on a preheated baking sheet in the oven. This will help the bottom of the chicken brown nicely.
Serving & Storage Suggestions
Serve Chicken Kiev Ole’ immediately after baking for the best flavor and texture. The warmth allows the cheese to remain melty and delicious. Leftovers can be stored in an airtight container in the refrigerator for up to 3 days. Reheat in the oven at 350°F (175°C) until warmed through. You can also reheat in the microwave, but the crust may become slightly less crispy. Freezing is not recommended, as it can affect the texture of the chicken and filling. This dish pairs beautifully with a side of Spanish rice, black beans, or a fresh corn salad.
Nutritional Information
| Nutrient | Amount per Serving | % Daily Value |
|---|---|---|
| Calories | 332.1 kcal | N/A |
| Calories from Fat | 153 g | 46% |
| Total Fat | 17.1 g | 26% |
| Saturated Fat | 9.9 g | 49% |
| Cholesterol | 110.2 mg | 36% |
| Sodium | 520.8 mg | 21% |
| Total Carbohydrate | 8.8 g | 2% |
| Dietary Fiber | 1.1 g | 4% |
| Sugars | 2.3 g | 9% |
| Protein | 35.1 g | 70% |
Variations & Substitutions
- Gluten-Free: Use gluten-free breadcrumbs for a gluten-free version.
- Spice It Up: Add a pinch of cayenne pepper to the breadcrumb mixture for extra heat.
- Cheese Swap: Try using pepper jack cheese for an even more intense flavor.
- Veggie Boost: Add finely chopped bell peppers or onions to the chili-cheese filling for added nutrients and flavor.
- Herb Infusion: Mix some chopped cilantro or parsley into the breadcrumb mixture for a fresh, herbaceous twist.
FAQs (Frequently Asked Questions)
Q: Can I make this ahead of time?
A: Absolutely! You can assemble the chicken rolls and keep them chilled in the refrigerator for up to 24 hours before baking. This actually helps the flavors meld together even more.
Q: How do I prevent the cheese from leaking out during baking?
A: Chilling the chicken rolls for at least 8 hours is crucial. Also, ensure the chicken is sealed tightly when rolling and secured well with toothpicks.
Q: Can I use different types of chilies?
A: Yes! Feel free to experiment with different varieties of canned green chilies, such as mild, medium, or hot, depending on your spice preference.
Q: What if I don’t have breadcrumbs?
A: You can use crushed crackers or cornflakes as a substitute for breadcrumbs.
Q: How do I know when the chicken is done?
A: The best way to check for doneness is to use a meat thermometer. The internal temperature of the chicken should reach 165°F (74°C).
Final Thoughts
Chicken Kiev Ole’ is more than just a recipe; it’s a delicious adventure in flavor. I encourage you to give it a try and experience the unique combination of classic comfort and Southwestern zest. Feel free to adjust the ingredients to your liking and make it your own. And please, share your creations and feedback! I can’t wait to hear what you think and what creative twists you come up with. Enjoy!