
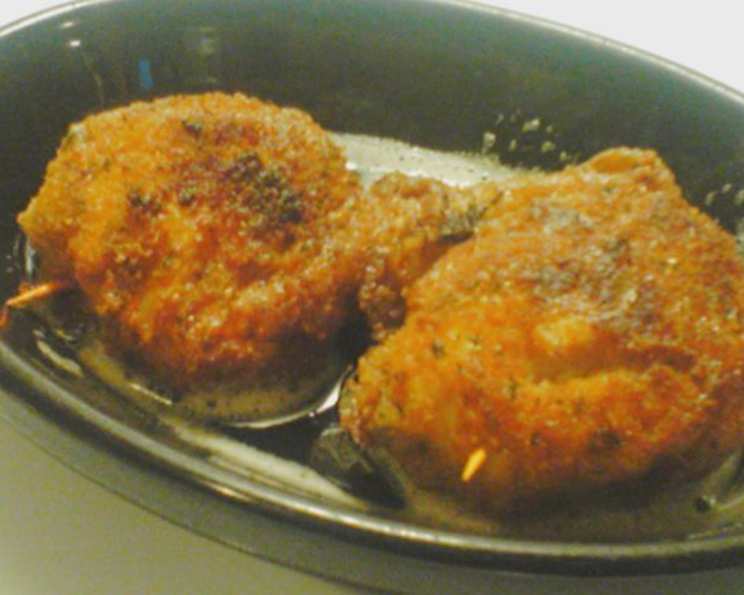
Chicken Kiev: A Culinary Journey to the Heart of Comfort
The first time I tasted Chicken Kiev, I was a young culinary student utterly overwhelmed by the precision and technique demanded by classic cuisine. One bite – the crisp, golden crust giving way to succulent chicken and then, that burst of herbaceous, garlicky butter – and suddenly, everything clicked. It wasn’t just about perfection; it was about creating an experience, a moment of pure deliciousness that stayed with you long after the last bite. The memory of that first encounter, the sheer joy of discovering such a flavourful marvel, continues to inspire me in the kitchen to this day.
Recipe Overview
- Prep Time: 40 minutes
- Cook Time: 10 minutes
- Total Time: 50 minutes
- Servings: 6
- Dietary Type: Not Gluten-Free
Ingredients
- 2 lbs boneless, skinless chicken breasts (6 chicken halves)
- 1 cup butter, at room temperature
- ½ teaspoon black pepper
- 1 teaspoon granulated garlic powder
- 2 large eggs
- 3 tablespoons cold water
- ¼ teaspoon black pepper
- ¼ teaspoon granulated garlic powder
- ¾ teaspoon dried dill weed
- ½ cup all-purpose flour
- ¾ cup fine dry breadcrumbs or ¾ cup saltine crumbs
- ½ medium lemon, sliced
- ¼ cup finely chopped fresh parsley
- 2 cups vegetable oil or 2 cups extra virgin olive oil
Equipment Needed
- Large zip-loc bags
- Mallet or small frying pan
- Mixing bowls
- Aluminum foil
- Skewers or toothpicks
- Shallow dish
- Medium-size frying pan
Instructions
- Begin by preparing the chicken. Remove all visible fat from the chicken breasts and discard. If each breast is a single piece, carefully split it into two halves.
- Place each chicken breast half in a large zip-loc bag that has been lightly sprayed with vegetable oil. This helps prevent sticking during pounding.
- Using a mallet or the bottom of a small frying pan, gently pound the chicken until it reaches a uniform thickness of about 1/8 inch. Be cautious not to over-pound, as this can cause the chicken to tear or break apart. The vegetable oil inside the bag helps the chicken slide, preventing it from sticking and tearing.
- Once pounded, place the prepared chicken breasts on a dish, cover, and set aside.
- Now, prepare the garlic-herb butter. In a small mixing bowl, combine the 1 cup of softened butter, ½ teaspoon of black pepper, and 1 teaspoon of granulated garlic powder. Mix thoroughly until well combined.
- On a 6-inch square piece of aluminum foil, shape the butter mixture into a 2″ x 3″ rectangle, ensuring it is approximately ¼ inch thick.
- Place the foil-wrapped butter in the freezer for about 30 minutes, or until it is firm enough to slice. This step is crucial to prevent the butter from melting too quickly during cooking.
- Remove the butter from the freezer and cut it into 6 equal pieces (each about ½” x 3″).
- Take one piece of chilled butter and place it at the edge of one of the prepared chicken breasts.
- Fold in the sides of the chicken breast just enough to cover the edges of the butter on each side, then carefully roll the chicken tightly to completely encase the butter. Securing the butter inside is crucial to avoid leakage during frying.
- Secure each chicken roll with skewers or toothpicks to maintain its shape and prevent the butter from escaping.
- Prepare the breading station. In one bowl, beat the eggs with 3 tablespoons of cold water to create an egg wash.
- In a separate mixing bowl, combine ¼ teaspoon of black pepper, ¼ teaspoon of granulated garlic powder, ¾ teaspoon of dried dill weed, and ½ cup of all-purpose flour.
- In a third bowl, measure out the ¾ cup of fine dry breadcrumbs or saltine crumbs.
- Completely coat each chicken roll in the flour mixture, ensuring an even layer.
- Dip the flour-coated chicken into the egg mixture, making sure it is fully submerged.
- Finally, roll and coat the chicken in the breadcrumbs mixture, pressing gently to adhere.
- Place the breaded chicken rolls in a shallow dish and chill in the refrigerator for at least 30 minutes. This allows the breading to set, resulting in a crispier crust.
- In a medium-size frying pan, pour in the 2 cups of vegetable oil or extra virgin olive oil and heat over medium-high heat. The oil should be hot enough to sizzle gently when a breadcrumb is dropped into it.
- Carefully place the chicken rolls into the hot oil, ensuring not to overcrowd the pan.
- Cook for approximately 5 minutes on each side, or until the chicken is cooked through and the breading is golden brown and crispy.
- To check for doneness, cut into one of the rolled chicken breasts to ensure that no pink meat is visible. The internal temperature should reach 165°F (74°C).
- Serve the Chicken Kiev immediately, garnished with lemon slices and fresh parsley.
Expert Tips & Tricks
- Freezing for Success: After forming the chicken rolls, consider freezing them for an hour or two before breading. This will help the butter stay solid during frying.
- Double Breading: For an extra-crisp crust, double-bread the chicken. Dip in flour, then egg, then breadcrumbs, and repeat the egg and breadcrumb steps.
- Butter Flavor Boost: Infuse the butter with other fresh herbs like chives, tarragon, or even a hint of lemon zest for a more complex flavour profile.
Serving & Storage Suggestions
Serve your freshly fried Chicken Kiev immediately while it’s hot and crispy. The burst of garlic-herb butter is best enjoyed straight from the pan. Garnish with fresh parsley and lemon slices for a bright, flavourful finish.
For leftovers, store the Chicken Kiev in an airtight container in the refrigerator for up to 3 days. Reheat in a preheated oven at 350°F (175°C) for about 15-20 minutes, or until heated through and crispy. You can also reheat in an air fryer for a similar result. Avoid microwaving, as it can make the crust soggy.
Nutritional Information
| Nutrient | Amount per Serving | % Daily Value |
|---|---|---|
| Calories | 1201.5 kcal | N/A |
| Calories from Fat | 969 g | 81% |
| Total Fat | 107.8 g | 165% |
| Saturated Fat | 30.1 g | 150% |
| Cholesterol | 239.6 mg | 79% |
| Sodium | 441 mg | 18% |
| Total Carbohydrate | 19.6 g | 6% |
| Dietary Fiber | 1.5 g | 6% |
| Sugars | 1.2 g | 4% |
| Protein | 40.6 g | 81% |
Note: Nutritional information is an estimate and may vary based on specific ingredients and cooking methods.
Variations & Substitutions
- Gluten-Free Chicken Kiev: Use gluten-free flour and breadcrumbs for a gluten-free version.
- Spicy Chicken Kiev: Add a pinch of cayenne pepper or a dash of hot sauce to the butter mixture for a spicy kick.
- Herb Variations: Experiment with different herbs in the butter, such as basil, oregano, or thyme.
- Cheese Filled: Mix some finely grated Parmesan or Gruyere cheese into the butter for an extra layer of flavour.
FAQs (Frequently Asked Questions)
Q: Why is it important to chill the butter before wrapping it in the chicken?
A: Chilling the butter ensures that it remains solid during the initial stages of cooking. This prevents it from leaking out before the chicken is cooked through.
Q: Can I bake the Chicken Kiev instead of frying it?
A: While frying yields the most authentic result, you can bake it at 375°F (190°C) for about 25-30 minutes. Basting with melted butter during baking will help with browning.
Q: How do I prevent the chicken from drying out?
A: Pounding the chicken to an even thickness and not overcooking it are key to preventing dryness. Also, make sure the butter is well-sealed inside.
Q: What’s the best way to secure the chicken rolls?
A: Toothpicks or small skewers work well. Just be sure to remove them before serving!
Q: Can I prepare the Chicken Kiev ahead of time?
A: Yes! You can prepare the chicken rolls up to the breading stage, then refrigerate them for up to 24 hours before frying.
Final Thoughts
Chicken Kiev is more than just a dish; it’s an experience. The combination of crispy, golden breading, tender chicken, and that glorious burst of garlic-herb butter is simply irresistible. Don’t be intimidated by the seemingly complex steps. Follow the instructions carefully, and you’ll be rewarded with a restaurant-quality meal that will impress your friends and family. So, grab your ingredients, sharpen your knives, and embark on this culinary adventure. And don’t forget to share your creations and feedback – I’d love to hear how it goes! Pair this with a side of roasted asparagus and creamy mashed potatoes for the perfect meal.