
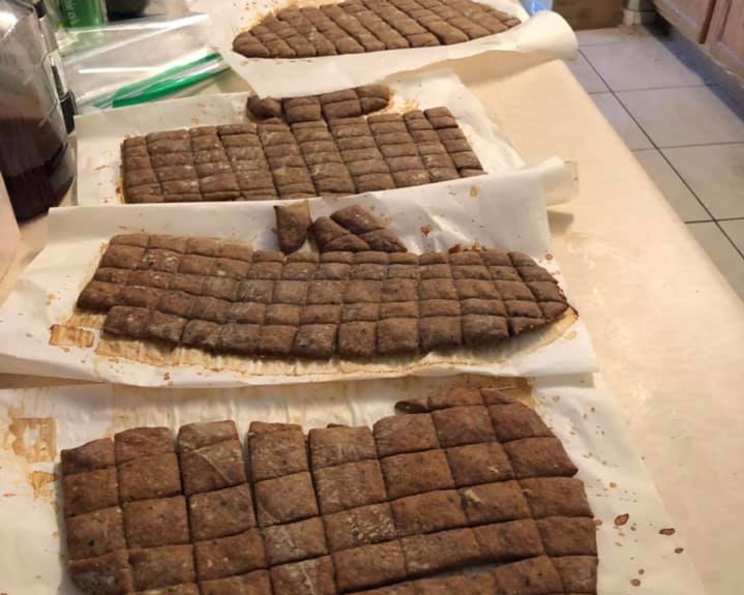
Chicken Liver Dog Biscuits: A Homemade Treat Your Pup Will Adore
I still remember the first time I baked these biscuits. My old Labrador, Gus, was recovering from a minor surgery and had lost his appetite. The vet suggested something extra palatable, and these chicken liver biscuits were a game-changer. The smell alone had Gus wagging his tail, and the first bite sent him into a frenzy of happy tail wags. From then on, these weren’t just treats; they were a sign of love and care, and a delicious way to show my canine companions how much they mean to me.
Recipe Overview
- Prep Time: 20 minutes
- Cook Time: 30 minutes
- Total Time: 1 hour 50 minutes (includes chilling)
- Yields: 3 dozen
- Dietary Type: Homemade Dog Treat
Ingredients
- 2 cups flour
- 3/4 cup cornmeal
- 1/2 cup powdered milk
- 1 teaspoon salt
- 1/2 teaspoon garlic powder
- 1 egg
- 6 tablespoons vegetable oil
- 1/2 cup water or broth
- 1/2 cup pureed chicken liver
Equipment Needed
- Mixing bowl
- Mixer
- Cookie cutters
- Rolling pin
- Cookie sheets
- Food processor or blender
Instructions
-
In a large mixing bowl, combine the flour, cornmeal, powdered milk, salt, and garlic powder.
-
In a separate bowl, whisk together the egg, vegetable oil, water (or broth), and pureed chicken liver. Ensure the chicken liver is thoroughly pureed for even distribution in the dough; a food processor works best for this.
-
Pour the wet ingredients into the dry ingredients and mix until a dough forms.
-
Turn the dough out onto a lightly floured surface and knead for approximately 3 minutes, until it forms a cohesive ball. If the dough is too sticky, add a little more flour, one tablespoon at a time.
-
Wrap the dough in plastic wrap and chill in the refrigerator for at least 1 hour, or preferably overnight. This chilling period is crucial for the dough to become firm and easier to roll out.
-
Preheat your oven to 350°F (175°C).
-
On a lightly floured surface, roll out the chilled dough to approximately 1/2 inch thickness. Aim for an even thickness to ensure consistent baking.
-
Use cookie cutters to cut out desired shapes. Bone-shaped cutters are particularly fitting, but any shape will do.
-
Place the cut-out biscuits onto ungreased cookie sheets, leaving a small space between each biscuit.
-
Bake in the preheated oven for approximately 30 minutes. Baking time may vary depending on your oven and the desired level of crunchiness. Begin checking for doneness at 25 minutes. The biscuits should be firm and lightly golden brown.
-
Once baked, remove the cookie sheets from the oven and let the biscuits cool completely on a wire rack before storing. Cooling completely is essential for the biscuits to harden and achieve the desired texture.
-
Store the cooled biscuits in an airtight container.
Expert Tips & Tricks
- Liver Prep: To streamline the process, boil a whole batch of chicken livers, puree them with a touch of vegetable oil, and freeze them in half-cup portions. This saves time whenever you want to whip up a batch of these treats.
- Dough Consistency: If your dough is too dry, add a teaspoon of water or broth at a time until it comes together. If it’s too wet, add flour gradually.
- Baking Time: The key to a good biscuit is a low and slow bake. This ensures they’re thoroughly dried out, which helps with shelf life and the satisfying crunch dogs love. Keep a close eye on them during the last 5-10 minutes of baking to prevent burning.
- Garlic Powder: While garlic can be beneficial in small amounts, be cautious. If you’re unsure, omit the garlic powder altogether.
Serving & Storage Suggestions
These chicken liver dog biscuits are best served as a treat or reward. Always ensure fresh water is available for your dog. Store the cooled biscuits in an airtight container at room temperature for up to two weeks, or in the refrigerator for up to a month to extend their shelf life. For longer storage, freeze the baked biscuits for up to three months. Thaw at room temperature before serving.
Nutritional Information
Note: Nutritional information is an estimate and may vary based on ingredient specifics.
| Nutrient | Amount per Serving | % Daily Value (Dog) |
|---|---|---|
| Calories | 65 kcal | N/A |
| Protein | 3g | N/A |
| Total Fat | 4g | N/A |
| Saturated Fat | 1g | N/A |
| Cholesterol | 15mg | N/A |
| Sodium | 25mg | N/A |
| Total Carbohydrate | 6g | N/A |
| Fiber | 0.5g | N/A |
| Sugars | 0.5g | N/A |
Variations & Substitutions
- Gluten-Free: Substitute the all-purpose flour with a gluten-free blend of flours such as rice flour, tapioca starch, and potato starch.
- Grain-Free: Replace the cornmeal with almond flour or coconut flour. You may need to adjust the liquid slightly to achieve the right dough consistency.
- Vegetarian: For dogs with sensitivities to liver, you can use pureed pumpkin or sweet potato as a substitute. Add a small amount of beef or chicken bouillon for added flavor, ensuring it’s low sodium.
- Flavor Boosters: Add a sprinkle of dried herbs like rosemary or thyme for a palatable aroma. A touch of grated Parmesan cheese (if your dog isn’t lactose intolerant) can also add a savory note.
FAQs (Frequently Asked Questions)
Q: Can I use chicken broth instead of water?
A: Yes, chicken broth can be used for added flavor, but ensure it is low sodium to avoid excessive salt intake for your dog.
Q: How do I know when the biscuits are done?
A: The biscuits should be firm to the touch and lightly golden brown. If you want them extra crunchy, bake them for a few minutes longer, but watch carefully to prevent burning.
Q: Can I freeze these biscuits?
A: Absolutely! These biscuits freeze well for up to 3 months. Allow them to cool completely before placing them in an airtight freezer bag or container.
Q: My dog has allergies. Can I modify the ingredients?
A: Yes, you can modify the ingredients to suit your dog’s dietary needs. Consider gluten-free flour, alternative protein sources, or omitting ingredients your dog is allergic to. Always consult with your vet if you have concerns.
Q: Are these biscuits suitable for puppies?
A: These biscuits can be suitable for puppies, but ensure they are cut into smaller, easily digestible pieces. As with any treat, moderation is key, and it’s always best to check with your veterinarian first.
Final Thoughts
Baking these chicken liver dog biscuits is more than just making a treat; it’s a simple act of love and care for your furry friend. Knowing exactly what goes into their food allows you to tailor it to their specific needs and preferences, ensuring they get the best possible nutrition and enjoyment. Don’t be afraid to experiment with variations to create a recipe that your dog will absolutely adore. So, preheat your oven, gather your ingredients, and get ready to see your dog’s tail wag with delight! Remember to share your baking successes (and even your funny bloopers) with other dog lovers. Happy baking!