
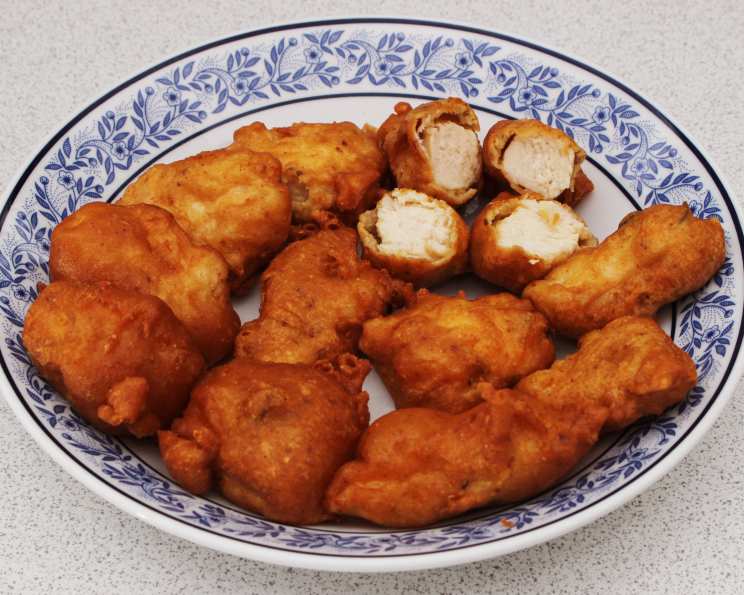
Chicken Pakoras: A Culinary Journey to Spicy, Crispy Perfection
The aroma alone transports me back to the bustling streets of Mumbai. I remember being a young culinary student, mesmerized by the street vendors expertly frying up batches of golden-brown pakoras. The sizzle of the oil, the vibrant colors of the spices, and the eager faces of the customers created a symphony of culinary delight. Chicken pakoras, with their tender, spiced chicken encased in a crispy batter, were always my favorite, a perfect blend of comfort and excitement. That memory is what I hope to bring to your kitchen.
Recipe Overview
- Prep Time: 35 minutes
- Cook Time: 8-10 minutes per batch
- Total Time: 45 minutes
- Servings: 4-6
- Yield: Approximately 20-25 pakoras
- Dietary Type: Not Gluten-Free
Ingredients
- 500 g chicken breasts, cut into 50 mm x 25 mm slices
- 150 g gram flour
- 1 teaspoon salt
- 1 pinch bicarbonate of soda
- 1 tablespoon rice flour
- 2 teaspoons ground cumin
- 2 teaspoons ground coriander
- 1 teaspoon chili powder
- 2-4 fresh green chilies, finely chopped
- Water, as required
- Vegetable oil, for deep frying
Equipment Needed
- Large Mixing Bowl
- Wok or Deep Fryer
- Slotted Spoon
- Absorbent Paper Towels
- Thermometer (optional, for monitoring oil temperature)
Instructions
- Begin by preparing the batter. Sieve the gram flour into a large mixing bowl to ensure a smooth, lump-free texture.
- Add the salt, bicarbonate of soda, rice flour, ground cumin, ground coriander, chili powder, and finely chopped green chilies to the sieved gram flour.
- Mix all the dry ingredients thoroughly until well combined. This ensures even distribution of the spices.
- Now, gradually add water to the dry mixture, mixing continuously until a thick batter forms. The batter should be thick enough to coat the chicken pieces evenly without being too runny. Aim for a consistency similar to pancake batter.
- Cover the bowl and chill the batter in the refrigerator for 30 minutes. This allows the flavors to meld and the batter to develop a better consistency, resulting in crispier pakoras.
- While the batter is chilling, prepare the chicken. Ensure the chicken slices are uniformly sized to promote even cooking.
- Once the batter has chilled, take the chicken pieces and thoroughly coat each piece with the batter. Make sure each piece is completely covered for maximum flavor and crispness.
- Heat the vegetable oil in a wok or deep fryer to 180°C (350°F). Use a thermometer to accurately gauge the oil temperature. If you don’t have a thermometer, test the oil by dropping a small amount of batter into it; if it sizzles and turns golden brown in a few seconds, the oil is ready.
- Using a tablespoon or tongs, carefully add the batter-coated chicken pieces to the hot oil. Avoid overcrowding the wok or deep fryer, as this will lower the oil temperature and result in soggy pakoras. Fry in batches, adding only as many chicken pieces as will fit without overlapping.
- Fry the chicken pakoras until they are golden brown and cooked through (approximately 6 to 8 minutes per batch), turning them occasionally to ensure even browning. The internal temperature of the chicken should reach 74°C (165°F).
- Remove the fried chicken pakoras with a slotted spoon and place them on absorbent paper towels to drain any excess oil.
- Repeat the frying process with the remaining chicken pieces, ensuring the oil temperature remains consistent.
Expert Tips & Tricks
- For extra crispy pakoras, add a tablespoon of hot oil to the batter after chilling. This helps to create a lighter and crispier texture.
- If the batter becomes too thick after chilling, add a tablespoon or two of water to thin it out slightly.
- Don’t overcrowd the pan! Frying in smaller batches ensures the oil temperature stays consistent and the pakoras cook evenly. Overcrowding lowers the temperature and makes them greasy.
- To keep the pakoras warm and crispy while you fry the remaining batches, preheat your oven to a low temperature (around 90°C or 200°F) and place the fried pakoras on a wire rack in the oven.
- If you want to make these spicier, increase the amount of chili powder or add a pinch of cayenne pepper to the batter.
- For a more authentic flavor, use mustard oil for frying. However, be careful not to overheat it, as it can have a strong smell and flavor.
- Adding 1/4 teaspoon of ajwain seeds to the batter will give it a unique flavor.
- Try adding a tablespoon of ginger-garlic paste for a richer flavour.
Serving & Storage Suggestions
Chicken pakoras are best served hot and fresh, straight from the fryer. They can be served as an appetizer, snack, or as part of a larger Indian meal. Garnish with fresh cilantro and serve with a variety of dipping sauces, such as mint chutney, tamarind chutney, or raita (yogurt dip).
Leftover chicken pakoras can be stored in an airtight container in the refrigerator for up to 2 days. To reheat, bake them in a preheated oven at 180°C (350°F) for 5-7 minutes, or until heated through and crispy. You can also reheat them in an air fryer for a similar result. Reheating in a microwave is not recommended, as it will make them soggy. They are best eaten immediately but can be stored in an airtight container in the freezer for up to 1 month. Let them defrost completely before reheating.
Nutritional Information
| Nutrient | Amount per Serving | % Daily Value |
|---|---|---|
| Calories | 450 kcal | 23% |
| Total Fat | 25g | 38% |
| Saturated Fat | 7g | 35% |
| Cholesterol | 100mg | 33% |
| Sodium | 800mg | 35% |
| Total Carbohydrate | 30g | 10% |
| Dietary Fiber | 3g | 12% |
| Sugars | 2g | N/A |
| Protein | 30g | 60% |
Nutritional information is an estimate and may vary based on specific ingredients and portion sizes.
Variations & Substitutions
- Vegetable Pakoras: Substitute the chicken with your favorite vegetables, such as cauliflower florets, sliced onions, potato slices, spinach leaves, or bell pepper strips.
- Paneer Pakoras: Replace the chicken with paneer (Indian cheese) cubes for a vegetarian option.
- Gluten-Free Pakoras: Use a gluten-free flour blend instead of gram flour. You may need to adjust the amount of water accordingly.
- Spicy Pakoras: Add more chili powder or cayenne pepper to the batter for a spicier kick. You can also use hotter varieties of green chilies.
- Herbed Pakoras: Add chopped fresh herbs, such as cilantro, mint, or curry leaves, to the batter for added flavor and aroma.
FAQs (Frequently Asked Questions)
Q: Can I make the batter ahead of time?
A: Yes, you can prepare the batter up to 24 hours in advance and store it in the refrigerator. However, the batter may thicken over time, so you may need to add a tablespoon or two of water to thin it out before using.
Q: Why are my pakoras soggy?
A: Soggy pakoras are usually caused by overcrowding the pan, frying at too low a temperature, or not draining the pakoras properly after frying. Make sure to fry in batches, maintain the correct oil temperature (180°C or 350°F), and drain the fried pakoras on absorbent paper towels.
Q: Can I bake the pakoras instead of frying?
A: While baking will not yield the same crispy texture as frying, you can bake the pakoras for a healthier alternative. Preheat your oven to 200°C (400°F), place the batter-coated chicken pieces on a baking sheet, and bake for 15-20 minutes, or until golden brown and cooked through.
Q: How do I prevent the batter from falling off the chicken?
A: Ensure that the chicken pieces are dry before coating them with the batter. Also, make sure the batter is thick enough to adhere properly to the chicken. Chilling the batter also helps it to stick better.
Q: What kind of oil is best for frying pakoras?
A: Vegetable oil, canola oil, or sunflower oil are all good choices for frying pakoras, as they have a high smoke point and a neutral flavor.
Final Thoughts
Now that you’ve unlocked the secrets to making incredible Chicken Pakoras, it’s time to gather your ingredients, fire up your wok, and embark on a culinary adventure. Don’t be afraid to experiment with different spices and variations to create your own signature pakoras. Whether you’re hosting a party, enjoying a cozy night in, or simply craving a taste of India, these crispy, flavorful treats are guaranteed to be a hit. Serve them with a refreshing mango lassi or a spicy chai for the perfect pairing. I would love to hear about your pakora creations – share your feedback and photos!