
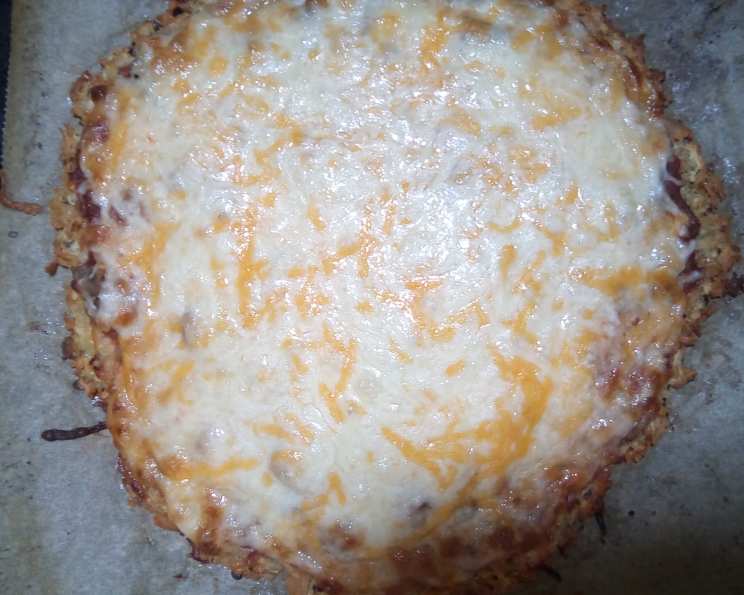
Chicken Pizza Crust: A Deliciously Guilt-Free Indulgence
The first time I tried a chicken crust pizza, I was skeptical, to say the least. I mean, chicken as a pizza base? It sounded more like a culinary stunt than a satisfying meal. But one bite of that crispy, savory crust, topped with bubbling mozzarella and fragrant basil, and I was a convert. Suddenly, pizza night wasn’t just a cheat meal; it was a protein-packed, flavorful adventure. Now, I can enjoy my favorite pizza toppings without the carb overload! This recipe is my go-to when I’m craving pizza but want to keep things light and healthy.
Recipe Overview
- Prep Time: 15 minutes
- Cook Time: 18-23 minutes
- Total Time: 33-38 minutes
- Servings: 2-4
- Yield: 1 Pizza
- Dietary Type: Low-Carb, Gluten-Free
Ingredients
- 10 ounces canned cubed chicken
- 1/4 cup Parmesan cheese
- 1 egg
Equipment Needed
- Baking sheet
- Parchment paper
- Mixing bowl
- Spoon or spatula
Instructions
-
Begin by preheating your oven to 350°F (175°C). It’s crucial to have your oven at the right temperature to ensure even cooking.
-
Open the can of cubed chicken and thoroughly drain the liquid. This step is essential to prevent a soggy crust. Excess moisture will hinder the crisping process, so make sure the chicken is as dry as possible.
-
Line a baking sheet with parchment paper. This will prevent the chicken from sticking and make cleanup a breeze. Parchment paper is your best friend when working with unconventional crusts!
-
Spread the drained chicken in a thin, even layer on the prepared baking sheet. Aim for a uniform thickness to promote even drying.
-
Bake the chicken for 10 minutes, or until it appears dry. Keep a close eye on it; you want the chicken to lose its moisture without becoming overly browned.
-
Increase the oven temperature to 500°F (260°C). This high heat will help create the crispy texture we’re after.
-
Remove the baking sheet from the oven and transfer the dried chicken to a mixing bowl. Handle it carefully, as it will be hot.
-
Add 1/4 cup of Parmesan cheese and 1 egg to the bowl with the chicken.
-
Stir the ingredients together until well combined. The egg acts as a binder, helping the chicken and Parmesan form a cohesive mixture.
-
Spread the chicken mixture into a pizza shape on the parchment-lined baking sheet. The thinner you spread it, the crispier the crust will be. Aim for a consistent thickness to avoid some parts being burnt while others remain soft.
-
Bake the chicken crust for 5-8 minutes, depending on its thickness. Monitor the crust closely; it should be golden brown and firm to the touch.
-
Remove the crust from the oven and cover with your desired pizza toppings. Get creative with your favorite sauces, cheeses, vegetables, and meats.
-
Return the pizza to the oven and bake for another 8 minutes, or until the cheese is melted and the toppings are cooked to your liking. The cheese should be bubbly and slightly browned.
-
Remove the pizza from the oven and let it cool slightly before slicing and serving.
Expert Tips & Tricks
- Press it thin: For a super crispy crust, use the bottom of a measuring cup or a spatula to press the chicken mixture very thin before baking.
- Dry Chicken is Key: Ensure your chicken is well-drained and even patted dry with paper towels before baking the initial 10 minutes. This step is crucial to prevent a soggy crust.
- Pre-cook toppings: If using vegetables with high water content, like mushrooms or bell peppers, consider sautéing them lightly before adding them to the pizza to prevent a soggy crust.
- Spice it up: Add a pinch of garlic powder, Italian seasoning, or red pepper flakes to the chicken mixture for extra flavor.
- Use a Pizza Stone: If you have a pizza stone, preheat it in the oven and transfer the parchment paper with the crust onto the hot stone for an extra crispy bottom.
Serving & Storage Suggestions
Serve your chicken crust pizza immediately for the best taste and texture. It’s delicious on its own or with a side salad. Leftovers can be stored in an airtight container in the refrigerator for up to 3 days. Reheat in the oven or a toaster oven for the best results, as microwaving can make the crust soggy. Unfortunately, freezing is not recommended as it affects the texture of the chicken crust.
Nutritional Information
(Estimates will vary based on specific ingredients and toppings)
| Nutrient | Amount per Serving | % Daily Value* |
|---|---|---|
| Calories | 394 kcal | 20% |
| Total Fat | 27g | 35% |
| Saturated Fat | 9g | 45% |
| Cholesterol | 210mg | 70% |
| Sodium | 325mg | 14% |
| Total Carbohydrate | 1g | 0% |
| Dietary Fiber | 0g | 0% |
| Sugars | 0g | 0% |
| Protein | 34g | 68% |
*Percent Daily Values are based on a 2,000 calorie diet.
Variations & Substitutions
- Cheese Variations: Experiment with different cheeses! Mozzarella, provolone, or a blend of Italian cheeses all work wonderfully.
- Spice it up: Add a dash of hot sauce or red pepper flakes to the chicken mixture for a spicy kick.
- Herb Infusion: Mix fresh herbs like basil, oregano, or thyme into the chicken mixture for an aromatic twist.
- Dairy-Free Option: Replace the Parmesan cheese with a dairy-free Parmesan alternative or nutritional yeast.
FAQs (Frequently Asked Questions)
Q: Can I use fresh chicken instead of canned?
A: Yes, you can use cooked and shredded fresh chicken. Ensure it’s well-drained and as dry as possible before mixing with the other ingredients.
Q: Can I add other seasonings to the crust?
A: Absolutely! Garlic powder, onion powder, Italian seasoning, or even a pinch of salt and pepper can enhance the flavor of the crust.
Q: Can I make this crust ahead of time?
A: It’s best to bake the crust and add the toppings just before serving for optimal crispness.
Q: What’s the best way to prevent the crust from sticking to the parchment paper?
A: Make sure the parchment paper is securely placed on the baking sheet and that you spread the chicken mixture evenly.
Q: My crust is browning too quickly. What should I do?
A: Lower the oven temperature by 25 degrees and continue baking until the toppings are cooked. You can also tent the pizza with foil to prevent further browning.
Final Thoughts
This chicken pizza crust recipe is a game-changer for anyone looking for a delicious, low-carb alternative to traditional pizza. It’s incredibly easy to make, customizable to your favorite toppings, and surprisingly satisfying. So go ahead, give it a try! Experiment with different flavors, share your creations with friends and family, and most importantly, enjoy every guilt-free bite. Bon appétit!