
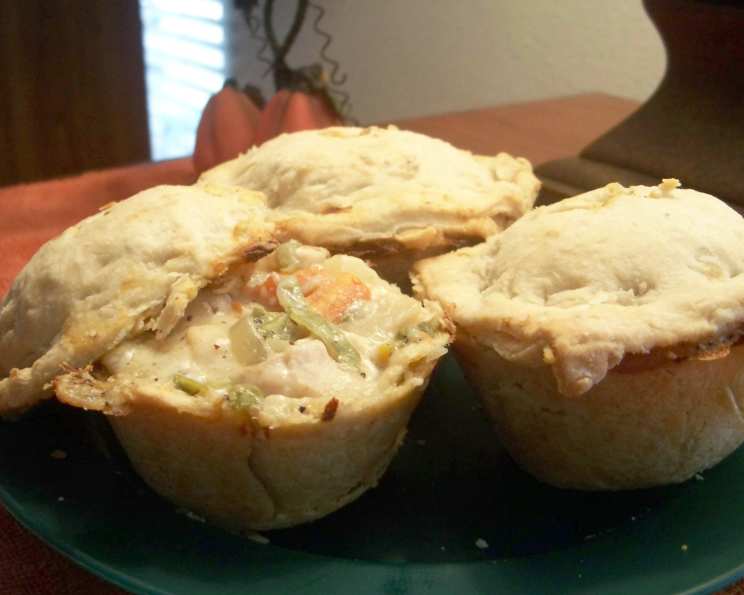
Comfort in a Crust: Homemade Chicken Pot Pie Perfection
The scent of chicken pot pie baking in the oven is pure nostalgia for me. It instantly transports me back to my grandmother’s kitchen, a place perpetually filled with warmth and the promise of a delicious meal. I remember standing on a stool, eagerly watching her expertly crimp the edges of the pie crust, her hands moving with practiced ease. The anticipation of that first, flaky bite, the creamy filling, and the tender chicken – it was pure, unadulterated comfort. Now, decades later, I still find myself turning to this classic dish when I crave a taste of home.
Recipe Overview
- Prep Time: 30 minutes
- Cook Time: 1 hour
- Total Time: 1 hour 30 minutes
- Servings: 4
- Yield: 4 individual pies
- Dietary Type: Comfort Food
Ingredients
For the Filling:
- 4 chicken breasts
- 2 cups potatoes, diced
- 1 cup onion, chopped
- 1/3 cup butter or margarine, melted
- 1/2 cup flour
- 2 cups chicken broth (reserved from cooking the chicken)
- 1 cup milk
- 1 teaspoon salt
- 1/4 teaspoon pepper
For the Pastry:
- 4 cups flour
- 2 teaspoons salt
- 1 1/2 cups vegetable shortening, plus 1 tablespoon vegetable shortening
- 1/3 – 1/2 cup cold water
Equipment Needed
- Large pot
- Skillet
- Whisk
- Large bowl
- Rolling pin
- 4 (6-inch) disposable pie pans
Instructions
-
Begin by preparing the chicken. Cut the chicken breasts into one-inch pieces and place them in a large pot. Cover the chicken with water, ensuring it’s just submerged. Bring the water to a boil and cook for approximately 20 minutes, or until the chicken is cooked through. Reserve the water – this will become your flavorful chicken broth later.
-
While the chicken is cooking, prepare the potatoes. Chop the potatoes into small, uniform dice. Parboil them in a separate pot of water until they are slightly tender but still firm. Drain the potatoes and set aside.
-
Next, focus on the onion base for the filling. In a skillet over medium heat, melt the butter (or margarine). Add the chopped onion and sauté until it becomes translucent and tender. This usually takes about 5-7 minutes.
-
Create a roux. Whisk in the flour into the sautéed onions. Stir continuously until the flour is fully incorporated and the mixture is smooth. Cook for 1 minute, stirring constantly, to cook out the raw flour taste.
-
Gradually add the liquids. Slowly pour in 2 cups of the reserved chicken broth and the milk into the skillet with the roux. Continue whisking constantly to prevent lumps from forming. Cook the mixture, stirring continuously, until it thickens and becomes bubbly. This should take about 5-7 minutes.
-
Combine the filling ingredients. Stir in the cooked chicken, parboiled potatoes, salt, and pepper into the thickened sauce. Ensure all ingredients are well combined. Set the filling aside.
-
Prepare the pastry. In a large bowl, combine the flour and salt.
-
Cut in the shortening. Using a pastry blender or your fingertips, cut the vegetable shortening into the flour mixture until it resembles coarse crumbs the size of peas. This step is crucial for a flaky crust.
-
Add the water. Gradually add the cold water, one tablespoon at a time, mixing gently after each addition. Continue adding water until the dough starts to come together and forms a sticky ball. Be careful not to overmix.
-
Divide and roll the dough. Divide the dough into 8 equal parts. On a lightly floured surface, roll 4 parts into 10-inch circles.
-
Assemble the pies. Place each pastry circle into a 6-inch disposable pie pan. Gently press the pastry into the bottom and up the sides of the pan.
-
Fill the pies. Divide the chicken mixture evenly among the pie pans.
-
Create the pie tops. Roll the remaining 4 portions of pastry into circles, just as before. Place each circle over the top of a filled pie pan.
-
Seal and flute the edges. Fold the edges of the top and bottom crusts together, pressing them firmly to seal. Flute the edges using your fingers or a fork for a decorative touch.
-
Cut slits in the top crusts. Cut several slits in the top of each pie to allow steam to escape during baking. This will prevent the crust from becoming soggy.
-
Freeze for later (optional). At this point, you can cover the pies tightly with foil and freeze them for up to 2 months. This is a great way to prepare meals in advance.
-
Bake the pies. To bake frozen pies, preheat your oven to 400 degrees Fahrenheit (200 degrees Celsius). Bake the frozen pies uncovered for 1 hour, or until the crust is golden brown and the filling is bubbly. If baking unfrozen pies, check for doneness after about 45 minutes.
Expert Tips & Tricks
- For a richer flavor, use homemade chicken broth instead of store-bought.
- To prevent a soggy bottom crust, blind-bake the bottom crust for 10 minutes before adding the filling.
- If the crust is browning too quickly, tent the pies with foil during the last 15-20 minutes of baking.
- For a golden-brown crust, brush the top with an egg wash (1 egg beaten with 1 tablespoon of water) before baking.
- Add vegetables: Don’t be afraid to customize! Carrots, celery and peas are classic additions.
- Make it Vegetarian: Substitute the chicken for mushrooms or lentils to create a vegetarian version.
Serving & Storage Suggestions
Serve the chicken pot pies warm, straight from the oven. They are a complete meal on their own, but a simple side salad complements them nicely. Leftovers can be stored in the refrigerator for up to 3 days. To reheat, cover the pie with foil and bake in a preheated oven at 350 degrees Fahrenheit (175 degrees Celsius) until heated through. You can also reheat individual portions in the microwave, but the crust may become slightly less crispy.
Nutritional Information
| Nutrient | Amount per Serving | % Daily Value |
|---|---|---|
| Calories | 750 kcal | 38% |
| Total Fat | 45g | 69% |
| Saturated Fat | 25g | 125% |
| Cholesterol | 100mg | 33% |
| Sodium | 900mg | 38% |
| Total Carbohydrate | 60g | 20% |
| Dietary Fiber | 5g | 20% |
| Sugars | 3g | – |
| Protein | 30g | 60% |
Note: Nutritional information is an estimate and may vary depending on ingredient substitutions and specific brands used.
Variations & Substitutions
- Gluten-Free: Use a gluten-free all-purpose flour blend for the crust.
- Dairy-Free: Substitute the milk with unsweetened almond milk or soy milk, and use a dairy-free butter substitute.
- Individual Hand Pies: Instead of large pies, make individual hand pies for a portable treat.
- Seasonal Vegetables: Incorporate seasonal vegetables like butternut squash in the fall or asparagus in the spring.
FAQs (Frequently Asked Questions):
Q: Can I use pre-made pie crust to save time?
A: Yes, using store-bought pie crust is a convenient option. Just ensure you buy enough for both the top and bottom crusts, and follow the package instructions.
Q: How do I prevent the bottom crust from getting soggy?
A: Par-baking the bottom crust before adding the filling can help prevent sogginess. Also, avoid adding too much liquid to the filling.
Q: Can I add other vegetables to the chicken pot pie?
A: Absolutely! Feel free to add your favorite vegetables, such as carrots, peas, celery, or green beans.
Q: How long can I store the frozen chicken pot pies?
A: Frozen chicken pot pies can be stored for up to 2 months in the freezer. Ensure they are tightly wrapped to prevent freezer burn.
Q: My filling is too thick. How can I thin it out?
A: Add a little more chicken broth or milk, one tablespoon at a time, until you reach the desired consistency.
Final Thoughts
Chicken pot pie is more than just a meal; it’s a symbol of comfort, warmth, and home. This recipe, passed down and perfected, is my gift to you. I encourage you to gather your ingredients, embrace the process, and create your own version of this timeless classic. Don’t be afraid to experiment with different flavors and ingredients to make it truly your own. Share it with loved ones, and let the warmth of a homemade chicken pot pie fill your home with joy. I would love to hear about your experiences making this recipe – share your feedback and any creative twists you’ve added! Perhaps pair it with a crisp green salad and a glass of chilled white wine for the ultimate comfort meal.