
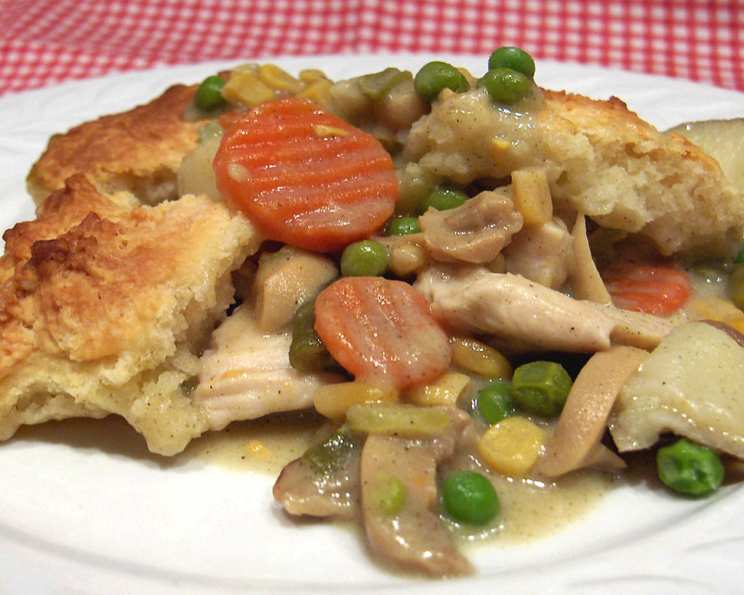
Chicken Pot Pie with Buttermilk Biscuit Crust: A Culinary Embrace
There’s a certain magic woven into the heart of a chicken pot pie. For me, it’s inextricably linked to the scent of my grandmother’s kitchen. The bubbling, savory aroma that would drift through the house on Sunday afternoons, a promise of warmth and comfort. I remember perched on a stool, watching her deftly crimp the edges of the pie crust, her hands moving with a practiced grace that seemed to channel generations of home cooks. That golden-brown crust, concealing a treasure trove of tender chicken and vegetables in a creamy sauce, was more than just a meal; it was a symbol of love, family, and the simple joys of life. Today, I strive to recreate that feeling with my own pot pies, adding my own twist while honoring the tradition.
Recipe Overview
- Prep Time: 30 minutes
- Cook Time: 1 hour
- Total Time: 1 hour 30 minutes
- Servings: 4-6
- Yield: 1 pot pie
- Dietary Type: Comfort Food
Ingredients
-
For the Filling:
- 12 ounces fresh boneless, skinless chicken breasts
- 3 cups water
- 2 medium potatoes, cut into 1/2 inch cubes
- 1/2 cup chopped celery
- 1 chicken bouillon cube
- 1 (10 ounce) package frozen mixed vegetables
- 4 tablespoons butter, divided
- 2 tablespoons flour
- 1 cup 2% low-fat milk
- 1 teaspoon poultry seasoning
- 1 can sliced mushrooms (or fresh mushrooms)
-
For the Buttermilk Biscuit Crust:
- 1 cup flour
- 1 teaspoon baking powder
- 1/4 teaspoon salt
- 1/2 cup buttermilk
Equipment Needed
- 2-quart casserole dish
- Medium saucepan
- Heavy saucepan
- Large bowl
- Small bowl
- Pastry blender or fork
- Measuring cups and spoons
Instructions
- Preheat your oven to 350 degrees Fahrenheit (175 degrees Celsius).
- Spray a 2-quart casserole dish with cooking spray to prevent sticking. This will make serving easier later.
- In a medium saucepan, combine the chicken breasts and water.
- Bring the mixture to a gentle boil over medium-high heat, then reduce the heat to low and simmer until the chicken is cooked through. This typically takes about 15 minutes. To ensure doneness, the internal temperature of the chicken should reach 165°F (74°C).
- Remove the cooked chicken from the pan, being careful not to discard the broth. The broth is key to the sauce.
- Reserve the broth in the saucepan for later use.
- Allow the chicken to cool slightly until it’s cool enough to handle. Then, shred the chicken with two forks and set it aside.
- Add the potatoes, celery, and chicken bouillon cube to the reserved broth in the saucepan.
- Bring the mixture to a boil over medium-high heat, then reduce the heat to low and simmer for 12 minutes, or until the vegetables are tender. Ensure the potatoes are easily pierced with a fork.
- Set the saucepan with the broth and vegetables aside.
- In a heavy saucepan, melt 2 tablespoons of butter over low heat.
- Add the 2 tablespoons of flour to the melted butter, stirring constantly with a whisk until smooth. This creates a roux, which will thicken the sauce.
- Cook the roux for 1 minute, stirring constantly. This helps to cook out the raw flour taste.
- Gradually add the milk to the roux, whisking constantly to prevent lumps from forming.
- Cook the mixture over medium heat, stirring constantly, until it thickens into a creamy sauce. This should take a few minutes.
- Remove the saucepan from the heat and stir in the poultry seasoning.
- In a large bowl, combine the shredded chicken, frozen mixed vegetables, sauce, and mushrooms. Ensure the frozen vegetables are evenly distributed.
- Spoon the chicken and vegetable mixture into the prepared casserole dish.
- In a small bowl, combine the 1 cup of flour, baking powder, and salt for the biscuit topping.
- Cut in the remaining 2 tablespoons of cold butter into the dry ingredients using a pastry blender or two forks until the mixture resembles coarse meal. The cold butter is crucial for creating flaky biscuits.
- Stir in the buttermilk until just mixed. Do not overmix, as this will result in tough biscuits.
- Spoon the biscuit dough in lumps over the chicken mixture in the casserole dish. The biscuits don’t need to completely cover the filling, as they will spread during baking.
- Bake in the preheated oven for 1 hour, or until the biscuits are golden brown and the mixture is hot and bubbly. If the biscuits are browning too quickly, you can loosely tent the pot pie with foil for the last 15 minutes of baking.
- Let cool for 5-10 minutes before serving.
Expert Tips & Tricks
- Make-Ahead Prep: The filling can be made a day in advance and stored in the refrigerator. This allows the flavors to meld together even more.
- Herb Infusion: Add fresh herbs like thyme or rosemary to the filling for a more complex flavor profile.
- Crispy Biscuit Topping: For extra crispy biscuits, brush the tops with melted butter before baking.
- Thickening Troubles: If your sauce isn’t thickening enough, mix a tablespoon of cornstarch with a tablespoon of cold water to create a slurry. Stir the slurry into the sauce and cook until thickened.
- Flavor Boost: A splash of Worcestershire sauce or a squeeze of lemon juice can brighten up the flavor of the filling.
Serving & Storage Suggestions
Serve the chicken pot pie warm, straight from the oven. A dollop of sour cream or a sprinkle of fresh parsley can add a nice finishing touch. Leftovers can be stored in an airtight container in the refrigerator for up to 3 days. To reheat, bake in a preheated oven at 350°F (175°C) until heated through, or microwave in short intervals until warm. For longer storage, the pot pie can be frozen for up to 2 months. Thaw overnight in the refrigerator before reheating.
Nutritional Information
| Nutrient | Amount per Serving | % Daily Value |
|---|---|---|
| Calories | 499.2 kcal | N/A |
| Calories from Fat | 144 g | 29% |
| Total Fat | 16.1 g | 24% |
| Saturated Fat | 8.9 g | 44% |
| Cholesterol | 91.2 mg | 30% |
| Sodium | 865.5 mg | 36% |
| Total Carbohydrate | 58.5 g | 19% |
| Dietary Fiber | 6 g | 23% |
| Sugars | 8.2 g | N/A |
| Protein | 30 g | 60% |
Variations & Substitutions
- Gluten-Free: Use a gluten-free flour blend for both the filling and the biscuit topping.
- Vegetarian: Substitute the chicken with sautéed mushrooms or lentils.
- Different Vegetables: Feel free to swap out the frozen mixed vegetables for other favorites like peas, carrots, or green beans.
- Crust Alternatives: Use puff pastry or refrigerated pie crust instead of the biscuit topping.
- Dairy-Free: Use almond milk or soy milk in place of the low-fat milk, and a dairy-free butter substitute.
FAQs (Frequently Asked Questions)
Q: Can I use rotisserie chicken to save time?
A: Absolutely! Rotisserie chicken is a great shortcut. Just shred it and add it to the filling.
Q: My biscuit topping is browning too quickly. What can I do?
A: Tent the pot pie loosely with aluminum foil during the last 15-20 minutes of baking.
Q: Can I make this pot pie in individual ramekins?
A: Yes, simply divide the filling and biscuit dough among individual ramekins and bake until golden brown. The baking time may be slightly shorter.
Q: What if I don’t have buttermilk?
A: You can make a buttermilk substitute by adding 1 tablespoon of lemon juice or white vinegar to 1/2 cup of milk. Let it sit for 5 minutes before using.
Q: Can I freeze the entire pot pie before baking?
A: Yes, assemble the pot pie in a freezer-safe dish, wrap it tightly in plastic wrap and then foil, and freeze for up to 2 months. Thaw overnight in the refrigerator before baking as directed.
Final Thoughts
This Chicken Pot Pie with Buttermilk Biscuit Crust is more than just a recipe; it’s an invitation to create a comforting and memorable meal. Whether you’re a seasoned cook or just starting out, I encourage you to give it a try. Don’t be afraid to experiment with different ingredients and flavors to make it your own. Share your creations with loved ones and savor the simple joy of a homemade meal. Pair it with a crisp green salad and a glass of your favorite wine for a complete and satisfying experience. Happy cooking!