
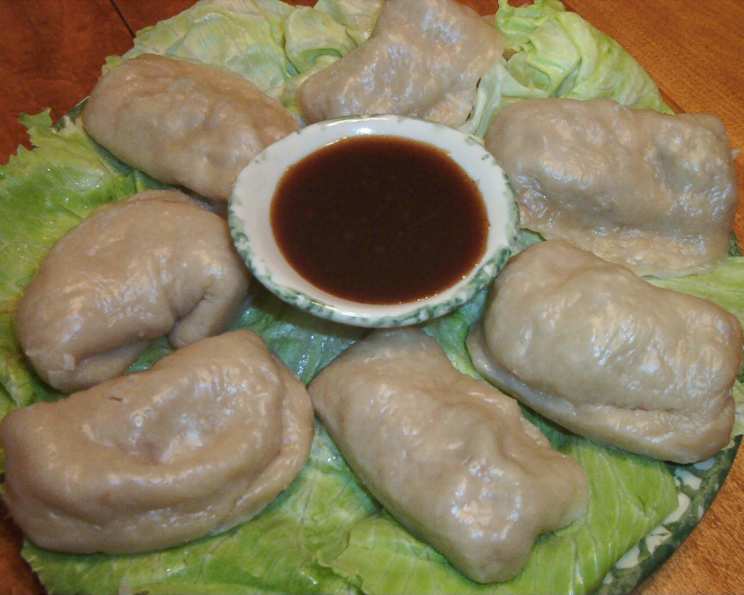
Chicken Pot Stickers: A Culinary Adventure
I remember vividly the first time I tasted a truly remarkable pot sticker. It wasn’t in a fancy restaurant, but at a bustling night market in Taipei. The air crackled with energy, the scent of a hundred different spices filled the humid night, and I watched, mesmerized, as a street vendor expertly pleated and pan-fried these little pockets of savory goodness. The crispy bottom, the tender dough, the flavorful chicken filling – it was an explosion of textures and tastes that transported me, and I’ve been chasing that perfect pot sticker ever since. This recipe, adapted from years of experimenting, brings me close to that cherished memory.
Recipe Overview
- Prep Time: 45 minutes
- Cook Time: 30 minutes
- Total Time: 1 hour 15 minutes
- Servings: 6
- Yields: 12 dumplings
- Dietary Type: Dairy-Free
Ingredients
Dough
- 1 1/2 cups all-purpose flour
- 1/2 teaspoon salt
- 3 tablespoons vegetable oil
- Boiling water (approximately 4 tablespoons, plus more as needed)
Filling
- 4 ounces ground chicken
- 4 water chestnuts, drained and finely chopped
- 3 green onions, finely chopped
- 1 teaspoon gingerroot, grated
- 1/2 teaspoon Chinese five spice powder
- 1 tablespoon reduced sodium soy sauce
- 1 teaspoon white sugar
- 1 teaspoon sesame oil
- 1/2 cup oil (for frying) – vegetable, canola, or peanut oil work well
Equipment Needed
- Large bowl
- Wooden spoon
- Rolling pin
- Large skillet with a lid
Instructions
-
Prepare the Dough: Sift the all-purpose flour and salt into a large bowl. This helps prevent lumps and ensures a smoother dough. Make a well in the center of the flour mixture.
-
Add Wet Ingredients: Pour the vegetable oil into the well. Add approximately 4 tablespoons of boiling water. The key here is boiling water; it helps develop the gluten in the flour, creating a more pliable dough.
-
Combine and Knead: Using a wooden spoon, stir the wet ingredients into the flour, gradually incorporating the flour from the sides. Add more boiling water, a tablespoon at a time, as needed, until the dough comes together into a shaggy mass.
-
Knead the Dough: Turn the dough out onto a lightly floured surface. Knead for about 5 minutes, or until it becomes smooth and elastic. The dough should be soft and pliable, not sticky. If it’s too sticky, add a little more flour, a teaspoon at a time.
-
Rest the Dough: Cover the dough with plastic wrap or a damp towel and let it rest for at least 30 minutes. This allows the gluten to relax, making the dough easier to roll out.
-
Divide the Dough: After resting, divide the dough into 12 equal pieces. This is most easily done with a bench scraper or knife.
-
Roll Out the Dumpling Wrappers: On a lightly floured surface, roll each piece of dough into a 6-inch circle. The thinner you roll them, the more delicate your pot stickers will be. Aim for a thickness similar to that of pasta. Keep the rolled-out wrappers covered with plastic wrap or a damp towel to prevent them from drying out.
-
Prepare the Filling: In a medium bowl, thoroughly mix together the ground chicken, finely chopped water chestnuts, finely chopped green onions, grated gingerroot, Chinese five spice powder, reduced sodium soy sauce, white sugar, and sesame oil. Ensure all the ingredients are evenly distributed for a consistent flavor in each pot sticker.
-
Assemble the Pot Stickers: Heat the oil in a large skillet over medium heat. Place approximately 1 tablespoon of the chicken mixture in the center of each dough circle.
-
Seal the Pot Stickers: Fold the dough circle over the filling to form a half-moon shape. Press the edges together firmly to seal. For a decorative touch, you can create pleats along the sealed edge. To do this, start at one end and pinch the edge of the dough, folding it slightly over itself. Repeat this process along the entire edge, creating small pleats.
-
Pan-Fry the Pot Stickers: In small batches, carefully place the assembled pot stickers in the hot oil in the skillet. Cook until the bottoms are golden brown, about 2-3 minutes. Watch closely to prevent burning.
-
Steam the Pot Stickers: Once the bottoms are golden brown, carefully pour approximately 1/3 cup of water into the pan. Be careful as the oil will splatter. Immediately cover the pan with a lid.
-
Steam and Cook Through: Continue cooking for approximately 5 minutes, or until the water has evaporated and the surfaces of the dumplings are well-steamed and translucent. The internal temperature of the chicken should reach 165°F (74°C).
-
Serve Immediately: Serve the chicken pot stickers immediately, while they are hot and crispy.
Expert Tips & Tricks
- Dough Consistency is Key: The dough should be soft and pliable, but not sticky. Adjust the amount of water as needed to achieve the right consistency.
- Prevent Sticking: To prevent the pot stickers from sticking to the pan, make sure the pan is well-oiled and the heat is not too high.
- Batch Cooking: Don’t overcrowd the pan when frying. Cook the pot stickers in batches to ensure they cook evenly and get crispy.
- Make Ahead: You can assemble the pot stickers ahead of time and freeze them. Place them on a baking sheet lined with parchment paper and freeze until solid. Then, transfer them to a freezer bag. Cook them directly from frozen, adding a minute or two to the cooking time.
- Dipping Sauce Enhancement: Elevate your dipping sauce with a dash of rice vinegar, a sprinkle of toasted sesame seeds, or a drizzle of chili oil.
Serving & Storage Suggestions
Serve the chicken pot stickers hot, with your favorite Asian dipping sauce. A simple combination of soy sauce, rice vinegar, sesame oil, and a pinch of red pepper flakes works wonderfully.
Leftover pot stickers can be stored in an airtight container in the refrigerator for up to 3 days. To reheat, pan-fry them again with a little oil until heated through and crispy, or steam them for a softer texture. You can also microwave them, but they may become a bit soggy.
Nutritional Information
| Nutrient | Amount per Serving | % Daily Value |
|---|---|---|
| Calories | 188 kcal | – |
| Calories from Fat | 119 kcal | 64% |
| Total Fat | 13.3 g | 20% |
| Saturated Fat | 1.8 g | 8% |
| Cholesterol | 6.6 mg | 2% |
| Sodium | 155.5 mg | 6% |
| Total Carbohydrate | 13.4 g | 4% |
| Dietary Fiber | 0.6 g | 2% |
| Sugars | 0.7 g | – |
| Protein | 3.8 g | 7% |
Variations & Substitutions
- Vegetarian Pot Stickers: Substitute the ground chicken with finely chopped mushrooms, tofu, or a combination of vegetables.
- Gluten-Free Pot Stickers: Use a gluten-free flour blend for the dough. You may need to add a little more water to achieve the right consistency.
- Spicy Pot Stickers: Add a pinch of red pepper flakes or a dash of chili oil to the filling for a spicy kick.
- Shrimp Pot Stickers: Substitute the ground chicken with finely chopped shrimp for a seafood twist.
FAQs (Frequently Asked Questions)
Q: Can I use store-bought dumpling wrappers?
A: Yes, you can use store-bought dumpling wrappers to save time. However, homemade dough provides a better texture and flavor.
Q: How do I prevent the pot stickers from sticking to the pan?
A: Make sure the pan is well-oiled and the heat is not too high. Cooking them in batches also helps.
Q: Can I freeze uncooked pot stickers?
A: Yes, you can freeze them. Place them on a baking sheet lined with parchment paper and freeze until solid. Then, transfer them to a freezer bag.
Q: How do I know when the chicken is cooked through?
A: The internal temperature of the chicken should reach 165°F (74°C).
Q: What’s the best way to reheat leftover pot stickers?
A: Pan-frying them again with a little oil is the best way to reheat them and maintain their crispiness.
Final Thoughts
These chicken pot stickers are more than just a recipe; they’re an invitation to create a culinary experience. Don’t be intimidated by the homemade dough – it’s surprisingly easy and rewarding. Gather your ingredients, put on some music, and enjoy the process of creating these little pockets of deliciousness. I encourage you to try this recipe, experiment with different fillings, and share your creations with friends and family. Serve them with a side of stir-fried vegetables or a bowl of miso soup for a complete and satisfying meal. Bon appétit!