
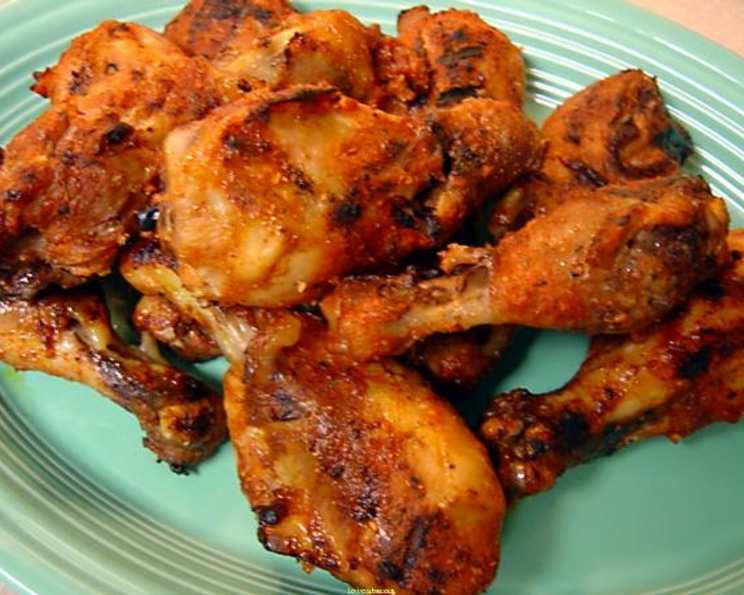
The Ultimate Chicken Tikka Recipe: A Culinary Journey
The first time I tasted truly authentic Chicken Tikka, I was backpacking through Delhi. The aroma alone, a heady mix of smoky spices and sizzling meat, drew me in. Served on a simple metal plate with a squeeze of lemon, it was an explosion of flavour that danced on my tongue. That single bite ignited a lifelong passion for Indian cuisine, and I’ve been chasing that perfect Tikka experience ever since. Today, I’m excited to share my version, one that captures the essence of that unforgettable street food experience.
Recipe Overview
- Prep Time: 15 minutes (plus overnight marinating)
- Cook Time: 45-68 minutes
- Total Time: 7 hrs 0-23 minutes
- Servings: 3-4
- Yield: Variable, depending on drumstick size
- Dietary Type: High Protein
Ingredients
- 3 lbs skinless chicken drumsticks
- 2/3 cup plain fat-free yogurt
- 1 tablespoon grated gingerroot
- 1 tablespoon chili powder (adjust to your spice preference)
- 1 tablespoon ground coriander
- 1/2 teaspoon salt (or to taste)
- 1/2 teaspoon black pepper
- 2 tablespoons lemon juice
- 5 drops red food coloring (optional, for visual appeal)
- 2 tablespoons tomato paste
- 2 tablespoons oil (vegetable or canola work well)
Equipment Needed
- Large mixing bowl
- Whisk
- Baking sheet
- Aluminum foil
- Grill or broiler
Instructions
-
Begin by thoroughly washing the chicken drumsticks. The most important step is to remove the skin from the drumsticks. A helpful tip is to use a paper towel to grip the skin, making it easier to pull off. You can even do this when the drumsticks are slightly frozen, which also assists in the skin removal process.
-
In a large mixing bowl, whisk together the marinade ingredients: yogurt, grated gingerroot, chili powder, ground coriander, salt, pepper, lemon juice, red food coloring (if using), tomato paste, and oil. Ensure all ingredients are fully combined to create a smooth and vibrant marinade.
-
Add the chicken drumsticks to the bowl containing the marinade. Use your hands to thoroughly coat each drumstick ensuring every piece is well covered. This is crucial for the chicken to absorb the flavors of the marinade.
-
Cover the bowl tightly with plastic wrap or transfer the chicken and marinade to a resealable bag. Refrigerate and chill for at least overnight or up to 24 hours. This marinating time allows the flavors to penetrate deep into the chicken, resulting in a more flavorful and tender final dish.
-
The next day, preheat your oven to 375°F (190°C). Ensure your oven is fully preheated before proceeding.
-
Line a baking sheet with aluminum foil. This will prevent the chicken from sticking and make cleanup easier.
-
Place the marinated chicken drumsticks on the prepared baking sheet. Be careful not to add any excess marinade that falls away from the chicken. This ensures the chicken bakes properly and doesn’t become soggy.
-
Bake in the preheated oven at 375°F (190°C) for 40-60 minutes. The exact baking time will depend on the size of your drumsticks. Check for doneness by inserting a meat thermometer into the thickest part of a drumstick; it should reach an internal temperature of 165°F (74°C). Alternatively, pierce a drumstick with a fork; the juices should run clear when cooked through.
-
For the final touch, finish cooking the chicken on a grill or under the broiler for 5-8 minutes. This step is crucial for achieving that characteristic slightly charred and smoky flavour. Be sure to watch carefully to prevent burning. If using a broiler, keep a close eye on the chicken and turn it as needed to ensure even browning.
Expert Tips & Tricks
- Marinating Time: Don’t skimp on the marinating time! The longer the chicken marinates, the more flavorful and tender it will become. If you’re short on time, even a few hours will make a difference, but overnight is ideal.
- Spice Level: Adjust the amount of chili powder to suit your personal preference. Start with the recommended amount and add more to taste if you like it spicier.
- Yogurt Consistency: Use thick, plain yogurt. If your yogurt is thin, you can strain it through cheesecloth to remove excess liquid.
- Don’t Overcrowd the Pan: Ensure the drumsticks are spaced apart on the baking sheet, rather than crowded together. Overcrowding will steam the chicken instead of baking it properly.
- Broiling/Grilling Safety: When using the broiler, keep the oven door slightly ajar to prevent overheating and burning. Watch the chicken closely, as it can brown very quickly.
- Flavor Boost: For an extra layer of flavour, add a pinch of garam masala to the marinade.
- Tender Chicken: Pounding the drumsticks lightly before marinating can help them cook more evenly and become even more tender.
Serving & Storage Suggestions
Serve your Chicken Tikka hot, straight from the grill or broiler. Garnish with fresh cilantro and a squeeze of lemon juice for a burst of freshness. It pairs perfectly with naan bread, rice, and a cooling raita (yogurt sauce).
Storage: Leftover Chicken Tikka can be stored in an airtight container in the refrigerator for up to 3-4 days.
Reheating: To reheat, you can use the oven, microwave, or stovetop. For best results, reheat in the oven at 350°F (175°C) until heated through. Microwaving may make the chicken slightly tougher, but it’s a quick and convenient option. To reheat on the stovetop, add a splash of water or broth to the pan to prevent drying out.
Nutritional Information
| Nutrient | Amount per Serving | % Daily Value |
|---|---|---|
| Calories | 677.9 kcal | N/A |
| Calories from Fat | N/A | 34% |
| Total Fat | 25.5 g | 39% |
| Saturated Fat | 5.5 g | 27% |
| Cholesterol | 350.7 mg | 116% |
| Sodium | 940 mg | 39% |
| Total Carbohydrate | 10 g | 3% |
| Dietary Fiber | 2.3 g | 9% |
| Sugars | 6 g | N/A |
| Protein | 97.7 g | 195% |
Note: Nutritional information is an estimate and may vary based on specific ingredients and portion sizes.
Variations & Substitutions
- Spicier Tikka: Add a finely chopped green chili to the marinade for extra heat.
- Tikka Masala: After baking the chicken, add it to a creamy tomato-based sauce (Tikka Masala sauce) for a restaurant-style dish.
- Vegetarian Option: Substitute the chicken with paneer (Indian cheese) or cauliflower florets. Marinate and bake as directed.
- Different Cuts of Chicken: While this recipe is specifically for drumsticks, you can also use chicken thighs or boneless, skinless chicken breasts. Adjust the cooking time accordingly. Chicken breasts will require a shorter cooking time than drumsticks or thighs.
- Smoked Paprika: Add a teaspoon of smoked paprika to the marinade for a deeper, smokier flavor.
- Dairy-Free: Use a plant-based yogurt alternative to keep the recipe dairy-free.
FAQs (Frequently Asked Questions)
Q: Can I marinate the chicken for longer than 24 hours?
A: While it’s generally safe, marinating for significantly longer than 24 hours can sometimes affect the texture of the chicken, making it slightly mushy. It’s best to stick to the recommended marinating time.
Q: Can I use a different type of yogurt?
A: Full-fat or Greek yogurt can be used, but keep in mind that they will affect the final texture and richness of the dish. Fat-free yogurt is used in the recipe for its balance of flavor and lower fat content.
Q: How do I prevent the chicken from drying out while baking?
A: Ensure that the chicken is well-coated in the marinade and avoid overbaking it. The marinade helps to keep the chicken moist during the cooking process.
Q: Can I make this recipe on the grill only?
A: Yes, you can skip the baking step and grill the chicken directly over medium heat, turning occasionally, until cooked through. Be mindful of flare-ups and move the chicken to a cooler part of the grill if needed.
Q: Can I freeze the marinated chicken?
A: Yes, you can freeze the chicken in the marinade. Thaw it in the refrigerator overnight before baking. This is a great way to prepare ahead of time.
Final Thoughts
Chicken Tikka is more than just a recipe; it’s a culinary adventure. With its vibrant flavors and simple techniques, it’s a dish that everyone can enjoy making at home. Don’t be intimidated by the list of ingredients; the end result is well worth the effort. I encourage you to try this recipe, experiment with your own variations, and share your delicious creations with friends and family. Pair it with a refreshing mango lassi or a crisp Indian beer for a complete and unforgettable meal.