
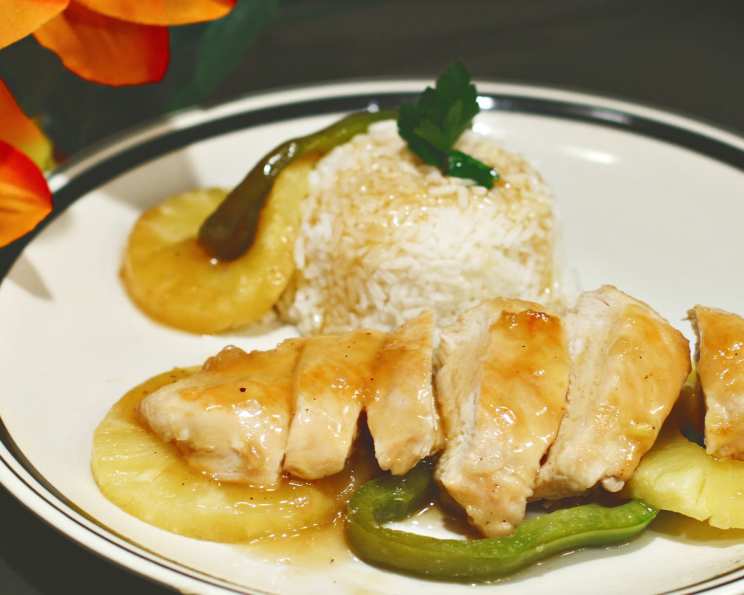
Chicken Waikiki: A Taste of Aloha at Home
I remember the first time I tried Chicken Waikiki. It wasn’t on a sun-drenched Hawaiian beach, but at a potluck hosted by my Auntie Lei. The aroma alone, a tantalizing blend of sweet pineapple and savory soy sauce, transported me. One bite of the tender chicken bathed in that glistening, tangy sauce, and I was hooked. It was like sunshine on a plate – a little bit of Aloha served right there in suburban Ohio.
Recipe Overview
- Prep Time: 25 minutes
- Cook Time: 60 minutes
- Total Time: 85 minutes
- Servings: 4-6
- Dietary Type: Not specified, can be modified to be gluten-free
Ingredients
- 6 pieces chicken, your choice (bone-in, skin-on thighs and drumsticks work well)
- ½ cup flour
- ⅓ cup salad oil (vegetable or canola oil)
- 1 teaspoon salt
- ¼ teaspoon pepper (plus more to taste)
- 1 (20 ounce) can sliced pineapple, undrained
- 1 cup sugar
- 2 tablespoons cornstarch
- ½ cup cider vinegar
- 1 tablespoon soy sauce
- ¼ teaspoon ginger (ground)
- 1 chicken bouillon cube
- 1 large green pepper, cut crosswise in ¼ inch circles
Equipment Needed
- Large skillet
- Shallow roasting pan
- Medium saucepan
- Measuring cups and spoons
Instructions
-
Begin by preparing the chicken. Wash the chicken pieces thoroughly under cold water. Pat them completely dry with paper towels. This step is crucial for achieving a good sear when browning the chicken.
-
Place the flour in a shallow dish. Dredge each piece of chicken in the flour, ensuring it’s evenly coated. Shake off any excess flour. This helps the chicken develop a nice crust and thicken the sauce later on.
-
Heat the salad oil in a large skillet over medium-high heat. The oil should be hot enough to sizzle when a drop of water is added.
-
Add the floured chicken pieces to the hot skillet, working in batches if necessary to avoid overcrowding the pan. Brown the chicken on all sides until golden brown. This step adds flavor and texture. Don’t worry about cooking the chicken all the way through at this point.
-
As the chicken pieces are browned, remove them from the skillet and transfer them to a shallow roasting pan. Arrange the chicken skin side up.
-
Sprinkle the chicken in the roasting pan evenly with the salt and pepper. Add more pepper than the recipe calls for if you prefer a bit more spice.
-
Preheat your oven to 350°F (175°C). Make sure the oven rack is positioned in the center.
-
While the oven preheats, prepare the sauce. Drain the pineapple slices, pouring the pineapple syrup into a 2-cup measuring cup. Add enough water to the pineapple syrup to bring the total liquid volume to 1 ¼ cups.
-
In a medium saucepan, combine the sugar, cornstarch, pineapple syrup mixture, cider vinegar, soy sauce, ginger, and chicken bouillon cube.
-
Place the saucepan over medium heat. Bring the mixture to a boil, stirring constantly to prevent scorching and to dissolve the cornstarch and bouillon cube.
-
Once the sauce comes to a boil, continue to boil it for 2 minutes, stirring constantly, until the sauce thickens slightly and becomes glossy.
-
Pour the prepared sauce evenly over the chicken in the roasting pan.
-
Bake the chicken, uncovered, in the preheated oven for 30 minutes.
-
After 30 minutes, remove the roasting pan from the oven. Add the pineapple slices and green pepper rings to the pan, distributing them evenly among the chicken pieces.
-
Return the roasting pan to the oven and bake for another 30 minutes, or until the chicken is cooked through and tender. The internal temperature of the chicken should reach 165°F (74°C). Use a meat thermometer inserted into the thickest part of the chicken to check for doneness.
-
Let the Chicken Waikiki rest for a few minutes before serving. This allows the juices to redistribute, resulting in a more tender and flavorful dish.
Expert Tips & Tricks
- For even browning, ensure the chicken is completely dry before flouring.
- If the sauce becomes too thick while boiling, add a tablespoon or two of water to thin it out.
- To add a little heat, consider adding a pinch of red pepper flakes to the sauce.
- If you don’t have cider vinegar, white vinegar can be substituted, but the flavor will be slightly different.
- For a richer flavor, use chicken broth instead of water in the sauce.
- If the chicken starts to brown too quickly in the oven, cover the roasting pan loosely with foil during the last 15 minutes of baking.
- Marinating the chicken in some of the sauce ingredients for 30 minutes before cooking will boost the flavor.
Serving & Storage Suggestions
Chicken Waikiki is best served hot, spooned generously over fluffy white rice. The sweet and tangy sauce perfectly complements the savory chicken and the neutral rice. Garnish with a sprinkle of fresh cilantro or chopped green onions for added freshness and visual appeal.
Leftovers should be stored in an airtight container in the refrigerator. It will keep for 3-4 days. To reheat, microwave individual portions or reheat the entire dish in a preheated oven at 350°F (175°C) until heated through. You may need to add a splash of water or chicken broth to the sauce to prevent it from drying out during reheating.
Freezing is also an option. Allow the Chicken Waikiki to cool completely before transferring it to freezer-safe containers or bags. It can be frozen for up to 2-3 months. Thaw overnight in the refrigerator before reheating.
Nutritional Information
| Nutrient | Amount per Serving | % Daily Value (Approximate) |
|---|---|---|
| Calories | 480 kcal | 24% |
| Total Fat | 17g | 26% |
| Saturated Fat | 3g | 15% |
| Cholesterol | 130mg | 43% |
| Sodium | 950mg | 40% |
| Total Carbohydrate | 65g | 22% |
| Dietary Fiber | 2g | 8% |
| Sugars | 50g | N/A |
| Protein | 25g | 50% |
Note: Nutritional information is an estimate and can vary based on specific ingredients and portion sizes.
Variations & Substitutions
- Gluten-Free: Substitute the all-purpose flour with a gluten-free blend and use tamari instead of soy sauce.
- Spicy: Add a pinch of red pepper flakes or a dash of sriracha to the sauce for a kick.
- Vegetable Variety: Add other vegetables like bell peppers (red, yellow, or orange), onions, or chunks of fresh pineapple to the roasting pan along with the green peppers.
- Chicken Alternatives: While this recipe is designed for chicken, it can also be adapted for pork chops or even firm tofu for a vegetarian option. Adjust cooking times accordingly.
- Sweetness Adjustment: If you prefer a less sweet sauce, reduce the amount of sugar by ¼ cup.
FAQs (Frequently Asked Questions)
Q: Can I use boneless, skinless chicken breasts instead of bone-in pieces?
A: Yes, you can. Reduce the cooking time as boneless chicken cooks faster. Be careful not to overcook them, or they will become dry.
Q: Can I make this ahead of time?
A: Yes, you can prepare the sauce and brown the chicken a day in advance. Store them separately in the refrigerator and combine them just before baking.
Q: What if I don’t have cider vinegar?
A: White vinegar or rice vinegar can be used as a substitute, but the flavor will be slightly different.
Q: Can I use fresh ginger instead of ground ginger?
A: Absolutely! Use about 1 teaspoon of grated fresh ginger for a more vibrant flavor.
Q: My sauce is too thin. How can I thicken it?
A: Mix a tablespoon of cornstarch with two tablespoons of cold water to create a slurry. Slowly whisk the slurry into the simmering sauce until it thickens.
Final Thoughts
Chicken Waikiki is more than just a recipe; it’s a taste of sunshine, a reminder of happy gatherings, and a celebration of simple, flavorful ingredients. Don’t be intimidated by the ingredient list – this dish is surprisingly easy to prepare and guaranteed to impress. So, gather your ingredients, preheat your oven, and bring a little bit of Aloha to your kitchen tonight. I’d love to hear about your experience and any variations you try. Bon appétit, or as they say in Hawaii, ‘ono!