
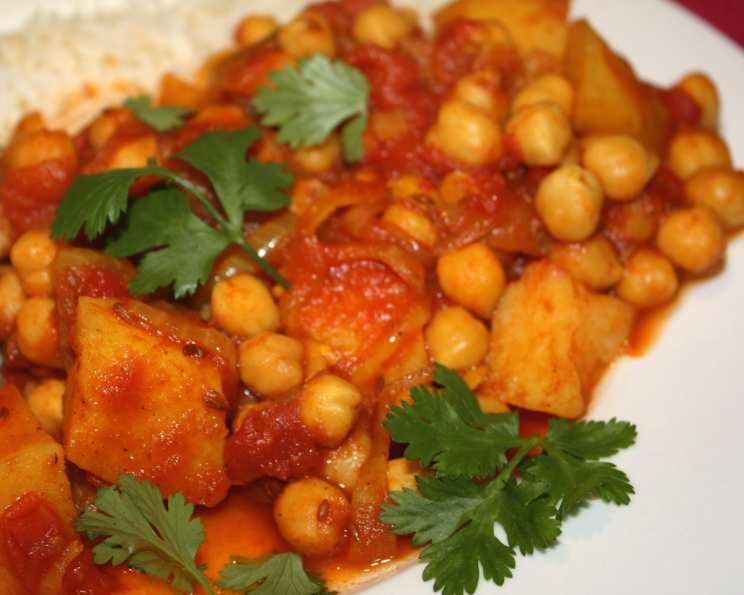
Pressure Cooker Chickpea Curry: A Vegan Delight
I remember the first time I tried chickpea curry; it was at a small, family-run restaurant tucked away in a vibrant corner of Delhi. The aroma alone, a heady mix of warm spices and earthy chickpeas, was enough to transport me. The creamy texture, the subtle heat, and the deep, savory flavors instantly made it a comfort food I craved. That single bite sparked a lifelong passion for experimenting with Indian cuisine, and this pressure cooker version, a simplified take on a beloved classic, brings me right back to that little Delhi eatery.
Recipe Overview
- Prep Time: 10 minutes
- Cook Time: 25 minutes
- Total Time: 35 minutes
- Servings: 6
- Dietary Type: Vegan, Gluten-Free
Ingredients
- 8 teaspoons olive oil
- 4 teaspoons cumin seeds
- 1 large onion, finely sliced
- 4 teaspoons crushed garlic (extra if you want more garlic flavour)
- 2 teaspoons ground coriander
- 2 teaspoons garam masala (extra for a spicier dish)
- 2 teaspoons ground turmeric
- 2 cups cooked chickpeas (roughly 29.5 ounces in total) or 2 (420 g) cans chickpeas, rinsed well and drained (roughly 29.5 ounces in total)
- 2 (400 g) cans diced tomatoes (roughly 28 ounces in total)
- 3 large potatoes, peeled and cut into cubes
- 1⁄4 teaspoon salt (add more to taste if desired)
- 1⁄4 teaspoon fresh ground black pepper
- 1⁄2 cup water
- Garnish: fresh cilantro stem, as garnish (cilantro also known as coriander)
Equipment Needed
- Pressure cooker
- Knife
- Cutting board
- Measuring spoons and cups
Instructions
- Heat the olive oil in the pressure cooker over high heat.
- Cook the cumin seeds for approximately 30 seconds, or until they start to crackle, releasing their fragrant oils. Be careful not to burn them!
- Add the finely sliced onion and cook, stirring frequently, for about 5 minutes, or until the onion is golden and soft. This step is crucial for building the flavor base of the curry.
- Reduce the heat to medium-low and stir in the crushed garlic, ground coriander, garam masala, and ground turmeric. Cook for another minute, stirring constantly, to bloom the spices and release their aromas. This step is important to avoid burning the spices, which can make the curry taste bitter.
- Add all the remaining ingredients – the cooked chickpeas, diced tomatoes (with their juices), cubed potatoes, salt, black pepper, and water.
- Close and lock the lid of the pressure cooker according to the manufacturer’s instructions.
- Bring the pressure cooker to high pressure over high heat. Once it reaches high pressure (indicated by the pressure regulator or valve), reduce the heat to low to stabilize the pressure.
- Cook for 15 minutes at high pressure.
- After 15 minutes, release the pressure carefully. You can use the quick release method (following your pressure cooker’s instructions), or allow the pressure to release naturally. Natural pressure release will result in slightly more tender potatoes, but quick release is faster.
- Once all the pressure is released and the pressure indicator has dropped, carefully open the lid of the pressure cooker.
- Stir the curry gently. If you prefer a thicker consistency, you can mash some of the potatoes against the side of the pot.
- Taste and adjust the seasoning as needed. Add more salt, pepper, or garam masala to suit your preference.
- Serve hot, garnished with a sprig of fresh cilantro (coriander).
NOTE: To cook dried chickpeas: Soak the dried chickpeas overnight. Drain the soaking water, place the soaked chickpeas in the pressure cooker, cover with fresh water, and cook on low pressure for 10 minutes. I soaked 2 cups of dried chickpeas, and the result was a little over 4 cups of cooked chickpeas. Canned/tinned chickpeas can be used if desired; be sure to drain and rinse them well.
Expert Tips & Tricks
- Spice Level: Adjust the amount of garam masala or add a pinch of cayenne pepper or chili powder to increase the heat level of the curry. If you’re sensitive to spice, start with a smaller amount and add more to taste.
- Thickening the Curry: If you want a thicker curry, remove a cup of the curry, blend it until smooth, and then stir it back into the pot. Alternatively, you can simmer the curry uncovered for a few minutes to allow some of the liquid to evaporate.
- Flavor Enhancement: For a richer flavor, add a tablespoon of tomato paste along with the diced tomatoes. A squeeze of fresh lemon or lime juice at the end can also brighten the flavors.
- Potato Variation: Sweet potatoes can be used in place of regular potatoes for a slightly sweeter and more nutritious curry.
- Pre-Soaked Chickpeas: If you forget to soak dried chickpeas overnight, you can use the quick-soak method. Place the dried chickpeas in a pot, cover with water, bring to a boil, and then simmer for 1 hour. Drain and rinse before using.
Serving & Storage Suggestions
Serve the chickpea curry hot with steamed basmati rice, naan bread, or pappadums. It also pairs well with a dollop of plain yogurt (dairy or non-dairy) and a sprinkle of chopped cilantro.
Storage:
- Room Temperature: Do not leave the curry at room temperature for more than 2 hours.
- Refrigerator: Store leftovers in an airtight container in the refrigerator for up to 3-4 days.
- Freezer: For longer storage, freeze the curry in freezer-safe containers for up to 2-3 months. Thaw in the refrigerator overnight before reheating.
Reheating: Reheat the curry on the stovetop over medium heat, stirring occasionally, until heated through. You may need to add a splash of water if the curry has thickened too much. You can also reheat it in the microwave.
Nutritional Information
| Nutrient | Amount per Serving | % Daily Value |
|---|---|---|
| Calories | 384 kcal | 19% |
| Total Fat | 8.3 g | 12% |
| Saturated Fat | 1.1 g | 5% |
| Cholesterol | 0 mg | 0% |
| Sodium | 478 mg | 19% |
| Total Carbohydrate | 69 g | 23% |
| Dietary Fiber | 12 g | 48% |
| Sugars | 6 g | 12% |
| Protein | 12 g | 24% |
Note: Nutritional information is an estimate and may vary based on specific ingredients and portion sizes.
Variations & Substitutions
- Coconut Chickpea Curry: Substitute the water with coconut milk for a creamier, richer flavor.
- Spinach Chickpea Curry (Saag Chana): Add a few cups of fresh spinach towards the end of cooking for a nutrient-packed version.
- Sweet Potato Chickpea Curry: Substitute the regular potatoes with sweet potatoes for a sweeter flavor profile.
- Spicy Chickpea Curry: Add a chopped green chili or a teaspoon of chili powder for extra heat.
- Different Legumes: You can substitute some of the chickpeas with other legumes like lentils or kidney beans.
- Greens Addition: Try adding kale or collard greens to add more nutrients and fiber.
FAQs (Frequently Asked Questions)
Q: Can I use dried chickpeas instead of canned?
A: Yes, you can use dried chickpeas. Be sure to soak them overnight and cook them in the pressure cooker before adding them to the curry as instructed in the recipe notes.
Q: How do I make this curry spicier?
A: You can add more garam masala, chili powder, cayenne pepper, or a chopped green chili to increase the heat. Adjust the amount to your liking.
Q: Can I make this curry ahead of time?
A: Absolutely! The flavors actually develop and deepen over time, making it a great dish to make a day or two in advance. Store it in the refrigerator and reheat before serving.
Q: What if I don’t have a pressure cooker?
A: You can still make this curry on the stovetop. Simply follow the same steps in a large pot, but increase the cooking time to about 45-60 minutes, or until the potatoes are tender and the curry has thickened.
Q: Can I add other vegetables?
A: Yes, feel free to add other vegetables like cauliflower, peas, carrots, or bell peppers to customize the curry to your liking. Add them along with the potatoes and tomatoes.
Final Thoughts
This pressure cooker chickpea curry is more than just a recipe; it’s a journey of flavors and a celebration of simple ingredients. It is a versatile and nourishing dish that can be enjoyed by vegans, vegetarians, and meat-lovers alike. I encourage you to try this recipe and experience the comforting warmth and exquisite taste of homemade chickpea curry. Don’t be afraid to experiment with different spices and vegetables to create your own signature version. Let me know how it turns out – I always love hearing about your culinary adventures! Serve it with warm naan and a cool glass of lassi for a complete and satisfying meal.