
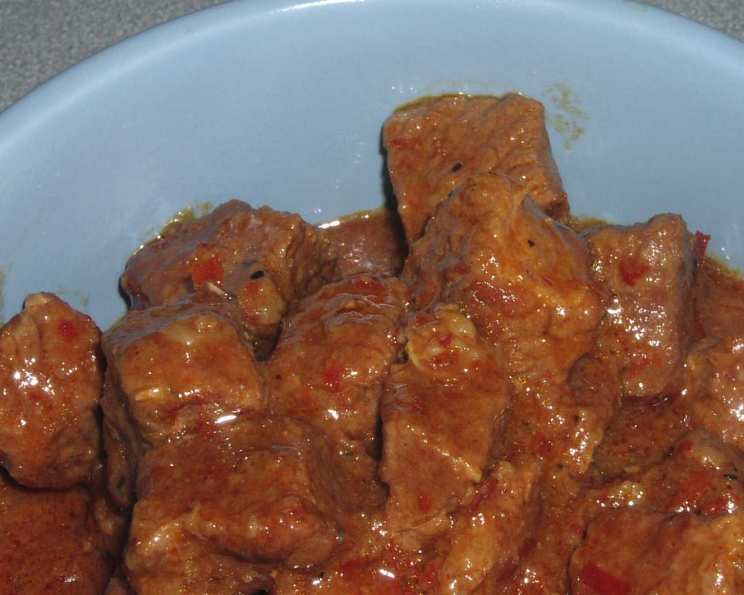
Chile Colorado: A Taste of Authentic Mexican Comfort
The scent of simmering chiles always takes me back to my abuela’s kitchen. She would spend hours coaxing the most incredible flavors from dried peppers, her hands stained a deep red from the process. While many versions of chile call for tomatoes, my grandmother always insisted on a tomato-free version, highlighting the pure, earthy essence of the chiles themselves. This recipe, inspired by her teachings and the desire for a truly authentic taste, delivers a rich and satisfying experience that’s sure to become a family favorite.
Recipe Overview
- Prep Time: 45 minutes
- Cook Time: 3 hours 20 minutes
- Total Time: 3 hours 20 minutes
- Servings: 12
- Yield: Varies based on desired thickness
- Dietary Type: Can be Gluten-Free, Dairy-Free
Ingredients
- 9 dried New Mexico chiles, washed, with stems and seeds removed
- 3 cups water
- 5 lbs boneless beef chuck roast, trimmed of fat
- 1/2 cup all-purpose flour (can substitute with gluten-free all-purpose flour)
- 1 tablespoon kosher salt
- 1 tablespoon black pepper
- 3 tablespoons olive oil
- 1 large yellow onion, chopped
- 2 cups beef stock or 2 cups water (plus more as needed)
Equipment Needed
- Medium Stockpot
- Blender
- Fine Mesh Strainer
- Medium Bowl
- Large Pot or Dutch Oven
Instructions
-
Begin by preparing the chiles. Place the dried New Mexico chiles and 3 cups of water into a medium stockpot. Bring the mixture to a boil over medium-high heat. Once boiling, remove the pot from the heat and let the chiles steep for 30 minutes to soften their skins. This step is crucial for extracting the maximum flavor from the chiles.
-
After the steeping process, strain the chiles into a bowl, making sure to reserve the cooking liquid. This liquid is packed with flavor and will be used later to adjust the consistency of the sauce.
-
Now, it’s time to puree the chiles. Place the soaked chiles and some of the reserved cooking liquid into a blender. Puree until completely smooth, adding more liquid as necessary to achieve a smooth sauce-like consistency. Be careful when blending hot liquids; start on a low speed and gradually increase to prevent splattering.
-
For the smoothest possible sauce, pass the pureed chile mixture through a fine mesh strainer into a clean bowl. This step removes any remaining seeds and tough skins, resulting in a velvety texture. Set the strained sauce aside.
-
Prepare the beef. Cut the beef chuck roast into 1 to 2-inch chunks. Trimming excess fat at this stage will prevent the chile from becoming greasy.
-
In a medium bowl, combine 1/2 cup of all-purpose flour, 1 tablespoon of kosher salt, and 1 tablespoon of black pepper. This mixture will be used to coat the beef, helping it to brown nicely and adding a layer of flavor.
-
Dredge the beef chunks in the seasoned flour mixture, ensuring each piece is evenly coated. This step helps to create a beautiful crust on the beef during the browning process. Set the dredged beef aside.
-
Heat 3 tablespoons of olive oil in a large pot or Dutch oven over medium heat. The pot should be large enough to accommodate all the beef without overcrowding.
-
Sauté 1 large chopped yellow onion in the hot oil until it becomes tender and translucent, about 5 minutes. Stir frequently to prevent burning. The sautéed onion adds a subtle sweetness and depth of flavor to the chile.
-
Working in batches, add the beef chunks to the pot, being careful not to overcrowd. Overcrowding the pot will lower the temperature and prevent the beef from browning properly. Cook the beef until evenly browned on all sides.
-
Remove the browned meat from the pot and set aside. Continue browning the remaining beef in batches.
-
Once all the beef is browned, return all of the cooked meat to the pot.
-
Stir in the pureed chile mixture, making sure to coat the beef evenly with the sauce.
-
Add enough beef stock (or water) to just cover the beef chunks, or to your personal preference regarding sauce thickness. If you prefer a thicker chile, use less liquid.
-
Bring the mixture to a boil over medium heat.
-
Reduce the heat to the lowest setting, cover the pot, and simmer for 3 hours, or until the meat is incredibly tender and easily shreds with a fork. Stir occasionally to prevent sticking and ensure even cooking.
-
During the simmering process, check the liquid level periodically and add more beef stock (or water) if necessary to maintain the desired consistency. The chile should be thick and rich, but not dry.
Expert Tips & Tricks
- Chile Preparation is Key: Don’t skimp on the soaking time for the chiles. The longer they soak, the smoother your sauce will be.
- Deglazing the Pot: After browning the beef, consider deglazing the pot with a splash of red wine or beer before adding the chile puree. This will add an extra layer of complexity to the flavor.
- Adjusting the Heat: New Mexico chiles typically have a mild to medium heat level. If you prefer a spicier chile, consider adding a few dried chile de arbol during the steeping process. Remove the seeds for less heat, leave them in for more.
- Slow Cooking is Essential: The low and slow simmering process is crucial for tenderizing the beef and allowing the flavors to meld together. Don’t rush it!
- Make-Ahead Magic: Chile Colorado is a fantastic make-ahead dish. The flavors actually improve after a day or two in the refrigerator.
Serving & Storage Suggestions
Chile Colorado is incredibly versatile. Serve it with warm tortillas, rice, and beans for a classic Mexican meal. It’s also delicious as a filling for burritos, enchiladas, or tamales. Garnish with chopped cilantro, diced onions, and a dollop of sour cream or Mexican crema.
Leftovers can be stored in an airtight container in the refrigerator for up to 3-4 days. For longer storage, freeze in freezer-safe containers for up to 2-3 months.
To reheat, thaw frozen chile in the refrigerator overnight. Reheat gently on the stovetop over medium-low heat, stirring occasionally, until heated through. You can also reheat it in the microwave, but be sure to cover it to prevent splattering.
Nutritional Information
(Note: Nutritional information is an estimate and may vary based on specific ingredients and portion sizes.)
| Nutrient | Amount per Serving | % Daily Value |
|---|---|---|
| Calories | 480 kcal | 24% |
| Total Fat | 30g | 46% |
| Saturated Fat | 12g | 60% |
| Cholesterol | 100mg | 33% |
| Sodium | 700mg | 29% |
| Total Carbs | 8g | 3% |
| Dietary Fiber | 2g | 8% |
| Sugars | 2g | N/A |
| Protein | 35g | 70% |
Variations & Substitutions
- Vegetarian Chile Colorado: Substitute the beef chuck roast with hearty vegetables like butternut squash, potatoes, and mushrooms. Use vegetable broth instead of beef stock.
- Spicier Chile: Add dried chile de arbol or a pinch of cayenne pepper to the chile puree for extra heat.
- Pork Chile Colorado: Replace the beef with pork shoulder for a slightly different flavor profile.
- Chicken Chile Colorado: Use boneless, skinless chicken thighs instead of beef for a lighter version. Reduce the simmering time accordingly.
- Gluten-Free Option: Use a gluten-free all-purpose flour blend for dredging the beef.
- Slow Cooker Version: Brown the beef and sauté the onion as directed, then transfer everything to a slow cooker. Cook on low for 6-8 hours, or until the beef is tender.
FAQs (Frequently Asked Questions)
Q: Can I use other types of dried chiles?
A: Yes, but the flavor will change. Ancho chiles are a common substitute for a milder flavor, while guajillo chiles will add a bit more heat.
Q: Do I have to strain the chile sauce?
A: While not strictly necessary, straining the sauce results in a smoother, more refined texture. It’s highly recommended!
Q: Can I add beans to this chile?
A: Absolutely! Add cooked pinto beans or kidney beans during the last 30 minutes of simmering.
Q: How do I thicken the chile if it’s too thin?
A: Remove the lid during the last hour of simmering to allow some of the liquid to evaporate. Alternatively, you can whisk together a tablespoon of cornstarch with a tablespoon of cold water and stir it into the chile during the last 15 minutes of cooking.
Q: How do I make this in a pressure cooker?
A: After browning the beef and sautéing the onion, add everything to the pressure cooker. Cook on high pressure for 45 minutes, then allow the pressure to release naturally.
Final Thoughts
Chile Colorado is more than just a dish; it’s a celebration of flavor, tradition, and the simple joy of cooking. Whether you’re a seasoned chef or a beginner in the kitchen, this recipe is sure to impress. Gather your ingredients, embrace the process, and prepare to be transported to a world of authentic Mexican comfort. Don’t be afraid to experiment and adjust the recipe to your own taste preferences. And most importantly, enjoy the delicious results! Serve with a cold Mexican beer or a refreshing margarita for the perfect culinary experience. ¡Buen provecho!