
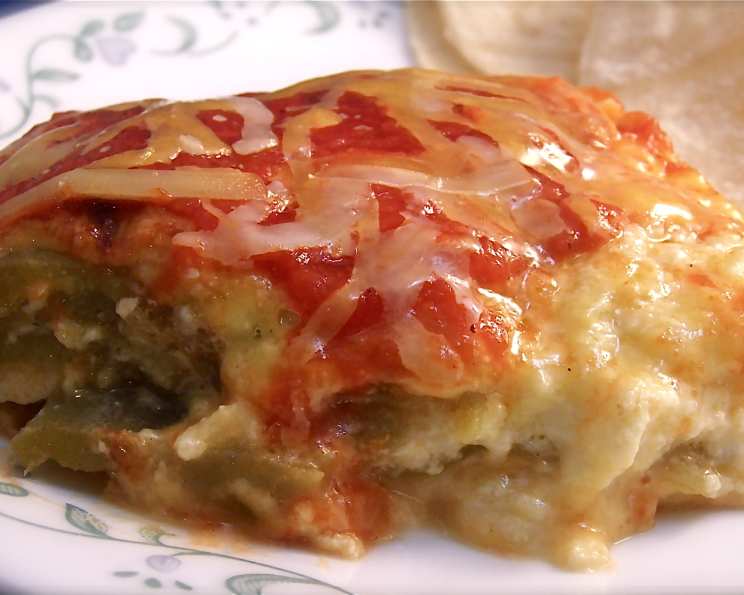
Chile Relleno Casserole: An Easier Path to a Classic
My grandmother, a true matriarch in every sense of the word, had a legendary green thumb and an even more legendary temper in the kitchen. But when she made chile rellenos, everyone fell silent. Crispy, cheesy, and bursting with flavor, they were a true labor of love. This casserole brings back those memories of family gatherings filled with laughter and the satisfying heat of roasted peppers, but without the hours spent individually stuffing and frying each chile. It’s a shortcut to comfort, a taste of tradition made accessible for any weeknight.
Recipe Overview
- Prep Time: 20 minutes
- Cook Time: 1 hour
- Total Time: 1 hour 20 minutes
- Servings: 6-8
- Dietary Type: Vegetarian (can be made gluten-free)
Ingredients
- 1/2 lb cheddar cheese, grated (about 2 cups)
- 1/2 lb Monterey Jack cheese, grated (about 2 cups)
- 3 (4 ounce) cans whole green chilies
- 3 tablespoons flour
- 2 (5 ounce) cans evaporated milk
- 2-3 eggs
- 1 (16 ounce) can tomato sauce, with 1/2 teaspoon dried oregano added
- Hot tortillas, and butter, as accompaniment
Equipment Needed
- 8-9″ square baking dish
- Mixing bowl
- Whisk
- Grater
Instructions
-
Begin by preheating your oven to 350 degrees F (175 degrees C). While the oven heats, thoroughly grease an 8-9 inch square baking dish. This will prevent sticking and ensure easy removal of the casserole after baking.
-
Now, let’s prepare the cheese and chilies. Grate both the cheddar cheese and the Monterey Jack cheese if you haven’t purchased them pre-shredded. Open the cans of whole green chilies. Carefully split each chile open lengthwise and lay them flat. This step ensures even distribution and optimal flavor in the casserole.
-
It’s time to assemble the casserole. Start by layering half of the green chilies (split open and laid flat) on the bottom of the greased baking dish. Next, sprinkle all of the Monterey Jack cheese evenly over the chilies. Then, arrange the remaining green chilies over the Jack cheese, again making sure they are split open and laid flat. Finally, top with all of the cheddar cheese, creating a vibrant and cheesy layer.
-
In a mixing bowl, prepare the custard. Whisk together the flour, evaporated milk, and eggs until smooth and well combined. Make sure there are no lumps of flour remaining. This mixture will bind the casserole together and create a creamy texture.
-
Pour the evaporated milk mixture evenly over the layered ingredients in the baking dish. Ensure that the liquid distributes throughout the casserole, reaching all the layers. This is crucial for a cohesive and delicious final product.
-
Bake in the preheated oven for 45 minutes. The casserole should be set around the edges but still slightly jiggly in the center. This indicates that it is almost done.
-
While the casserole is baking, prepare the tomato sauce. In a small saucepan or bowl, combine the canned tomato sauce with the 1/2 teaspoon of dried oregano. Stir well to incorporate the oregano, enhancing the flavor of the sauce.
-
After 45 minutes, remove the casserole from the oven. Carefully pour the prepared tomato sauce evenly over the top of the casserole, spreading it to cover the entire surface. Return the casserole to the oven and bake for an additional 15 minutes. This final baking period allows the tomato sauce to meld with the cheese and chilies, creating a delicious finishing touch.
-
Once the additional 15 minutes have passed, remove the casserole from the oven. Let it stand for 5 minutes before serving. This allows the casserole to set slightly and makes it easier to cut and serve.
-
Serve hot with warm flour or corn tortillas and butter as an accompaniment. A simple salad also complements the richness of the casserole.
Expert Tips & Tricks
- Cheese Selection: While this recipe calls for cheddar and Monterey Jack, feel free to experiment with other cheeses like Oaxaca, Asadero, or even a spicy pepper jack for an extra kick.
- Chile Preparation: For a deeper, smokier flavor, roast the green chilies yourself before adding them to the casserole. You can roast them under the broiler or directly over a gas flame until the skins are blackened, then peel them before using.
- Make-Ahead Option: This casserole can be assembled ahead of time and stored in the refrigerator for up to 24 hours before baking. Add an extra 10-15 minutes to the baking time if baking from cold.
- Preventing a Soggy Casserole: Ensure the chilies are well-drained before layering them in the dish. Excess moisture can lead to a soggy casserole.
- Adding Protein: For a heartier meal, consider adding cooked and crumbled chorizo, shredded chicken, or black beans to the casserole layers.
Serving & Storage Suggestions
Serve the Chile Relleno Casserole hot, directly from the baking dish or sliced into squares. Garnish with a dollop of sour cream or Mexican crema, chopped cilantro, and a sprinkle of crumbled cotija cheese for added flavor and visual appeal.
Leftovers can be stored in an airtight container in the refrigerator for up to 3 days. To reheat, bake in a preheated oven at 350°F (175°C) until heated through, or microwave individual portions. You can also freeze the casserole for up to 2 months. Thaw overnight in the refrigerator before reheating. Note that the texture of the casserole may change slightly after freezing and thawing.
Nutritional Information
| Nutrient | Amount per Serving | % Daily Value* |
|---|---|---|
| Calories | 520 kcal | 26% |
| Total Fat | 35g | 45% |
| Saturated Fat | 22g | 110% |
| Cholesterol | 150mg | 50% |
| Sodium | 900mg | 39% |
| Total Carbohydrate | 15g | 5% |
| Dietary Fiber | 2g | 8% |
| Sugars | 8g | – |
| Protein | 30g | 60% |
*Percent Daily Values are based on a 2,000 calorie diet. Your daily values may be higher or lower depending on your calorie needs.
Variations & Substitutions
- Gluten-Free: To make this casserole gluten-free, substitute the all-purpose flour with a gluten-free flour blend or cornstarch.
- Dairy-Free: Use dairy-free cheeses and plant-based evaporated milk. Ensure the cheeses melt well for the best texture.
- Spicy: Add diced jalapeños or a pinch of cayenne pepper to the cheese layers or the custard mixture for a spicier version.
- Vegetarian Protein Boost: Incorporate crumbled vegetarian sausage or seasoned tofu for added protein.
- Mexican Flavors: Add a packet of taco seasoning to the evaporated milk mixture for a deeper Mexican flavor profile.
- Seasonal Variation: During the fall, add roasted butternut squash cubes to the layers for a sweeter, seasonal twist.
FAQs (Frequently Asked Questions)
Q: Can I use canned diced green chilies instead of whole chilies?
A: Yes, you can use canned diced green chilies, but whole chilies offer a better texture and slightly more distinct flavor. Drain the diced chilies well before adding them to the casserole.
Q: Can I use regular milk instead of evaporated milk?
A: Evaporated milk is recommended for its richer flavor and creamier texture. If you substitute with regular milk, the casserole may be slightly less rich. You could add a tablespoon of melted butter to the milk to compensate.
Q: How do I prevent the top from browning too quickly?
A: If the top of the casserole is browning too quickly, tent it loosely with aluminum foil during the last 15-20 minutes of baking.
Q: Can I add other vegetables to this casserole?
A: Absolutely! Diced onions, bell peppers, corn, or zucchini can be added to the layers for extra flavor and nutrition. Sauté them lightly before adding them to the casserole.
Q: Is it important to let the casserole rest before serving?
A: Yes, letting the casserole rest for 5 minutes before serving allows it to set slightly, making it easier to cut and serve. It also prevents the filling from being too runny.
Final Thoughts
This Chile Relleno Casserole is more than just a recipe; it’s an invitation to create memories around the table with loved ones. It’s a chance to experience the comforting flavors of a classic dish without the fuss. So gather your ingredients, preheat your oven, and let the aroma of cheesy, chile-infused goodness fill your home. I encourage you to make this recipe your own, experiment with variations, and share your feedback. Serve it with a refreshing margarita or a cold Mexican beer for the perfect pairing! Enjoy!