
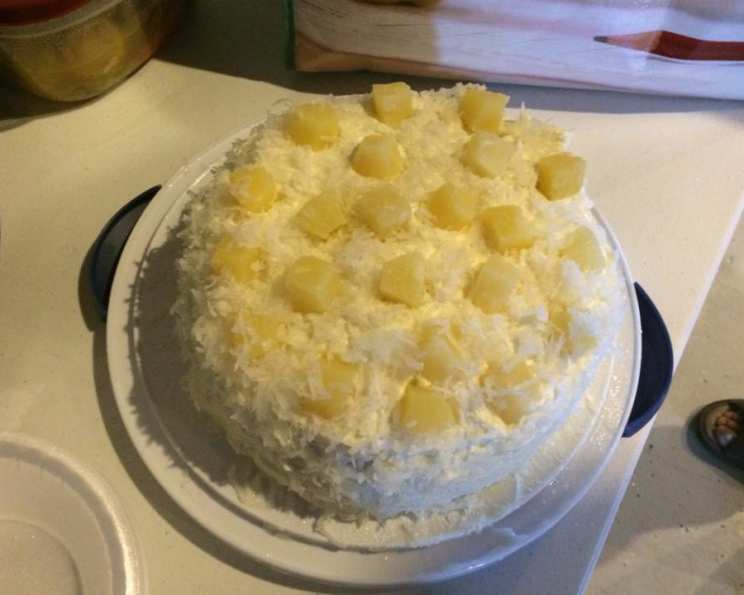
Chilean Pineapple Cake: A Taste of Celebration
The scent of pineapple always takes me back to my days working in a bustling Santiago bakery. While croissants and empanadas might be the daily bread, the Chilean Pineapple Cake was reserved for special occasions. I remember the head baker, a stern but kind woman named Elena, carefully layering the delicate sponge with whipped cream and juicy pineapple. It was always a flurry of activity, the air thick with powdered sugar and the sweet tang of tropical fruit – a testament to celebrations and family gatherings. It was a cake that meant more than just dessert, it was happiness made edible.
Recipe Overview
- Prep Time: 45 minutes
- Cook Time: 30 minutes
- Total Time: 1 hour 15 minutes
- Servings: 8
- Yield: 1 cake
- Dietary Type: Not specified
Ingredients
- 6 eggs
- 1 cup sugar
- 3/4 cup all-purpose flour, sifted
- 3/4 cup cornstarch
- 2 teaspoons baking powder
- 1 (20 ounce) can pineapple chunks
- 1/8 cup liquor, white (such as pisco, tequila, vodka, or simply pineapple juice)
- 1 quart heavy whipping cream
- 3/4 cup powdered sugar
- Coconut flakes, to taste (for decoration)
Equipment Needed
- Two 9″ cake pans
- Medium bowl
- Small saucepan
- Electric mixer (or whisk)
- Cake stand
- Refrigerator
Instructions
-
Preheat your oven to 325ºF (160ºC). Grease two 9″ cake pans thoroughly and set them aside.
-
In a medium bowl, sift together the all-purpose flour, cornstarch, and baking powder. Sifting ensures a light and airy cake texture. Set this aside.
-
In a small saucepan, combine the sugar with just enough water to moisten it, creating a consistency similar to wet sand. Cook this mixture over medium heat, stirring constantly, until it reaches the consistency of a soft ball (240 degrees F or 115 degrees C). A candy thermometer is extremely helpful for this step! Remove from heat and set aside to cool slightly.
-
In a separate clean and dry bowl, use an electric mixer to beat the egg whites until they form stiff peaks. This is crucial for creating a light and airy meringue.
-
Gradually add the hot sugar syrup to the beaten egg whites, beating continuously until the meringue is cool to the touch. This step is important for stabilizing the meringue.
-
Add the egg yolks one at a time to the meringue, ensuring each yolk is fully incorporated before adding the next.
-
Gently fold in the sifted dry ingredients into the egg mixture in stages. Be careful not to overmix, as this will deflate the meringue and result in a dense cake.
-
Pour the batter evenly into the two prepared cake pans.
-
Bake in the preheated oven for approximately 30 minutes, or until a toothpick inserted into the center comes out clean. Baking times can vary depending on your oven, so start checking for doneness around 25 minutes.
-
Allow the cakes to cool completely in the pans before removing them. Once cool, carefully remove the cakes from the pans.
-
While the cakes are cooling, prepare the whipped cream. In a large bowl, beat the heavy whipping cream with an electric mixer until soft peaks form.
-
Gradually add the powdered sugar to the whipped cream and continue beating until stiff peaks form. Be careful not to overwhip, as this can turn the cream grainy.
-
Place the whipped cream in the refrigerator to chill while you assemble the cake. This will help it hold its shape better.
-
Open the can of pineapple chunks and strain, reserving the juice.
-
In a small bowl, mix the reserved pineapple juice with the liquor of your choice (or just use the pineapple juice if you prefer a non-alcoholic version).
-
To assemble the cake, place one cake layer on a cake stand.
-
Sprinkle the cake layer generously with the pineapple juice mixture, ensuring it is moist but not soggy.
-
Spread a thick layer of whipped cream over the moistened cake layer.
-
Distribute the pineapple chunks evenly over the whipped cream layer.
-
Spread a thin layer of whipped cream over the pineapple chunks.
-
Place the second cake layer on a plate and sprinkle one side with the pineapple juice mixture.
-
Carefully invert the second cake layer onto the assembled cake, moistened side down.
-
Sprinkle the top of the second cake layer with the remaining pineapple juice mixture.
-
Repeat the layers of whipped cream, pineapple chunks, and a final layer of whipped cream.
-
Evenly cover the entire cake with a thin layer of whipped cream (this is a “crumb coat” to trap any loose crumbs).
-
Refrigerate the cake for at least 20 minutes to allow the crumb coat to set.
-
After chilling, frost the entire cake with the remaining whipped cream.
-
Decorate the top of the cake with the remaining pineapple chunks and toasted coconut flakes.
-
Refrigerate the cake for at least 1 hour before serving to allow the flavors to meld and the cake to firm up.
Expert Tips & Tricks
- Meringue Mastery: Achieving the perfect meringue is key. Make sure your bowl and whisk are completely clean and free of any grease. A tiny bit of cream of tartar can also help stabilize the egg whites.
- Juice Judiciously: Don’t over-saturate the cake layers with pineapple juice; a little goes a long way.
- Whipped Cream Wonders: Ensure your heavy cream is very cold before whipping. Chilling your bowl and beaters also helps.
- Flavor Boost: A touch of vanilla extract or almond extract can enhance the overall flavor profile of the cake.
Serving & Storage Suggestions
Serve the Chilean Pineapple Cake chilled. It’s best enjoyed within 2-3 days of making it. Store leftover cake in an airtight container in the refrigerator. While freezing is possible, it can affect the texture of the whipped cream.
Nutritional Information
| Nutrient | Amount per Serving | % Daily Value |
|---|---|---|
| Calories | 550 kcal | 28% |
| Total Fat | 35g | 54% |
| Saturated Fat | 22g | 110% |
| Cholesterol | 225mg | 75% |
| Sodium | 150mg | 6% |
| Total Carbohydrate | 55g | 18% |
| Dietary Fiber | 1g | 4% |
| Sugars | 35g | – |
| Protein | 6g | 12% |
Note: Nutritional information is an estimate and may vary based on specific ingredients and portion sizes.
Variations & Substitutions
- Gluten-Free Option: Substitute the all-purpose flour with a gluten-free flour blend for a gluten-free version.
- Dairy-Free Delight: Replace the heavy whipping cream with a non-dairy whipped topping.
- Citrus Zest: Add a teaspoon of lemon or orange zest to the cake batter for a bright citrus flavor.
- Tropical Twist: Incorporate other tropical fruits like mango or passion fruit into the filling.
FAQs (Frequently Asked Questions)
Q: Can I make this cake ahead of time?
A: Yes, you can bake the cake layers a day in advance. Wrap them tightly in plastic wrap and store them at room temperature. Prepare the whipped cream and assemble the cake a few hours before serving.
Q: Can I use canned pineapple slices instead of chunks?
A: Yes, you can use canned pineapple slices. Just make sure to drain them well and chop them into smaller pieces before using them in the filling.
Q: Can I skip the liquor in the pineapple juice mixture?
A: Absolutely! The cake is delicious with just the pineapple juice, especially if you are serving it to children.
Q: How do I prevent the cake from becoming soggy?
A: Don’t over-saturate the cake layers with pineapple juice. A light sprinkling is enough to keep them moist.
Q: Can I use a different type of frosting?
A: While whipped cream is traditional, you can experiment with other frostings like cream cheese frosting or buttercream frosting.
Final Thoughts
The Chilean Pineapple Cake is more than just a recipe; it’s a celebration of flavor, texture, and tradition. I encourage you to try this recipe and share the joy of this delicious cake with your loved ones. Don’t be intimidated by the multiple steps – each one is simple and rewarding. Enjoy every moment of the process, from sifting the flour to the final flourish of coconut flakes. And please, let me know what you think! Perhaps share your favorite liquor pairing, or a variation that you’ve discovered. Happy baking!