
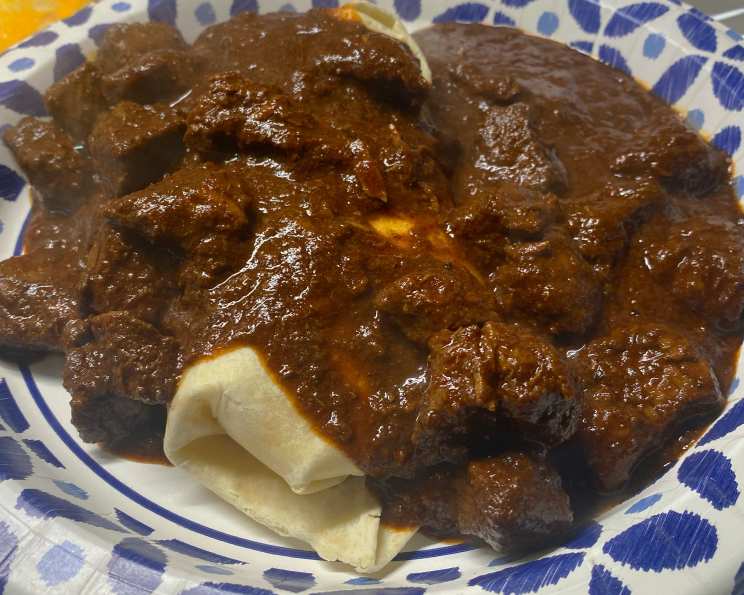
Chili Con Carne – Casa Rio Recipe: A Taste of Authentic Tex-Mex
The aroma of chili always transports me back to my college days. Picture this: a tiny apartment, a group of friends huddled around a table laden with steaming bowls, laughter echoing against the walls. This wasn’t just any chili; it was a deeply flavorful concoction, a comforting hug in a bowl that warmed us from the inside out on those chilly nights. It became our ritual, a symbol of friendship and shared experiences. We were always experimenting, trying to recreate that perfect chili, and that’s where my love for the art of chili-making began. Today, I’m excited to share a recipe that captures that essence, taking inspiration from a classic Tex-Mex favorite.
Recipe Overview:
- Prep Time: 2 hours
- Cook Time: 3 hours
- Total Time: 5 hours
- Servings: Varies
- Yield: 1 gallon
- Dietary Type: Varies (See Variations & Substitutions for adjustments)
Ingredients:
- 1 lb pork, 3/4 inch cube
- 3 lbs beef, 3/4 inch cube
- 1 1/2 tablespoons ground jalapenos
- 1 1/2 tablespoons ground fresh garlic
- 1 tablespoon salt
- 1 tablespoon ground cumin (comino)
- 6 tablespoons fresh ancho chilies, pods seeded and ground
- 2 teaspoons black pepper
- 6 tablespoons good quality chili powder
- Roux made from masa corn flour
- Water, as needed
Equipment Needed:
- Large Stock Pot
- Grinder (for chilies, optional)
- Measuring spoons and cups
Instructions:
- Begin by preparing the ancho chilies. Deseed and clean the ancho chili pods.
- Soak the cleaned pods for 1 hour in hot water to soften them. This step is crucial for achieving a smooth paste.
- Drain the softened chilies and grind them into a paste. You can use a food processor or grinder for this, or even a mortar and pestle for a more traditional approach. Reserve the ancho chili paste.
- Place the pork and beef cubes into a large stock pot.
- Fill the pot with water to completely cover the meat. The water level is important, so ensure the meat is submerged for even cooking.
- Bring the water to a simmer over medium-high heat. Avoid a rapid boil, as this can toughen the meat.
- Add the ground jalapenos, ground fresh garlic, salt, cumin (comino), ancho chili pod paste, and black pepper to the pot.
- Stir well to combine all the ingredients. This ensures that the flavors are evenly distributed throughout the chili.
- Bring the mixture to a boil.
- Reduce the heat to a simmer and cook until the meat is tender and done. This process typically takes around 2 to 3 hours, depending on the size of the meat cubes and the heat level. Check the meat periodically for tenderness.
- Add the chili powder and mix all ingredients well. This is where the distinctive chili flavor really starts to develop.
- Simmer for an additional 20 minutes to allow the flavors to meld together.
- Remove the pot from the heat.
- Thicken the chili with a roux made from masa corn flour and water. Add the roux gradually, stirring constantly, until you reach your desired consistency.
Expert Tips & Tricks:
- Meat Selection: The quality of the meat is crucial. Using a good cut of beef, such as chuck, will yield a richer, more flavorful chili. Don’t be afraid to experiment with different cuts to find your favorite.
- Chili Powder Blend: The type of chili powder you use can significantly impact the flavor. Explore different brands and blends to find one that suits your taste. Some chili powders have a smoky flavor, while others are sweeter or spicier.
- Slow Simmer: Patience is key! Allowing the chili to simmer slowly for a long time is essential for developing deep, complex flavors. Don’t rush the process.
- Spice Level: Adjust the amount of jalapenos and chili powder to your preference. If you prefer a milder chili, reduce the amount of jalapenos or use a milder chili powder.
- Roux Consistency: When adding the roux, make sure to stir constantly to prevent lumps from forming. If lumps do occur, you can use an immersion blender to smooth out the chili.
- Make Ahead: Chili is often even better the next day, as the flavors have had more time to meld. This makes it a great dish for make-ahead meals or entertaining.
- Flavor Enhancement: For an extra layer of depth, consider adding a tablespoon of unsweetened cocoa powder or a splash of apple cider vinegar during the last 30 minutes of simmering.
Serving & Storage Suggestions:
Serve the Chili Con Carne hot, garnished with your favorite toppings such as shredded cheese, sour cream, chopped onions, cilantro, or a dollop of guacamole. It pairs perfectly with cornbread, tortilla chips, or a side of rice.
To store leftovers, allow the chili to cool completely before transferring it to an airtight container. Refrigerate for up to 3-4 days. For longer storage, freeze the chili for up to 2-3 months. Thaw overnight in the refrigerator before reheating.
To reheat, simply warm the chili in a saucepan over medium heat, stirring occasionally, until heated through. You can also reheat it in the microwave, but be sure to stir it periodically to ensure even heating.
Nutritional Information:
| Nutrient | Amount per Serving | % Daily Value |
|---|---|---|
| Calories | 10283 kcal | N/A |
| Calories from Fat | 9141 | 89% |
| Total Fat | 1015.7 g | 1562% |
| Saturated Fat | 416.5 g | 2082% |
| Cholesterol | 1729.2 mg | 576% |
| Sodium | 8380.6 mg | 349% |
| Total Carbohydrate | 34.5 g | 11% |
| Dietary Fiber | 19 g | 76% |
| Sugars | 4.1 g | 16% |
| Protein | 245.5 g | 490% |
Note: Nutritional information is an estimate and may vary based on specific ingredients and serving sizes.
Variations & Substitutions:
- Vegetarian Chili: Substitute the pork and beef with beans (such as kidney beans, black beans, or pinto beans) and vegetable broth. Add more vegetables like bell peppers, corn, or zucchini for added flavor and texture.
- Spicy Chili: Increase the amount of jalapenos or add a hotter chili powder, such as cayenne pepper.
- Smoky Chili: Add a teaspoon of smoked paprika or a few drops of liquid smoke to enhance the smoky flavor.
- Chicken Chili: Substitute the pork and beef with chicken breast or thighs.
- Venison Chili: Use ground venison or cubed venison for a leaner chili.
- Gluten-Free: Ensure that your chili powder and masa corn flour are certified gluten-free.
FAQs (Frequently Asked Questions):
Q: Can I use pre-ground ancho chili powder instead of grinding my own?
A: Yes, you can use pre-ground ancho chili powder if you prefer. However, grinding your own from fresh pods will result in a more intense and flavorful chili.
Q: How can I adjust the thickness of the chili?
A: To thicken the chili, add more roux made from masa corn flour and water. To thin it, add more water or beef broth.
Q: Can I make this chili in a slow cooker?
A: Yes, you can adapt this recipe for a slow cooker. Brown the meat before adding it to the slow cooker, then add all the remaining ingredients. Cook on low for 6-8 hours or on high for 3-4 hours.
Q: What kind of masa corn flour should I use?
A: Use a good-quality masa corn flour that is specifically designed for making tortillas or tamales. This will give the roux a better flavor and texture.
Q: Can I freeze leftover chili?
A: Absolutely! Chili freezes very well. Allow it to cool completely before transferring it to an airtight container and freezing for up to 2-3 months.
Final Thoughts:
This Chili Con Carne recipe is more than just a set of instructions; it’s an invitation to create a warm, comforting, and deeply flavorful dish that will nourish both body and soul. Don’t be afraid to experiment with different variations and substitutions to make it your own. Whether you’re sharing it with friends and family or enjoying a quiet night in, I hope this chili brings you as much joy as it has brought me over the years. So gather your ingredients, put on some music, and let the aroma of simmering chili fill your kitchen. And please, don’t hesitate to share your feedback – I’d love to hear about your chili-making adventures! Pair this wonderful chili with a cold Mexican beer or a robust red wine for the perfect culinary experience. Happy cooking!