
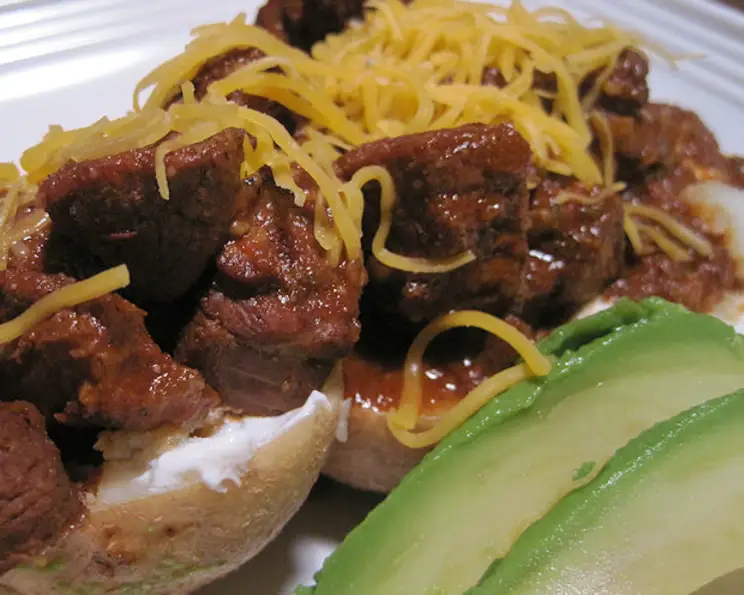
Chili Con Carne: A Culinary Embrace of Comfort
There’s something magical about the aroma of chili simmering on the stove, isn’t there? I remember my grandmother’s kitchen, filled with the warm, spicy scent of her famous chili, a dish that symbolized family gatherings and cozy winter evenings. Each spoonful was a hug from her, a comforting blend of savory beef, rich tomatoes, and a subtle hint of heat that lingered long after the bowl was empty. This Chili Con Carne recipe, inspired by Cook’s Country, evokes that same sense of warmth and nostalgia, a taste of home that’s both simple and deeply satisfying.
Recipe Overview
- Prep Time: 20 minutes
- Cook Time: 1 hour 45 minutes
- Total Time: 2 hours 5 minutes
- Servings: 6
- Yield: About 8 cups
- Dietary Type: Gluten-Free (naturally)
Ingredients
- 1 (14 ounce) can diced tomatoes
- 1 1/2 teaspoons minced chipotle chiles in adobo (or to taste)
- 4 slices bacon, diced fine
- 1 boneless beef chuck-eye roast (3 1/2 – 4 lbs, trimmed and cut into 1-inch pieces)
- 1 onion, chopped fine
- 1 jalapeno chile, seeded and chopped fine
- 3 tablespoons chili powder (quality chili powder is key!)
- 2 teaspoons ground cumin
- 1 1/2 teaspoons dried oregano
- 5 garlic cloves, minced
- 4 cups water
- 1 tablespoon brown sugar
- 2 tablespoons corn muffin mix (like Jiffy or Red Mill)
- Salt and pepper to taste
- Optional garnishes: avocado, shredded cheese
Equipment Needed
- Food processor
- Large Dutch oven or heavy-bottomed pot
- Paper towels
- Medium bowl
- Microwave-safe wrap or waxed paper
Instructions
-
Begin by preparing the tomato base. Add the can of diced tomatoes and the chipotle chiles in adobo to a food processor. Pulse until the mixture is smooth and slightly pureed. This creates a flavorful foundation for the chili.
-
In a large Dutch oven or heavy-bottomed pot, cook the diced bacon over medium heat until it is crisp. This will render the fat and add a smoky depth to the chili.
-
Transfer the crisp bacon to a paper towel-lined plate to drain. Be sure to reserve 3 tablespoons of the bacon fat in the Dutch oven; this flavorful fat will be used to brown the beef and sauté the vegetables.
-
Pat the beef chuck-eye roast pieces dry with paper towels and generously season them with salt and pepper. Drying the beef is crucial for achieving a good sear.
-
Heat 1 tablespoon of the reserved bacon fat in the empty Dutch oven over medium-high heat until it is just smoking. Working in batches, carefully add the beef to the pot, ensuring not to overcrowd it. Overcrowding will cause the beef to steam instead of brown.
-
Brown the beef on all sides, using a second tablespoon of the reserved bacon fat for the second batch if needed. A good sear creates a rich, caramelized flavor that enhances the overall taste of the chili.
-
Once the beef is browned, transfer it to a bowl and set aside.
-
Add the remaining tablespoon of bacon fat, the chopped onion, and the chopped jalapeno to the empty Dutch oven. Cook over medium heat until the onion is softened, about 5 minutes. The jalapeno adds a touch of heat, so adjust the amount according to your preference.
-
Stir in the chili powder, ground cumin, dried oregano, and minced garlic. Cook until fragrant, about 30 seconds. Toasting the spices in the hot fat releases their essential oils, creating a more complex and aromatic flavor profile.
-
Stir in the water, the pureed tomato mixture, the cooked bacon, the browned beef, and the brown sugar. Bring the mixture to a boil. The brown sugar adds a subtle sweetness that balances the heat and acidity of the other ingredients.
-
Once boiling, reduce the heat to low and simmer, covered, for 1 hour. This allows the flavors to meld together and the beef to begin to tenderize.
-
After 1 hour, remove the cover and skim any fat from the surface of the chili. This step helps to create a cleaner, richer flavor.
-
Continue to simmer uncovered until the meat is tender, about 30 to 45 minutes. The exact cooking time will depend on the size and quality of the beef. Check for tenderness by piercing a piece of beef with a fork; it should be easily pierced with minimal resistance.
-
While the chili simmers, prepare the thickening agent. Ladle 1 cup of the chili liquid into a medium bowl and stir in the corn muffin mix. Cover the bowl with microwave-safe wrap or waxed paper and microwave until the mixture is thickened, about 1 minute. This creates a slurry that will help to thicken the chili without adding a starchy flavor.
-
Slowly whisk the corn muffin mix slurry into the chili and simmer until the chili is slightly thickened, about 5 to 10 minutes. Stir frequently to prevent sticking.
-
Season the chili with salt and pepper to taste before serving.
-
Garnish with avocado and shredded cheese, if desired. These toppings add a cool, creamy contrast to the rich and spicy chili.
Expert Tips & Tricks
- Quality Matters: Invest in high-quality chili powder. The flavor difference is significant.
- Beef Prep: Ensure your beef is well-trimmed and cut into even pieces for uniform cooking.
- Browning is Key: Don’t skip the browning step. It builds deep, savory flavor. Work in batches to avoid overcrowding the pot.
- Spice Level: Adjust the amount of chipotle chiles and jalapeno to suit your heat preference. Remember, you can always add more spice, but it’s difficult to remove it.
- Slow Simmer: The low and slow simmer is crucial for tenderizing the beef and melding the flavors. Don’t rush this step!
- Thickening: The corn muffin mix adds a subtle sweetness and cornbread flavor to the chili, thickening it without being overly starchy.
Serving & Storage Suggestions
Serve the Chili Con Carne hot, garnished with your favorite toppings such as shredded cheese, sour cream, diced avocado, chopped onions, or a dollop of Greek yogurt. It’s delicious on its own, over rice, or as a topping for baked potatoes or nachos.
Leftover chili can be stored in an airtight container in the refrigerator for up to 3 days. It can also be frozen for up to 3 months. To reheat, simply warm it in a saucepan over medium heat, stirring occasionally, or microwave it in a microwave-safe dish.
Nutritional Information
| Nutrient | Amount per Serving | % Daily Value |
|---|---|---|
| Calories | 346 kcal | N/A |
| Calories from Fat | 115 kcal | N/A |
| Total Fat | 12.9 g | 19% |
| Saturated Fat | 4.7 g | 23% |
| Cholesterol | 144.4 mg | 48% |
| Sodium | 284 mg | 11% |
| Total Carbohydrate | 10.3 g | 3% |
| Dietary Fiber | 2.8 g | 11% |
| Sugars | 5.2 g | N/A |
| Protein | 49.5 g | 98% |
Note: Nutritional information is an estimate and may vary based on specific ingredients and portion sizes.
Variations & Substitutions
- Vegetarian Chili: Substitute the beef with lentils, kidney beans, or black beans for a hearty vegetarian version.
- Spicy Chili: Add more chipotle chiles, a dash of cayenne pepper, or a few drops of hot sauce for extra heat.
- Sweet Chili: Add a tablespoon of molasses or honey for a sweeter flavor profile.
- Chicken Chili: Replace the beef with diced chicken thighs for a lighter option.
- White Bean Chili: Use great northern beans or cannellini beans for a creamy white chili.
- Smoked Paprika: Add 1 teaspoon of smoked paprika alongside the other spices for a smoky flavor.
FAQs (Frequently Asked Questions)
Q: Can I make this chili in a slow cooker?
A: Yes! Brown the beef and sauté the vegetables as directed, then transfer everything to a slow cooker. Cook on low for 6-8 hours, or on high for 3-4 hours. Add the corn muffin mix slurry during the last 30 minutes of cooking.
Q: Can I use ground beef instead of chuck roast?
A: Absolutely. Brown the ground beef in the Dutch oven and drain off any excess fat before adding the other ingredients.
Q: How can I make this chili less spicy?
A: Remove the seeds and membranes from the jalapeno before chopping it, or omit it altogether. You can also reduce the amount of chipotle chiles.
Q: Can I freeze this chili?
A: Yes, chili freezes well. Allow it to cool completely before transferring it to freezer-safe containers or bags. Thaw overnight in the refrigerator before reheating.
Q: Why is it important to brown the beef before simmering?
A: Browning the beef creates a Maillard reaction, which develops deep, savory flavors that enhance the overall taste of the chili. It also adds color and texture to the dish.
Final Thoughts
This Chili Con Carne recipe is more than just a dish; it’s an experience. It’s about gathering around the table with loved ones, sharing stories, and enjoying a comforting meal that nourishes both body and soul. I encourage you to try this recipe and make it your own, adjusting the spices and toppings to suit your personal preferences. And don’t forget to share your creations and feedback – I’d love to hear how it turns out! Perhaps pair it with some homemade cornbread and a crisp salad for the perfect cozy night in.