
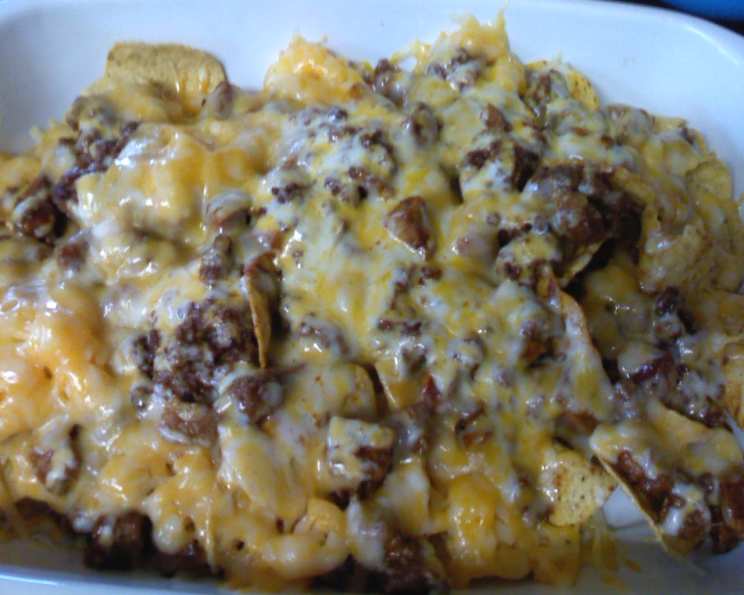
Chili Dog Nachos: A Culinary Collision of Comfort
I still remember the smoky aroma wafting from the concession stand at my first baseball game. It was a cacophony of grilled onions, sizzling hot dogs, and, of course, the unmistakable tang of chili. That memory, coupled with my unyielding love for nachos, sparked an idea – a culinary collision of comfort food: Chili Dog Nachos. It’s the perfect dish for game days, casual get-togethers, or simply satisfying a craving for something bold and delicious.
Recipe Overview
- Prep Time: 10 minutes
- Cook Time: 15 minutes
- Total Time: 25 minutes
- Servings: 4-5
- Yield: 1 platter
- Dietary Type: Not specified (Can be adapted to gluten-free or dairy-free)
Ingredients
- 1 tablespoon vegetable oil
- 1 lb ground beef
- Salt and pepper to taste
- 2-3 hot dogs, sliced into 1/2-inch pieces (bratwurst or Italian sausage work well too)
- 1 small onion, chopped
- 2 teaspoons Worcestershire sauce
- 2 tablespoons chili powder
- 2 teaspoons ground cumin
- 1 (8 ounce) can tomato sauce
- Yellow corn tortilla chips
- 1 (10 ounce) bag shredded yellow cheddar cheese
- Sour cream (optional)
- Salsa (optional)
- Chopped green onion (optional)
Equipment Needed
- Medium skillet
- Wooden spoon
- Platter or casserole dish
Instructions
-
Begin by heating a medium skillet over high heat. This initial high heat is crucial for achieving a good sear on the beef, which will contribute to a richer flavor in the final dish.
-
Add the vegetable oil to the hot skillet. Immediately add the ground beef and begin to brown and crumble it with a wooden spoon. This should take approximately 2 minutes. Use the wooden spoon to break up the beef into smaller pieces as it cooks.
-
Season the ground beef generously with salt and pepper. Adjust the amount to your personal preference. Then, add the sliced hot dogs to the skillet and continue browning for another 3 minutes. The hot dogs will impart a distinct smoky flavor.
-
Introduce the chopped onion to the skillet. Cook for an additional 3 to 5 minutes, or until the onion becomes softened and translucent. During this stage, the onions will release their natural sugars, adding a touch of sweetness to complement the savory flavors.
-
Incorporate the seasonings: Add the Worcestershire sauce, chili powder, and ground cumin to the skillet. Stir well to ensure that the seasonings are evenly distributed and coat the meat mixture. Continue cooking for another 3 to 5 minutes, allowing the spices to bloom and release their aromatic oils.
-
Pour in the tomato sauce and stir to combine. Reduce the heat to low and let the mixture simmer for 5 minutes more. This simmering process allows the flavors to meld together and the sauce to thicken slightly, creating a cohesive and flavorful chili dog topping.
-
While the chili dog topping is simmering, preheat your broiler. Broiling is a quick and efficient way to melt the cheese and create a bubbly, golden-brown topping.
-
Arrange the corn tortilla chips on a platter or in a casserole dish. Ensure that the chips are spread in a single layer for even coverage.
-
Spoon the cooked chili dog topping evenly over the corn chips. Distribute the topping generously, making sure that each chip is adequately covered.
-
Cover the chili dog sauce completely with the shredded yellow cheddar cheese. The amount of cheese can be adjusted to your liking, but a generous layer will create a satisfyingly cheesy and gooey topping.
-
Place the platter or casserole dish under the hot broiler and melt the cheese for approximately 2 minutes, or until it is melted and bubbly. Keep a close watch to prevent the cheese from burning.
-
Remove the chili dog nachos from the broiler and garnish with sour cream, salsa, and chopped green onions, if desired. These toppings add a refreshing coolness and vibrant flavors to balance the richness of the chili and cheese.
Expert Tips & Tricks
- Spice it up: For an extra kick, add a pinch of cayenne pepper or a dash of hot sauce to the chili dog topping.
- Meat Matters: Experiment with different types of meat. Ground turkey or even plant-based crumbles can be used as a substitute for ground beef. Similarly, try different types of sausages like chorizo or kielbasa for a unique flavor profile.
- Make-Ahead Prep: The chili dog topping can be made ahead of time and stored in the refrigerator for up to 3 days. This is a great way to save time when preparing for a party or gathering.
- Cheese Variations: Feel free to experiment with different types of cheese. Monterey Jack, pepper jack, or a Mexican cheese blend would all be delicious alternatives to cheddar.
- Broiler Safety: Keep a very close eye on the nachos while broiling, as they can burn quickly.
Serving & Storage Suggestions
Serve the Chili Dog Nachos immediately while they are hot and the cheese is melted and bubbly. These nachos are best enjoyed fresh, but leftovers can be stored in an airtight container in the refrigerator for up to 2 days. To reheat, bake in a preheated oven at 350°F (175°C) until heated through and the cheese is melted. You can also microwave them in short intervals, but the chips may become slightly soggy. These are not suitable for freezing.
Nutritional Information
| Nutrient | Amount per Serving | % Daily Value |
|---|---|---|
| Calories | 677 kcal | N/A |
| Calories from Fat | 464 g | 69% |
| Total Fat | 51.6 g | 79% |
| Saturated Fat | 24.8 g | 124% |
| Cholesterol | 163.5 mg | 54% |
| Sodium | 1138.8 mg | 47% |
| Total Carbohydrate | 10.9 g | 3% |
| Dietary Fiber | 2.5 g | 9% |
| Sugars | 4.9 g | 19% |
| Protein | 42.8 g | 85% |
Note: Nutritional information is an estimate and may vary based on specific ingredients and portion sizes.
Variations & Substitutions
- Vegetarian Chili Dog Nachos: Substitute the ground beef with plant-based crumbles and use vegetarian hot dogs.
- Gluten-Free: Ensure that the tortilla chips are certified gluten-free.
- Dairy-Free: Use dairy-free cheese shreds and sour cream alternatives.
- Spicy Southwestern: Add diced jalapeños or green chilies to the chili dog topping for an extra kick.
- Italian Inspired: Use Italian sausage instead of hot dogs and add a sprinkle of oregano and basil to the chili dog topping. Top with mozzarella cheese and a drizzle of pesto after broiling.
FAQs (Frequently Asked Questions)
Q: Can I use pre-shredded cheese, or is it better to shred my own?
A: While pre-shredded cheese is convenient, freshly shredded cheese melts more smoothly because it lacks the anti-caking agents found in pre-shredded varieties.
Q: Can I bake these nachos instead of broiling them?
A: Yes, you can bake them in a preheated oven at 350°F (175°C) for about 10-15 minutes, or until the cheese is melted and bubbly.
Q: What type of tortilla chips works best for nachos?
A: Sturdy yellow corn tortilla chips are ideal, as they hold up well to the toppings without becoming soggy. Look for thicker chips designed for dipping.
Q: Can I add beans to the chili dog topping?
A: Absolutely! Kidney beans, black beans, or pinto beans would all be delicious additions, adding both flavor and texture.
Q: How can I prevent the chips at the bottom from becoming soggy?
A: Spread the chips in a single layer and avoid over-saucing them. You can also place a layer of parchment paper between the chips and the platter to absorb excess moisture.
Final Thoughts
Chili Dog Nachos are more than just a snack; they are a celebration of flavors and textures that bring people together. This recipe is incredibly versatile, so feel free to experiment with different ingredients and toppings to create your own signature version. Don’t be afraid to get creative and have fun in the kitchen! I encourage you to give this recipe a try and share your creations and feedback. These nachos pair perfectly with a cold beer or a refreshing margarita for the ultimate game-day experience.