
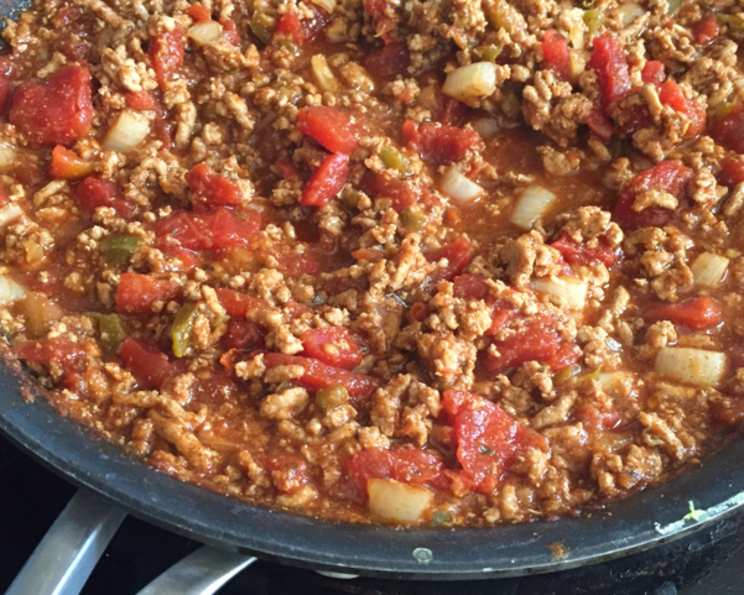
Chili – HCG P2: A Hearty and Flavorful Delight
The aroma of chili always transports me back to crisp autumn evenings spent tailgating before football games with friends. We’d gather around, bundled in scarves and jackets, sharing stories and laughter over steaming bowls of chili. It wasn’t just the food, but the feeling of warmth, community, and shared excitement that made those moments so special. While traditional chili might be off-limits on certain diets, I was determined to recreate that cozy experience without compromising my goals. This HCG P2-friendly version delivers the same satisfying warmth and robust flavor, proving that dietary restrictions don’t have to mean sacrificing deliciousness.
Recipe Overview
- Prep Time: 5 minutes
- Cook Time: 20 minutes
- Total Time: 25 minutes
- Servings: 4
- Yields: 4 cups
- Dietary Type: HCG Phase 2
Ingredients
- 3 tablespoons taco seasoning (see recipe posted by the same chef, or use a compliant, sugar-free version)
- 400 g (approx. 14 ounces) 96% lean ground beef, raw weight
- 28 ounces diced tomatoes, unsalted
- 1/4 cup water
Equipment Needed
- Large skillet or pot
- Spoon or spatula
Instructions
-
Begin by browning the ground beef in a large skillet or pot over medium-high heat. Since we’re using 96% lean beef, you may need to add a small amount of water or fat-free broth to prevent sticking. Use only a minimal amount – just enough to keep the meat from burning.
-
As the beef cooks, break it apart with a spoon or spatula until it’s fully crumbled. Continue cooking until the beef is browned through, with no pink remaining.
-
Once the beef is browned, drain off any excess liquid. This step is crucial for keeping the chili lean and compliant with the HCG P2 protocol.
-
Now, add the taco seasoning to the browned beef. Stir well to ensure the beef is evenly coated with the spices. This is where the chili flavor really starts to develop.
-
Pour in the 1/4 cup of water. This will help to distribute the taco seasoning and create a bit of liquid for simmering.
-
Next, add the diced tomatoes to the pot. Make sure they are unsalted to adhere to the HCG protocol.
-
Stir everything together thoroughly, ensuring all the ingredients are well combined.
-
Bring the mixture to a boil over medium-high heat. Once it’s boiling, reduce the heat to low, cover the pot, and simmer for approximately 20 minutes. Simmering allows the flavors to meld together beautifully, creating a richer, more complex chili.
-
After simmering, remove the pot from the heat. The chili is now ready to serve.
Expert Tips & Tricks
- Flavor Boost: If your taco seasoning is mild, consider adding a pinch of red pepper flakes for a little extra heat (ensure it’s compliant with your dietary restrictions).
- Meat Quality: Using high-quality, extra-lean ground beef is essential for both flavor and dietary compliance.
- Simmering is Key: Don’t rush the simmering process. Allowing the chili to simmer for the full 20 minutes (or even a bit longer) will significantly improve the flavor.
- Seasoning Adjustment: Taste the chili after simmering and adjust the taco seasoning if needed. Remember, you can always add more, but you can’t take it away!
Serving & Storage Suggestions
Serve this chili hot in a bowl. While many chili toppings are not allowed on the HCG P2 diet, you can enjoy it as is or perhaps add a small sprinkle of compliant herbs.
For storage, allow the chili to cool completely before transferring it to an airtight container. It can be stored in the refrigerator for up to 3 days. To reheat, simply microwave or heat on the stovetop until warmed through.
For longer storage, the chili can be frozen for up to 2 months. Thaw it in the refrigerator overnight before reheating.
Nutritional Information
| Nutrient | Amount per Serving | % Daily Value |
|---|---|---|
| Calories | 176.7 kcal | – |
| Calories from Fat | – | 27% |
| Total Fat | 5.4 g | 8% |
| Saturated Fat | 2.3 g | 11% |
| Cholesterol | 62 mg | 20% |
| Sodium | 236.8 mg | 9% |
| Total Carbohydrate | 8.9 g | 2% |
| Dietary Fiber | 2.8 g | 11% |
| Sugars | 5.6 g | – |
| Protein | 23.2 g | 46% |
Note: Nutritional information is an estimate and may vary based on specific ingredients and preparation methods.
Variations & Substitutions
- Taco Seasoning: Ensure your taco seasoning is free of sugar and other restricted ingredients if you are following the HCG P2 protocol. You can find compliant recipes online or create your own blend using spices like chili powder, cumin, paprika, oregano, garlic powder, and onion powder.
- Spicier Chili: For those who enjoy a spicier chili, add a pinch of red pepper flakes or a small amount of compliant hot sauce (check ingredients carefully) during the simmering process.
- Vegetarian Option: While this recipe is designed for use with lean ground beef, you may be able to adapt it to use a plant-based ground meat substitute as long as it’s very low in fat and carbohydrates and otherwise compliant with the HCG P2 diet. Be sure to check all ingredients carefully.
FAQs (Frequently Asked Questions)
Q: Can I add beans to this chili?
A: No, beans are not allowed on Phase 2 of the HCG diet. This recipe is specifically designed to be bean-free.
Q: What kind of tomatoes should I use?
A: Use diced tomatoes that are unsalted. Check the label carefully to ensure there are no added sugars or other prohibited ingredients.
Q: Can I use a different type of ground meat?
A: It’s best to stick with 96% lean ground beef to maintain the low-fat profile required for the HCG P2 diet.
Q: How long does this chili last in the refrigerator?
A: This chili will last for up to 3 days in the refrigerator, stored in an airtight container.
Q: Can I freeze this chili?
A: Yes, you can freeze this chili for up to 2 months. Thaw it in the refrigerator overnight before reheating.
Final Thoughts
This HCG P2-friendly chili proves that you don’t have to sacrifice flavor or comfort while adhering to dietary guidelines. It’s a satisfying and delicious way to enjoy a classic dish without compromising your goals. So, gather your ingredients, follow the simple steps, and get ready to enjoy a hearty bowl of chili. I encourage you to try this recipe and share your feedback. Bon appétit!