
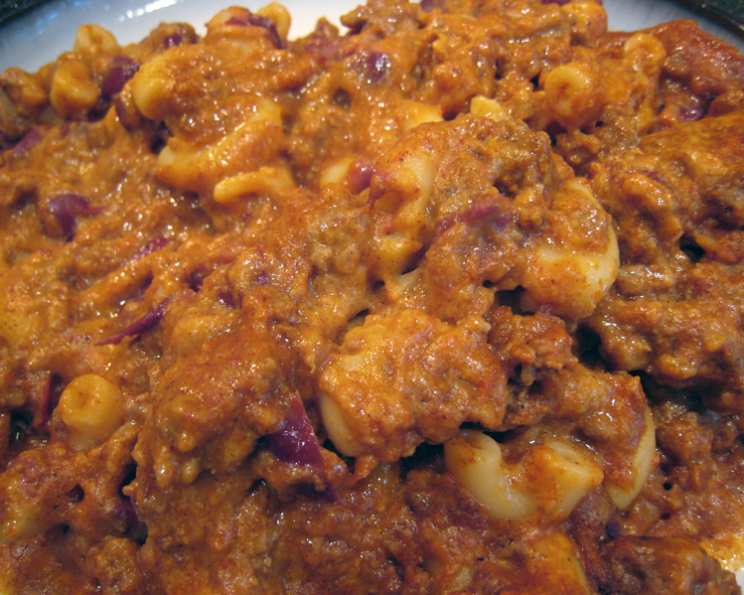
Chili Mac N Cheese: A Symphony of Comfort
The aroma alone transports me back to chilly autumn evenings, huddled around the kitchen table with my family. This wasn’t just any meal; it was the comfort food champion. My mom would always make a massive batch, enough for seconds, thirds, and maybe even a sneaky midnight snack. The combination of savory chili, creamy cheese sauce, and perfectly cooked macaroni was pure magic. It’s a dish that always brings a smile to my face, and I’m thrilled to share my take on it with you.
Recipe Overview
- Prep Time: 15 minutes
- Cook Time: 30 minutes
- Total Time: 45 minutes
- Servings: 8
- Dietary Type: Not specified (can be adapted to gluten-free)
Ingredients
- 1 lb lean ground beef
- 16 ounces kidney beans
- 16 ounces tomato sauce
- 1 (1 1/4 ounce) envelope McCormick chili seasoning mix (if you like it spicy, consider using two packets or the hot chili seasoning)
- 4 ounces elbow macaroni
- 1/4 cup (2 ounces) butter
- 1/4 cup flour
- 2 teaspoons dry mustard
- 1/2 teaspoon paprika
- 2 cups milk
- 2 cups cheddar cheese, shredded
Equipment Needed
- Large skillet
- Large saucepan
- 9×13 inch baking dish
- Colander
Instructions
-
Preheat your oven to 350°F (175°C). Prepare a 9×13 inch baking dish by lightly greasing it or spraying it with non-stick cooking spray. This will prevent the Chili Mac from sticking and ensure easy cleanup.
-
In a large skillet over medium-high heat, brown the lean ground beef. Use a spatula to break it up into crumbles as it cooks. Once the beef is fully cooked and no longer pink, drain off any excess fat. Removing the excess fat is crucial for achieving the desired texture and flavor in the finished dish.
-
Add the kidney beans, tomato sauce, and chili seasoning mix to the skillet with the browned ground beef. Mix well to ensure that the seasoning is evenly distributed throughout the mixture. The chili seasoning is the heart of this dish, so make sure it’s thoroughly incorporated.
-
Bring the chili mixture to a boil over medium-high heat. Once boiling, reduce the heat to low and simmer for 10 minutes, stirring occasionally. Simmering allows the flavors to meld together, creating a richer and more complex chili base.
-
While the chili is simmering, prepare the elbow macaroni. Cook the macaroni according to the package directions for al dente. Al dente means “to the tooth” in Italian, referring to pasta that is cooked but still firm. This prevents the macaroni from becoming mushy during baking. Once cooked, drain the macaroni thoroughly in a colander.
-
In a large saucepan over medium heat, melt the butter. Once the butter is melted, stir in the flour, dry mustard, and paprika. This creates a roux, which is the base for the cheese sauce.
-
Slowly add the milk to the roux, stirring constantly with a whisk. Continue stirring until the mixture is smooth and there are no lumps. Adding the milk gradually and whisking continuously is essential for a smooth, creamy sauce.
-
Cook the sauce over medium heat until it boils, stirring constantly. Once boiling, reduce the heat to low and simmer for 1 minute, continuing to stir. Simmering thickens the sauce and ensures that the flour is fully cooked, preventing a starchy taste.
-
Remove the saucepan from the heat and stir in the shredded cheddar cheese until it is completely melted and the sauce is smooth and creamy. Use a high-quality cheddar cheese that melts well for the best results.
-
Fold in the drained macaroni to the cheese sauce, ensuring that it is evenly coated. The cheese sauce should be thick enough to cling to the macaroni.
-
Add the macaroni and cheese mixture to the chili in the skillet and mix well. Ensure that the macaroni and cheese are evenly distributed throughout the chili.
-
Pour the combined chili and macaroni mixture into the prepared 9×13 inch baking dish. Spread it out evenly in the dish.
-
Bake in the preheated oven at 350°F (175°C) for 20-25 minutes, or until the Chili Mac N Cheese is heated through and bubbly. The top should be lightly golden brown.
-
Let rest for 5 minutes before serving. This allows the Chili Mac N Cheese to set slightly and makes it easier to serve.
Expert Tips & Tricks
- For a richer flavor, use a blend of cheeses in the cheese sauce. Try adding some Monterey Jack or Gruyere along with the cheddar.
- If you want a creamier cheese sauce, add a tablespoon of cream cheese or sour cream at the end.
- To prevent the macaroni from sticking together while cooking, add a teaspoon of olive oil to the boiling water.
- If you’re short on time, you can use canned chili instead of making it from scratch. Just be sure to drain off any excess liquid.
- For an extra layer of flavor and texture, sprinkle some crushed tortilla chips or breadcrumbs over the top before baking.
Serving & Storage Suggestions
Serve the Chili Mac N Cheese hot, straight from the oven. It’s delicious on its own, but you can also serve it with a side of cornbread, a dollop of sour cream, or a sprinkle of chopped green onions.
Leftovers can be stored in an airtight container in the refrigerator for up to 3 days. To reheat, microwave individual portions or bake the entire dish in a preheated oven at 350°F (175°C) until heated through. You can also freeze individual portions for up to 2 months. Thaw overnight in the refrigerator before reheating.
Nutritional Information
| Nutrient | Amount per Serving | % Daily Value |
|---|---|---|
| Calories | 442.8 kcal | N/A |
| Calories from Fat | 216 g | 49% |
| Total Fat | 24 g | 36% |
| Saturated Fat | 13.4 g | 67% |
| Cholesterol | 90.3 mg | 30% |
| Sodium | 751.8 mg | 31% |
| Total Carbohydrate | 30.3 g | 10% |
| Dietary Fiber | 4 g | 16% |
| Sugars | 4 g | N/A |
| Protein | 26.8 g | 53% |
Variations & Substitutions
- Gluten-Free: Use gluten-free macaroni and ensure that the chili seasoning mix is also gluten-free. You may also need to use a gluten-free flour blend for the roux.
- Spicier: Add a pinch of cayenne pepper or a dash of hot sauce to the chili mixture for an extra kick. You can also use the “hot” version of the chili seasoning mix.
- Vegetarian: Substitute the ground beef with plant-based ground meat or an extra can of kidney beans.
- Different Cheeses: Experiment with different types of cheese in the cheese sauce. Pepper jack, Colby jack, or even a sharp provolone can add unique flavors.
- Add Vegetables: Incorporate chopped vegetables like bell peppers, onions, or corn into the chili mixture for added nutrients and flavor.
FAQs (Frequently Asked Questions)
Q: Can I make this ahead of time?
A: Yes, you can assemble the Chili Mac N Cheese in the baking dish ahead of time and store it in the refrigerator for up to 24 hours. Add a few minutes to the baking time to ensure it’s heated through.
Q: Can I use a different type of bean?
A: Absolutely! Pinto beans, black beans, or even a mixture of beans would work well in this recipe.
Q: How do I prevent the cheese sauce from being grainy?
A: Use freshly grated cheese, as pre-shredded cheese often contains cellulose that can prevent it from melting smoothly. Also, don’t overheat the cheese sauce, as this can cause the cheese to separate.
Q: Can I freeze Chili Mac N Cheese?
A: Yes, you can freeze individual portions of Chili Mac N Cheese for up to 2 months. Thaw overnight in the refrigerator before reheating.
Q: I don’t have dry mustard. Can I use regular mustard?
A: Yes, you can substitute 1 tablespoon of prepared yellow mustard for the 2 teaspoons of dry mustard.
Final Thoughts
This Chili Mac N Cheese is more than just a recipe; it’s a hug in a bowl. It’s a crowd-pleaser, a family favorite, and a guaranteed way to warm up on a chilly evening. I encourage you to try this recipe and make it your own. Feel free to experiment with different variations and substitutions to suit your tastes. And most importantly, enjoy the process and share the love with those around you. Bon appétit!