
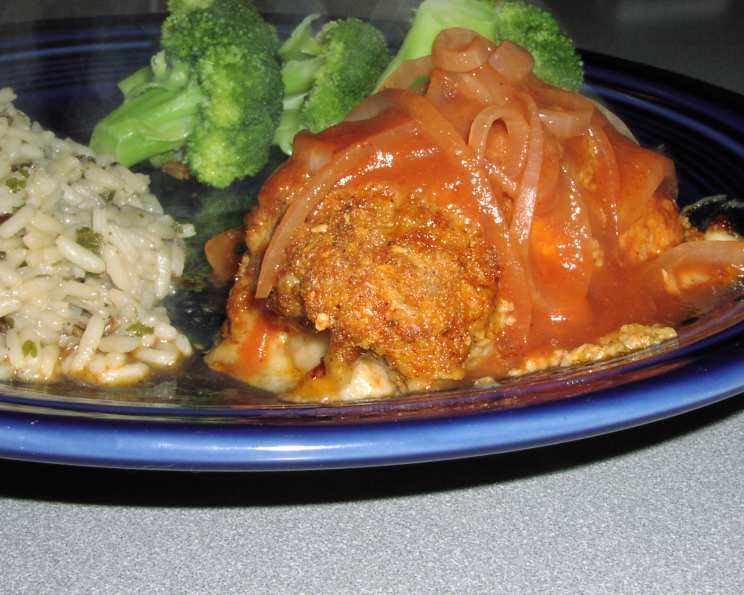
Chili Pheasant: A Southwestern Culinary Adventure
The first time I tasted Chili Pheasant, it was a revelation. My Aunt Millie, a true Texan through and through, served it at a family gathering one sweltering summer. The aroma alone—smoky chilies mingling with the delicate scent of pheasant—was enough to make my mouth water. But the taste! Tender pheasant, oozing with melted Monterey Jack and a hint of green chile heat, all bathed in a rich, savory tomato sauce. It was a symphony of flavors that transported me to the heart of the Southwest, and I’ve been making it ever since. This recipe is a slightly tweaked version of hers, and it’s just as good as I remember!
Recipe Overview
- Prep Time: 30 minutes
- Cook Time: 20-30 minutes
- Total Time: 50-60 minutes
- Servings: 8
- Yield: 8 rolls
- Dietary Type: Gluten-Free (if using gluten-free breadcrumbs)
Ingredients
- 8 pheasant breasts, boned
- 1 (10 1/2 ounce) can green chilies, chopped
- 8 ounces Monterey Jack cheese, cut into 8 strips
- 1/4 cup breadcrumbs
- 1/4 cup Parmesan cheese
- 1 tablespoon chili powder
- 1/2 teaspoon salt
- 1/4 teaspoon cumin
- 10 tablespoons butter, melted
- 1 (15 ounce) can tomato sauce
- 1/2 teaspoon cumin
- 1/3 cup onion, sliced
- Hot pepper sauce, to taste (optional)
Equipment Needed
- Baking dish
- Toothpicks
- Small saucepan
- Rolling pin or meat mallet
- Mixing bowl
Instructions
-
Begin by preparing the pheasant breasts. Place each breast between two sheets of plastic wrap. Using a rolling pin or meat mallet, flatten the breasts to about 1/4-inch thickness. This will make them easier to roll and ensures even cooking.
-
Now, it’s time to add the filling. On each flattened pheasant breast, place about 1 tablespoon of the chopped green chilies and one strip of Monterey Jack cheese.
-
Carefully roll each breast to enclose the filling. Ensure the cheese and chilies are fully contained. Use a toothpick to secure the roll, preventing it from unravelling during cooking.
-
In a mixing bowl, combine the breadcrumbs, Parmesan cheese, chili powder, salt, pepper (if using, a dash of hot pepper sauce can be added here), and 1/4 teaspoon of cumin. Mix these ingredients thoroughly to create a flavorful coating.
-
Dip each pheasant roll into the melted butter, ensuring it is well coated. Then, immediately dredge the buttered roll in the breadcrumb mixture, pressing gently to help the crumbs adhere.
-
Place the coated pheasant rolls in a baking dish. At this point, you can chill the rolls in the refrigerator for at least 4 hours, or even overnight. This allows the flavors to meld and helps the rolls hold their shape during baking.
-
Before baking, drizzle any remaining melted butter over the pheasant rolls. This will help them brown beautifully in the oven.
-
Bake in a preheated oven at 400 degrees F (200 degrees C) for 20 to 30 minutes, or until the pheasant rolls are golden brown and cooked through. The internal temperature should reach 165 degrees F (74 degrees C).
-
While the pheasant rolls are baking, prepare the tomato sauce. In a small saucepan, combine the tomato sauce, the remaining 1/2 teaspoon of cumin, and the sliced onion. Add hot pepper sauce to your preferred level of spiciness.
-
Cook the tomato sauce over medium heat until it is heated through and the onions are softened, about 5-7 minutes. Stir frequently to prevent sticking.
-
Once the pheasant rolls are cooked, remove them from the oven.
-
Spoon the warm tomato sauce generously over the pheasant rolls in the baking dish.
-
Serve immediately and enjoy!
Expert Tips & Tricks
- Don’t overcook the pheasant. It can dry out easily. Use a meat thermometer to ensure it reaches 165°F (74°C) internal temperature, but pull it out of the oven as soon as it hits that mark.
- Spice it up! If you like a lot of heat, use a hotter variety of green chilies, or add a pinch of cayenne pepper to the breadcrumb mixture.
- Make ahead: These rolls can be assembled a day in advance and stored, covered, in the refrigerator until ready to bake. Just add a few extra minutes to the cooking time if baking straight from the fridge.
- Prevent cheese leakage: Ensure the pheasant breasts are well sealed around the cheese and green chilies to avoid melty messes during baking. A good, tight roll and properly secured toothpicks are key.
Serving & Storage Suggestions
Serve the Chili Pheasant hot, right out of the oven, with a generous spoonful of the tomato sauce. It pairs beautifully with sides like Spanish rice, black beans, or a simple green salad.
Leftovers can be stored in an airtight container in the refrigerator for up to 3 days. To reheat, gently warm in a preheated oven at 350°F (175°C) until heated through, or microwave on low power in short intervals. The sauce will help keep it moist during reheating. The cooked pheasant can also be frozen in an airtight container for up to 2 months. Thaw overnight in the refrigerator before reheating.
Nutritional Information
| Nutrient | Amount per Serving | % Daily Value |
|---|---|---|
| Calories | 351 kcal | 18% |
| Total Fat | 19.9 g | 31% |
| Saturated Fat | 7.4 g | 37% |
| Cholesterol | 127 mg | 42% |
| Sodium | 219 mg | 9% |
| Total Carbohydrate | 2.3 g | 1% |
| Dietary Fiber | 0.4 g | 2% |
| Sugars | 1.0 g | 0% |
| Protein | 38.5 g | 77% |
Nutritional information is an estimate and may vary based on specific ingredients and portion sizes.
Variations & Substitutions
- Gluten-Free: Use gluten-free breadcrumbs to make this dish suitable for those with gluten sensitivities.
- Cheese Alternatives: Substitute the Monterey Jack cheese with pepper jack for extra heat, or use a dairy-free cheese alternative for a dairy-free version.
- Vegetarian Option: Although this is a Chili Pheasant recipe, you could adapt the chili flavors for a vegetarian version using stuffed bell peppers.
- Sauce Variation: Use salsa instead of tomato sauce for a chunkier, spicier sauce.
- Different Protein: If pheasant isn’t available, chicken breasts can be used as a substitute.
FAQs (Frequently Asked Questions)
Q: Can I use pre-shredded cheese instead of cutting my own strips?
A: Yes, pre-shredded cheese can be used, but strips of cheese melt more evenly and prevent cheese from leaking out during cooking.
Q: How can I prevent the pheasant from drying out?
A: Flattening the pheasant ensures quick and even cooking, but be careful not to overcook it. Using a meat thermometer and basting with the melted butter also help.
Q: Can I use dried chilies instead of canned green chilies?
A: Yes, but you will need to rehydrate the dried chilies first. Soak them in hot water for about 30 minutes, then chop them finely before using.
Q: What if I don’t have Parmesan cheese?
A: Pecorino Romano or Asiago cheese are good substitutes. You could also omit the Parmesan cheese altogether; the breadcrumbs will still provide texture.
Q: Can I add other vegetables to the tomato sauce?
A: Absolutely! Diced bell peppers, zucchini, or carrots would all be delicious additions.
Final Thoughts
Chili Pheasant is more than just a recipe; it’s a flavor-packed journey to the heart of Southwestern cuisine. The combination of tender pheasant, melted cheese, and the smoky, spicy tomato sauce is simply irresistible. Don’t be intimidated by the ingredient list – it’s a surprisingly easy dish to prepare, and the results are well worth the effort. So gather your ingredients, preheat your oven, and prepare to be transported to the sun-drenched landscapes of the Southwest. I’d love to hear what you think – share your culinary adventures! This dish pairs wonderfully with a crisp Sauvignon Blanc or a cold Mexican beer. Enjoy!