
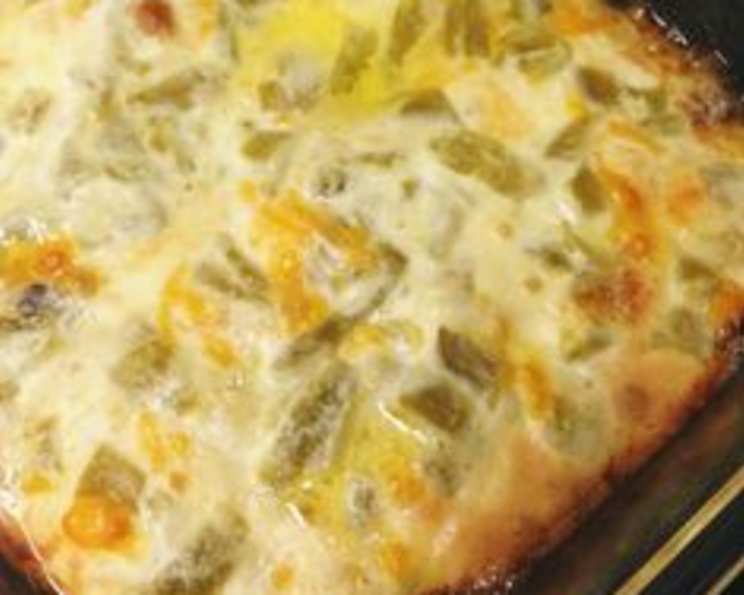
Chili Relleno Casserole: A Southwestern Comfort Food Classic
I’ll never forget the first time I tasted a truly exceptional chili relleno. It was at a small family-run restaurant in Santa Fe, New Mexico. The aroma of roasted chiles hung heavy in the air, mingling with the warm scent of melting cheese. The combination of the slight heat of the peppers, the creamy cheese, and the light, airy batter was simply divine. I knew right then I had to find a way to capture those flavors in my own kitchen. This Chili Relleno Casserole is my attempt to recreate that unforgettable experience – an easy, crowd-pleasing dish that brings a little bit of Southwestern sunshine to any table.
Recipe Overview
- Prep Time: 20 minutes
- Cook Time: 25 minutes
- Total Time: 45 minutes
- Servings: 8
- Yield: 1 casserole
- Dietary Type: Gluten-Free
Ingredients
- 6 large eggs
- 1 lb Monterey Jack cheese, grated
- 1 lb Colby cheese, grated
- 8 ounces whole green chilies, canned
Equipment Needed
- 9×13-inch casserole dish
- Mixer (hand or stand)
- Two large mixing bowls
- Cheese grater
- Rubber spatula
Instructions
-
Begin by preheating your oven to 350°F (175°C). Prepare your 9×13-inch casserole dish by lightly greasing it. This will prevent the casserole from sticking and make serving easier.
-
Next, separate the egg whites from the egg yolks, placing them into two separate large mixing bowls. Be careful not to get any yolk into the whites.
-
Using a mixer (hand or stand), whip the egg whites until stiff peaks form. This is a crucial step as the whipped egg whites provide the structure and lightness of the casserole. The peaks should hold their shape when the beaters are lifted. Don’t overwhip, or they will become dry.
-
In the other mixing bowl, beat the egg yolks until they are smooth and light in color. This ensures they are fully incorporated into the whites later.
-
Gently fold the egg yolks into the whipped egg whites. It’s important to be gentle during this step to avoid deflating the whites. Use a rubber spatula and fold in one direction, lifting the mixture from the bottom and folding it over the top. Season the mixture with salt and pepper to taste.
-
Grate both the Monterey Jack cheese and the Colby cheese and combine them in a separate bowl. Mix them well to ensure an even distribution of flavors.
-
Now it’s time to assemble the casserole. Start by spreading a small amount of the egg mixture evenly in the bottom of the greased casserole dish. This will create a base layer to hold the other ingredients.
-
Split open the green chilies lengthwise and remove the seeds, if desired. Layer the green chilies on top of the egg mixture in the dish, covering the base. The chilies provide the signature flavor of the chili relleno.
-
Sprinkle a generous amount of the grated cheese mixture on top of the green chilies. Distribute it evenly to ensure every bite is cheesy and delicious.
-
Spread some more of the egg mixture on top of the cheese. This layer will help bind the cheese and chilies together.
-
Repeat the layers of green chilies, cheese mixture, and egg mixture until all of the ingredients are used, finishing with a layer of the egg mixture on top. This final layer will create a golden-brown crust.
-
Bake in the preheated oven for 25 minutes, or until the casserole is golden brown and set. A toothpick inserted into the center should come out clean.
-
Let the casserole cool slightly before cutting and serving. This allows the cheese to set and the flavors to meld together.
Expert Tips & Tricks
- Whipping the Egg Whites: Ensuring stiff peaks in your egg whites is key to the fluffy texture. A clean, dry bowl is essential. Avoid any trace of grease or yolk, as these can prevent the whites from whipping properly.
- Cheese Selection: While Monterey Jack and Colby are classic choices, feel free to experiment with other cheeses. Pepper Jack adds a spicy kick, while cheddar provides a sharper flavor.
- Chile Prep: If you prefer a milder flavor, rinse the canned green chilies before using them. Roasting fresh Anaheim peppers and using those will take this casserole to a new level of deliciousness! Just blister the skins under the broiler, then steam them in a sealed bag to loosen the skins before peeling, seeding, and chopping.
- Make-Ahead Option: The casserole can be assembled ahead of time and stored in the refrigerator for up to 24 hours before baking. This is a great option for busy weeknights or when entertaining guests.
- Preventing a Soggy Bottom: Ensure the casserole dish is well-greased to prevent sticking. You can also line the bottom of the dish with parchment paper for easier removal.
Serving & Storage Suggestions
Serve the Chili Relleno Casserole warm, either on its own or as a side dish. It pairs perfectly with a dollop of sour cream, a sprinkle of fresh cilantro, or a side of salsa. For a complete meal, serve alongside Mexican rice and refried beans.
Leftovers can be stored in an airtight container in the refrigerator for up to 3 days. To reheat, simply microwave individual portions or bake the entire casserole in a preheated oven at 350°F (175°C) until heated through. You can also freeze the casserole for longer storage. Wrap tightly in plastic wrap and then in foil. Thaw overnight in the refrigerator before reheating.
Nutritional Information
| Nutrient | Amount per Serving | % Daily Value |
|---|---|---|
| Calories | 425 kcal | 21% |
| Total Fat | 30g | 46% |
| Saturated Fat | 18g | 90% |
| Cholesterol | 200mg | 67% |
| Sodium | 600mg | 25% |
| Total Carbohydrate | 5g | 2% |
| Dietary Fiber | 1g | 4% |
| Sugars | 3g | – |
| Protein | 30g | 60% |
Variations & Substitutions
- Spicy Version: Add a pinch of cayenne pepper or a dash of hot sauce to the egg mixture for a spicier kick. You can also use pepper jack cheese.
- Vegetarian Version: This recipe is already vegetarian-friendly.
- Dairy-Free Version: Substitute the Monterey Jack and Colby cheese with your favorite dairy-free cheese alternative.
- Meat Lover’s Version: Add cooked and crumbled chorizo, ground beef, or shredded chicken to the layers for a heartier casserole.
- Different Chilies: Use different types of chilies for varying levels of heat and flavor. Anaheim, poblano, or even jalapeño peppers can be used.
FAQs (Frequently Asked Questions)
Q: Can I use pre-shredded cheese?
A: While pre-shredded cheese is convenient, freshly grated cheese melts more smoothly and evenly. If using pre-shredded, toss it with a little cornstarch to help prevent clumping.
Q: How can I prevent the casserole from being watery?
A: Make sure to drain the green chilies well before adding them to the casserole. Also, avoid overmixing the egg mixture, as this can cause it to become watery.
Q: Can I add vegetables to the casserole?
A: Absolutely! Consider adding diced onions, bell peppers, or corn to the layers for added flavor and texture.
Q: How do I know when the casserole is done?
A: The casserole is done when it is golden brown and set. A toothpick inserted into the center should come out clean.
Q: Can I make this in a smaller dish?
A: Yes, you can halve the recipe and bake it in an 8×8-inch baking dish. Reduce the baking time accordingly.
Final Thoughts
This Chili Relleno Casserole is a testament to the fact that simple ingredients, when combined with care and a little culinary know-how, can create something truly extraordinary. Don’t be afraid to experiment with variations and make it your own. Whether you’re looking for a comforting weeknight meal or a crowd-pleasing dish to share with friends and family, this casserole is sure to be a hit. I encourage you to try this recipe and share your experience. Pair it with a refreshing margarita and some good company for a truly memorable meal!