
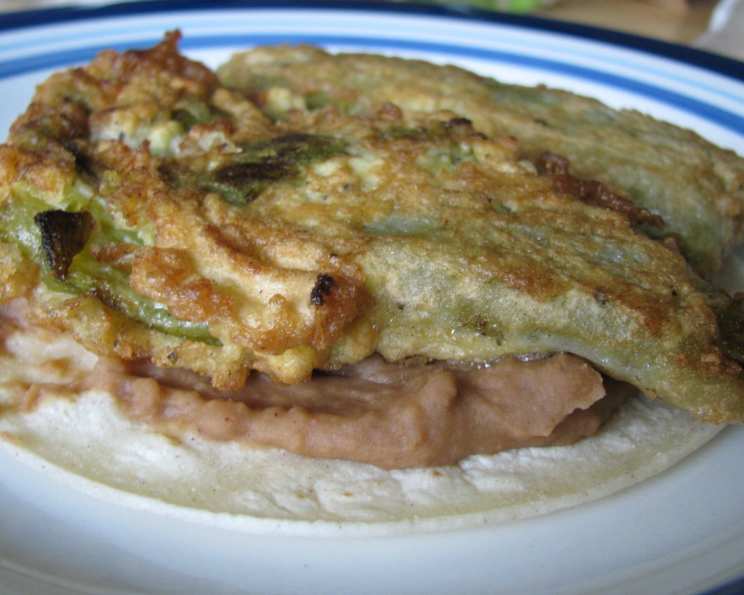
Chili Rellenos: A Taste of Tradition
The first time I tasted a truly exceptional chili relleno, it was at a small family-run restaurant in Oaxaca, Mexico. The aroma alone – a blend of roasted peppers, melting cheese, and gently fried batter – was intoxicating. But the moment I took that first bite, the combination of textures and flavors transported me. The slight char of the pepper, the gooey richness of the cheese, and the light, airy coating created a symphony on my palate I’ve been chasing ever since. I’ve spent years perfecting my own version, hoping to capture just a bit of that magic.
Recipe Overview
- Prep Time: 20 minutes
- Cook Time: 15 minutes
- Total Time: 35 minutes
- Servings: 4
- Yield: 8 pieces
- Dietary Type: Vegetarian
Ingredients
- 20 ounces whole green chilies, (2 small cans)
- ½ lb Monterey Jack cheese, (Pepper Jack for more heat). Sliced to fit in chilies
- 1 cup flour
- 3 eggs, separated (yolks from whites)
- 3 tablespoons flour
- Oil (I use peanut oil) for frying
- Salt and pepper to taste
Equipment Needed
- Large skillet or deep fryer
- Mixing bowls
- Whisk
- Slotted spoon or spider
- Plate lined with paper towels
Instructions
-
Begin by draining the canned green chilies thoroughly. Gently make a slit lengthwise in each chili, being careful not to tear it completely open.
-
Slice the Monterey Jack cheese into strips that will easily fit inside the chilies. For a bit of a kick, consider using Pepper Jack instead. Carefully stuff each chili with a slice or two of cheese, ensuring it’s well-filled but not overflowing.
-
On a plate, spread out one cup of flour. Lightly dredge each stuffed chili in the flour, coating it completely. This helps the egg batter adhere properly. Season the flour with salt and pepper to taste before dredging. Set the floured chilies aside on a clean plate.
-
Now, prepare the egg batter. In a clean, dry mixing bowl, separate the eggs. Place the egg whites in one bowl and the yolks in another.
-
Using a whisk or electric mixer, beat the egg whites until they form stiff peaks. This is crucial for achieving a light and airy coating. The peaks should hold their shape when the whisk is lifted. Set the beaten egg whites aside.
-
In the bowl with the egg yolks, add 3 tablespoons of flour. Mix well until the mixture is smooth and thick. It will appear quite dense.
-
Gently incorporate the egg whites into the yolk mixture. Start by adding a spoonful of the whites and gently folding it in to loosen the yolk mixture. Then, continue folding in the remaining whites, a little at a time, until everything is just combined. Be careful not to overmix, as this will deflate the whites and result in a flat batter.
-
Heat the oil in a large skillet or deep fryer to approximately 350°F (175°C). You can test the temperature by dropping a small piece of batter into the oil; it should sizzle and turn golden brown within seconds.
-
Working one at a time, dip each floured chili relleno into the egg batter, ensuring it’s completely coated on all sides.
-
Carefully place the battered chili relleno into the hot oil. Avoid overcrowding the pan, as this will lower the oil temperature and result in soggy rellenos.
-
Fry the chili rellenos for about 2 minutes on each side, or until they are golden brown and crispy.
-
Use a slotted spoon or spider to remove the fried chili rellenos from the oil and place them on a plate lined with paper towels to drain excess oil.
-
Serve immediately while hot and the cheese is melted and gooey.
Expert Tips & Tricks
- Stabilize your egg whites: A pinch of cream of tartar added to the egg whites before beating can help stabilize them and create even stiffer peaks.
- Cheese selection: Feel free to experiment with different cheeses. Oaxaca cheese is a classic choice that melts beautifully, or you could use a blend of cheeses for added flavor complexity.
- Roasting your own chilies: For an even deeper flavor, roast your own poblano peppers instead of using canned chilies. Roast them until the skin is blackened, then place them in a sealed bag to steam. The skin will then peel off easily.
- Make-ahead tip: You can stuff and flour the chilies ahead of time and store them in the refrigerator until you’re ready to fry them. This will save time on the day of serving.
- Prevent soggy rellenos: Ensure the oil is hot enough before frying, and don’t overcrowd the pan. Overcrowding lowers the oil temperature and can result in soggy rellenos.
Serving & Storage Suggestions
Chili rellenos are best served immediately while the batter is crispy and the cheese is molten. They are traditionally served with a generous spoonful of salsa on top, alongside refried beans and warm flour tortillas. They also pair well with Mexican rice or a fresh salad.
Leftover chili rellenos can be stored in the refrigerator for up to 3 days. To reheat, bake them in a preheated oven at 350°F (175°C) until heated through and the batter is crispy again. You can also reheat them in a skillet with a little oil, turning occasionally until heated through. Microwaving is not recommended, as it can make the batter soggy. Freezing is not recommended as it will alter the texture of the pepper and batter.
Nutritional Information
| Nutrient | Amount per Serving | % Daily Value |
|---|---|---|
| Calories | 458 kcal | 23% |
| Total Fat | 21.5g | 33% |
| Saturated Fat | 12.1g | 60% |
| Cholesterol | 190mg | 63% |
| Sodium | 369mg | 15% |
| Total Carbohydrate | 42.4g | 14% |
| Dietary Fiber | 3.1g | 12% |
| Sugars | 7.8g | 31% |
| Protein | 25.3g | 50% |
Variations & Substitutions
- Vegan Chili Rellenos: Use vegan cheese and a batter made from chickpea flour and aquafaba (the liquid from canned chickpeas) to create a delicious vegan version.
- Gluten-Free Chili Rellenos: Use a gluten-free flour blend for dredging and for the batter.
- Spicy Chili Rellenos: Use a spicier cheese like habanero jack, or add a pinch of cayenne pepper to the batter.
- Different Peppers: While poblano peppers are traditional, you can also use Anaheim peppers or even jalapeños for a spicier kick.
- Sauce Variations: Experiment with different sauces. Try a creamy chipotle sauce, a tangy tomatillo salsa, or a rich mole sauce.
FAQs (Frequently Asked Questions)
Q: Can I use pre-shredded cheese instead of slicing it myself?
A: While you can use pre-shredded cheese, freshly sliced cheese tends to melt more smoothly and evenly inside the chili.
Q: How do I prevent the cheese from leaking out during frying?
A: Make sure the chili is well-sealed after stuffing it with cheese and that the batter completely covers the chili before frying.
Q: Can I bake the chili rellenos instead of frying them?
A: Baking will not achieve the same crispy texture as frying, but it is a healthier option. Bake at 375°F (190°C) for about 20-25 minutes, or until golden brown.
Q: What is the best type of oil for frying chili rellenos?
A: Oils with a high smoke point, such as peanut oil, vegetable oil, or canola oil, are ideal for frying.
Q: Why is my batter not sticking to the chilies?
A: Make sure you are dredging the chilies in flour before dipping them in the batter. This helps the batter adhere properly. Also, ensure that your batter is not too thin.
Final Thoughts
Chili rellenos are more than just a dish; they’re an experience. The combination of flavors and textures is truly satisfying, and the process of making them is a rewarding culinary adventure. Don’t be intimidated by the steps involved; with a little practice, you’ll be creating restaurant-quality chili rellenos in your own kitchen in no time. I encourage you to try this recipe and share your feedback. Pair it with a refreshing margarita for a complete Mexican feast!