
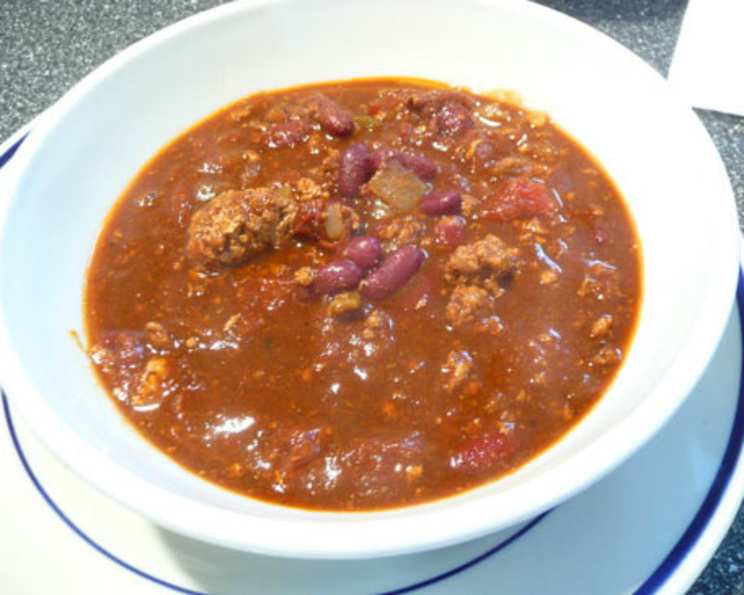
Chili Under Pressure: A Flavorful Feast in Minutes
The aroma of chili has always been synonymous with warmth and comfort in my family. I can still picture my grandmother, her hands stained with paprika, stirring a massive pot of chili on a cold winter afternoon. The savory scent would fill the entire house, a fragrant promise of a hearty meal that would bring us all together. While her slow-cooked masterpiece simmered for hours, this pressure cooker version allows me to recreate those cherished flavors in a fraction of the time, perfect for busy weeknights when I crave a taste of home.
Recipe Overview
- Prep Time: 15 minutes
- Cook Time: 8 minutes (plus pressure build and release time)
- Total Time: 30 minutes
- Servings: 6
- Dietary Type: Adaptable (see variations)
Ingredients
- 1 lb ground beef
- 2 teaspoons olive oil
- 1 onion, chopped
- 1 small green bell pepper, chopped
- 1 jalapeno pepper, seeded and finely chopped
- 2 garlic cloves, minced
- 2 (14 1/2 ounce) cans dark red kidney beans, drained and rinsed
- 2 (14 1/2 ounce) cans diced tomatoes, undrained
- 3 tablespoons tomato paste
- 1 tablespoon dark brown sugar
- 2 teaspoons unsweetened cocoa powder
- 1⁄4 teaspoon crushed red pepper flakes (optional)
- 2 tablespoons chili powder
- 2 teaspoons ground cumin
- 1⁄2 teaspoon kosher salt (to taste)
- 2 cups water
Equipment Needed
- Pressure cooker (Instant Pot or similar)
- Knife
- Cutting board
- Measuring spoons and cups
- Wooden spoon or spatula
Instructions
- Begin by preparing the base. Turn your pressure cooker to the sauté function on medium-high heat. Add the ground beef and cook until it is brown and crumbly.
- Remove the beef from the pressure cooker and drain any excess grease. This step is crucial to prevent a greasy chili. Set the beef aside for now.
- Now, add the olive oil to the pressure cooker. Once the oil is heated, add the chopped onion, green bell pepper, and jalapeno pepper.
- Cook the vegetables, stirring frequently, for about 3-4 minutes, or until the onion becomes translucent. This step softens the vegetables and releases their flavors.
- Add the minced garlic to the vegetables. Cook and stir for about 30 seconds, just until the garlic becomes fragrant. Be careful not to burn the garlic, as this can impart a bitter taste.
- Return the browned ground beef to the pressure cooker. Add the kidney beans, diced tomatoes (undrained), tomato paste, dark brown sugar, cocoa powder, chili powder, ground cumin, salt, water, and the optional crushed red pepper flakes.
- Stir all the ingredients thoroughly to combine, ensuring the tomato paste is fully dissolved.
- Place the lid on the pressure cooker and lock it securely according to the manufacturer’s instructions. Ensure the pressure release valve is in the sealing position.
- Bring the pressure cooker up to pressure, aiming for 15 psi. This may take several minutes, depending on your pressure cooker model.
- Once the pressure cooker reaches the desired pressure, reduce the heat to maintain the pressure. Cook for 8 minutes.
- After the 8 minutes of cooking time, remove the pressure cooker from the heat and allow the pressure to release naturally. This may take 5-10 minutes. Do not force the pressure release unless absolutely necessary, as natural pressure release helps develop the flavors.
- Once the pressure is fully released, carefully remove the lid, tilting it away from you to avoid any escaping steam.
- Give the chili a good stir. Taste and adjust the seasoning, adding more salt, chili powder, or cumin as needed.
- Serve hot and enjoy!
Expert Tips & Tricks
- For a richer flavor, consider browning the ground beef in a skillet before adding it to the pressure cooker. This creates a deeper, more caramelized flavor.
- Adjust the amount of jalapeno pepper and crushed red pepper flakes to your desired level of spiciness. If you prefer a milder chili, omit the crushed red pepper flakes altogether.
- The cocoa powder might seem like an odd ingredient, but it adds a depth of flavor and richness to the chili that is truly remarkable. Don’t skip it!
- If you find the chili is too thick after cooking, add a little more water to reach your desired consistency.
- If you don’t have dark red kidney beans, you can substitute them with other types of beans, such as pinto beans or black beans.
- For a smoother chili, you can use an immersion blender to partially blend the chili after it has finished cooking. Be careful not to over-blend, as you still want some texture.
Serving & Storage Suggestions
Serve this hearty chili hot, garnished with your favorite toppings. Some popular choices include:
- Shredded cheddar cheese
- Sour cream or plain Greek yogurt
- Chopped green onions
- Diced avocado
- A dollop of guacamole
- Tortilla chips or cornbread
Leftover chili can be stored in an airtight container in the refrigerator for up to 3-4 days. For longer storage, freeze the chili in freezer-safe containers for up to 2-3 months. To reheat, thaw the chili overnight in the refrigerator and then heat it in a saucepan over medium heat, stirring occasionally, until heated through. You can also reheat it in the microwave.
Nutritional Information
| Nutrient | Amount per Serving | % Daily Value |
|---|---|---|
| Calories | 413.3 kcal | N/A |
| Calories from Fat | N/A | N/A |
| Total Fat | 14.5 g | 22% |
| Saturated Fat | 4.9 g | 24% |
| Cholesterol | 51.4 mg | 17% |
| Sodium | 317.7 mg | 13% |
| Total Carbohydrate | 45.1 g | 15% |
| Dietary Fiber | 13.9 g | 55% |
| Sugars | 8.7 g | N/A |
| Protein | 28.5 g | 56% |
Note: Nutritional information is an estimate and may vary based on specific ingredients and portion sizes.
Variations & Substitutions
- Vegetarian/Vegan Chili: Substitute the ground beef with plant-based ground meat alternatives, such as Beyond Meat or Impossible Burger, or use a combination of lentils and diced vegetables like zucchini and carrots. Ensure you use vegetable broth instead of water.
- Spicy Chili: Add more jalapeno peppers or a pinch of cayenne pepper to increase the heat level. You can also use a spicier variety of chili powder.
- White Chicken Chili: Substitute the ground beef with shredded cooked chicken and use great northern beans instead of kidney beans.
- Beef & Beer Chili: Add a can of your favorite dark beer (like stout or porter) to the chili for a richer, more complex flavor. Reduce the amount of water accordingly.
- Sweet Potato Chili: Add diced sweet potato to the chili for a touch of sweetness and added nutrients.
FAQs (Frequently Asked Questions)
Q: Can I make this chili without a pressure cooker?
A: Absolutely! You can simmer this chili in a large pot on the stovetop for about 1-2 hours, or until the flavors have melded together.
Q: Can I use dried beans instead of canned beans?
A: Yes, but you will need to pre-soak the dried beans overnight and cook them separately before adding them to the chili. Alternatively, some pressure cookers have a setting for cooking dried beans.
Q: What if I don’t have dark brown sugar?
A: You can substitute with regular brown sugar or even molasses for a similar flavor.
Q: Can I double or triple this recipe?
A: Yes, you can easily double or triple this recipe, but make sure your pressure cooker is large enough to accommodate the increased volume. You may also need to increase the cooking time slightly.
Q: My chili is too watery. How can I thicken it?
A: Simmer the chili uncovered for a few minutes to allow some of the liquid to evaporate. Alternatively, you can mix a tablespoon of cornstarch with a tablespoon of cold water and stir it into the chili to thicken it.
Final Thoughts
This Chili Under Pressure is more than just a quick and easy meal; it’s a warm hug in a bowl, perfect for a cozy night in or a gathering with friends and family. Don’t be afraid to experiment with the ingredients and adjust the recipe to suit your own taste preferences. I encourage you to give this recipe a try and experience the magic of pressure cooking for yourself. And if you do, please share your feedback – I’d love to hear how it turned out and what variations you made! Perhaps pair this chili with a crisp green salad and a slice of crusty bread for a complete and satisfying meal. Enjoy!