
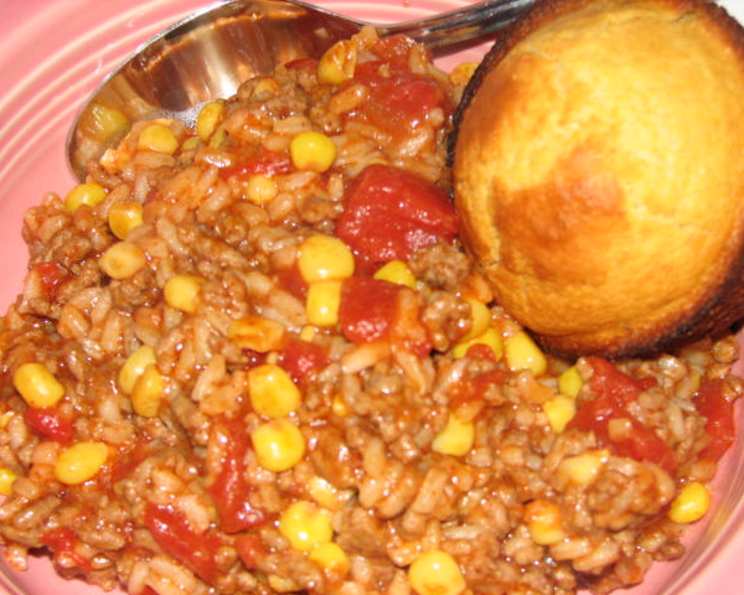
Chili With Rice: A Hearty Skillet Delight
The aroma still takes me back. I remember chilly autumn evenings, the kind where the wind howled just enough to rattle the windows, and my grandmother, Nana Elsie, would be at the stove. Not baking, not her usual delicate cookies, but stirring something… hearty. A rich, savory scent would fill her small kitchen, a promise of warmth and spice that made the cold outside seem miles away. It wasn’t always the prettiest dish – Nana Elsie was all about substance over style – but that skillet of chili with rice, bubbling gently on the burner, was pure comfort in a bowl. It was a staple, a go-to for busy weeknights, a simple dish made with love that warmed you from the inside out.
Recipe Overview:
- Prep Time: 10 minutes
- Cook Time: 45 minutes
- Total Time: 55 minutes
- Servings: 4-6
- Yield: 1 large skillet
- Dietary Type: Varies (can be adapted to Gluten-Free, Dairy-Free)
Ingredients:
- 1/2 cup onion, chopped
- 1 lb lean ground beef
- 1 (11 ounce) can corn, drained
- 1 (28 ounce) can tomatoes, undrained
- 1 cup long grain rice
- 1 1/2 – 2 cups water
- 1 – 2 Oxo beef cubes (or equivalent beef bouillon)
- Chili powder, to taste
- Salt, to taste
- Pepper, to taste
- 1 teaspoon oil (vegetable, olive, or canola)
- 2 cups boiling water (for pre-cooking rice)
Equipment Needed:
- Large skillet or Dutch oven
- Large pot
- Colander or strainer
- Cutting board
- Knife
- Measuring cups and spoons
Instructions:
-
Begin by chopping the onion. Heat the oil in a large skillet or Dutch oven over medium heat. Add the chopped onion and cook for 2-3 minutes, until softened and translucent. This will form the aromatic base for your chili.
-
Add the lean ground beef to the skillet with the softened onions. Break up the beef with a spoon or spatula and cook until browned, ensuring no pink remains. Drain off any excess grease. This step is crucial for preventing a greasy final product.
-
While the meat and onions are browning, prepare the rice. In a large pot, bring 2 cups of water to a boil. Add the long grain rice to the boiling water. Reduce the heat to a gentle boil and cook for approximately 15 minutes, partially cooking the rice.
-
After 15 minutes, drain the rice in a colander or strainer. This pre-cooking step shortens the overall cooking time in the chili and helps prevent it from becoming overly starchy.
-
Return to the skillet with the browned meat and onions. Add the entire can of tomatoes, including the juice. Break up any large pieces of tomatoes with a spoon or spatula. This will ensure an even consistency throughout the chili.
-
Add the drained can of corn and the partially cooked rice to the skillet. Stir to combine all the ingredients.
-
Add approximately 1 cup of water to the skillet. Crumble in the Oxo beef cubes (or equivalent beef bouillon) to create a beefy broth. Season generously with chili powder, salt, and pepper to taste. Remember, you can always add more seasoning later, so start with a conservative amount.
-
At this point, the mixture should be fairly runny. Don’t be alarmed; the rice will absorb the liquid as it cooks.
-
Cover the skillet with a lid, reduce the heat to low, and allow the chili to simmer for about 30 minutes, or until the rice is cooked through and tender. Stir occasionally to prevent sticking and ensure even cooking.
-
After 30 minutes, check the rice for doneness. If the rice is still firm, add the remaining 1/2 cup of water and continue to simmer for another 10-15 minutes, or until the rice is cooked through and the chili has reached your desired consistency.
-
Taste the chili and adjust the seasoning as needed. Add more chili powder for a spicier kick, or additional salt and pepper to enhance the overall flavor.
Expert Tips & Tricks:
- Spice it up: For extra heat, add a pinch of cayenne pepper or a chopped jalapeno to the skillet along with the onions.
- Bean boost: Kidney beans, pinto beans, or black beans can be added for a heartier chili. Drain and rinse a 15-ounce can and add it along with the corn.
- Vegetable variations: Feel free to add other vegetables such as diced bell peppers, zucchini, or carrots for added nutrients and flavor.
- Make it ahead: This chili is a great make-ahead dish. The flavors meld together even more beautifully overnight. Prepare the chili up to the simmering stage, let it cool completely, and store it in the refrigerator for up to 2 days. When ready to serve, simply reheat over low heat, stirring occasionally, until heated through.
- Thickening the chili: If your chili is too watery, remove the lid during the last 15 minutes of simmering to allow some of the liquid to evaporate. Alternatively, you can mash a small portion of the chili with a fork to release some of the starch from the rice, which will help thicken the sauce.
Serving & Storage Suggestions:
Serve the chili hot, straight from the skillet, or ladle it into bowls. Garnish with your favorite toppings, such as shredded cheese, sour cream, chopped green onions, or a dollop of guacamole. For a complete meal, serve with a side of cornbread or crackers.
Leftovers can be stored in an airtight container in the refrigerator for up to 3-4 days. To freeze, allow the chili to cool completely, then transfer it to freezer-safe containers or bags. Frozen chili can be stored for up to 2-3 months. Thaw overnight in the refrigerator before reheating. Reheat the chili in a saucepan over medium heat, stirring occasionally, until heated through. You may need to add a splash of water or broth if the chili has thickened too much during storage.
Nutritional Information:
| Nutrient | Amount per Serving | % Daily Value |
|---|---|---|
| Calories | 450 kcal | 23% |
| Total Fat | 18g | 28% |
| Saturated Fat | 7g | 35% |
| Cholesterol | 80mg | 27% |
| Sodium | 400mg | 17% |
| Total Carbohydrate | 55g | 18% |
| Dietary Fiber | 7g | 28% |
| Sugars | 10g | – |
| Protein | 25g | 50% |
Note: Nutritional information is an estimate and may vary based on specific ingredients and portion sizes.
Variations & Substitutions:
- Vegetarian Chili: Substitute the ground beef with plant-based ground meat alternatives or lentils. Use vegetable broth instead of beef broth.
- Spicy Southwest Chili: Add a can of diced green chilies and a teaspoon of cumin to the chili for a Southwest flavor.
- Chicken Chili: Replace the ground beef with ground chicken or shredded cooked chicken.
- Gluten-Free: Ensure the beef bouillon cubes are gluten-free.
- Dairy-Free: Omit any dairy-based toppings such as cheese or sour cream.
FAQs (Frequently Asked Questions):
Q: Can I use brown rice instead of white rice?
A: Yes, you can use brown rice, but it will require a longer cooking time. You may need to add more water and simmer for an additional 20-30 minutes, or until the brown rice is tender.
Q: Can I add beans to this chili?
A: Absolutely! Beans are a great addition to chili. Kidney beans, pinto beans, or black beans work well. Drain and rinse a 15-ounce can of your favorite beans and add it along with the corn.
Q: How do I make this chili spicier?
A: You can add more chili powder, a pinch of cayenne pepper, or a chopped jalapeno to the skillet. Start with a small amount and taste as you go, adding more until you reach your desired level of spice.
Q: What if my chili is too thick?
A: If your chili becomes too thick, simply add a splash of water or beef broth to thin it out. Stir well to combine and allow it to simmer for a few more minutes to incorporate the added liquid.
Q: Can I cook this chili in a slow cooker?
A: Yes, this chili can be easily adapted for the slow cooker. Brown the ground beef and onions in a skillet as directed, then transfer everything to the slow cooker. Add all the remaining ingredients, stir well, and cook on low for 6-8 hours or on high for 3-4 hours.
Final Thoughts:
This chili with rice is more than just a recipe; it’s a warm embrace on a cold day, a comforting hug in a bowl. It’s a reminder that the simplest dishes can be the most satisfying. Whether you’re a seasoned chef or a beginner cook, I encourage you to give this recipe a try. Feel free to experiment with different variations and toppings to make it your own. And most importantly, share it with the people you love. I’d love to hear your feedback and see your creations! Pair this chili with a crusty loaf of bread and a crisp green salad for a complete and satisfying meal. Enjoy!