
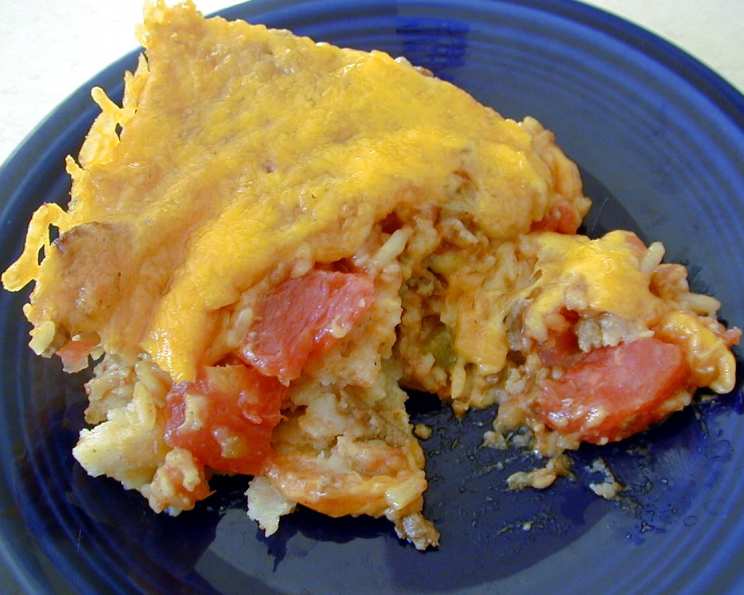
Chiliquiles Casserole: A Taste of Home
I remember the first time I tasted chiliquiles. It was at a potluck fundraiser at my daughter’s elementary school. The aroma alone, a symphony of toasted tortillas, savory meat, and melted cheese, drew me in. One bite, and I was hooked. This wasn’t just food; it was a hug in a pan, a vibrant expression of love and community that I’ve cherished ever since.
Recipe Overview
- Prep Time: 20 minutes
- Cook Time: 30-45 minutes
- Total Time: 50-65 minutes
- Servings: 8-10
- Yield: 1 casserole
- Dietary Type: Varies (can be adapted to gluten-free)
Ingredients
- 1 lb ground beef
- 2 onions, chopped
- 3 garlic cloves, minced
- Two (15 ounce) cans diced tomatoes
- 1 teaspoon chili powder
- 1⁄4 teaspoon ground cumin
- Salt and pepper to taste
- One (4 ounce) can chopped green chilies
- 1 dozen corn tortillas
- 2 lbs Monterey Jack cheese, grated
- 1 pint sour cream
Equipment Needed
- Large skillet
- 13x9x2-inch baking pan
Instructions
- Begin by sautéing the chopped onions, ground beef, and minced garlic in a large skillet over medium heat. Cook until the onions are translucent and the beef is browned, usually about 5-7 minutes.
- Drain any excess fat from the skillet. Nobody wants a greasy casserole!
- Add the diced tomatoes, chili powder, ground cumin, salt, and pepper to the skillet. Simmer the mixture for 30 minutes, allowing the flavors to meld together beautifully. Stir occasionally to prevent sticking. The longer simmer time deepens the flavor profile.
- Stir in the can of chopped green chilies. This adds a lovely kick, so adjust the amount to your preference.
- While the sauce is simmering, cut the corn tortillas into quarters. This makes them easier to layer and bite into in the finished casserole.
- Now, it’s time to assemble the chiliquiles. In a 13x9x2-inch baking pan, layer half of the tortilla pieces, overlapping them to completely cover the bottom of the pan.
- Spread half of the meat sauce evenly over the tortillas.
- Sprinkle half of the grated Monterey Jack cheese generously over the meat sauce.
- Repeat the layers, starting with the remaining tortilla pieces, then the remaining meat sauce, and finally topping with the remaining Monterey Jack cheese.
- Bake in a preheated oven at 350°F (175°C) for about 30-45 minutes, or until the casserole is bubbling and the cheese has melted and started to turn golden brown. Keep a close eye on it; ovens can vary!
- Remove the casserole from the oven and let it cool slightly for 5-10 minutes.
- Spread a layer of sour cream evenly over the top of the baked casserole.
Expert Tips & Tricks
- For an extra layer of flavor, consider adding a can of drained and rinsed black beans to the meat mixture.
- Don’t be afraid to experiment with different types of cheese. Cheddar, Colby Jack, or even a Mexican blend would work beautifully.
- If you’re short on time, you can use pre-shredded cheese. However, freshly grated cheese melts more smoothly.
- To prevent the tortillas from becoming soggy, lightly toast them in a dry skillet before layering them in the casserole.
- Adjust the amount of chili powder and green chilies to your desired level of spiciness.
- Make-Ahead Tip: Prepare the casserole up to the baking step and store it, covered, in the refrigerator for up to 24 hours. Add the sour cream just before serving.
- Freezing Tip: This casserole freezes well. Prepare it up to the sour cream topping stage, wrap it tightly in plastic wrap and then foil, and freeze for up to 3 months. Thaw completely in the refrigerator before baking as directed. Add the sour cream after baking.
Serving & Storage Suggestions
Serve the chiliquiles casserole warm, straight from the oven. Garnish with additional sour cream, chopped cilantro, diced avocado, or a dollop of your favorite salsa. It’s a great dish for a casual weeknight dinner or a potluck gathering.
Leftovers can be stored in an airtight container in the refrigerator for up to 3-4 days. To reheat, bake in a preheated oven at 350°F (175°C) until heated through, or microwave in individual portions.
Nutritional Information
| Nutrient | Amount per Serving | % Daily Value |
|---|---|---|
| Calories | 795.6 kcal | N/A |
| Calories from Fat | 506 g | 64% |
| Total Fat | 56.3 g | 86% |
| Saturated Fat | 32.7 g | 163% |
| Cholesterol | 165.1 mg | 55% |
| Sodium | 929.9 mg | 38% |
| Total Carbohydrate | 30.7 g | 10% |
| Dietary Fiber | 4.5 g | 18% |
| Sugars | 6.9 g | 27% |
| Protein | 43.8 g | 87% |
Note: Nutritional information is an estimate and may vary based on specific ingredients and portion sizes.
Variations & Substitutions
- Vegetarian: Substitute the ground beef with crumbled tofu or a vegetarian ground beef substitute. You can also add more vegetables like bell peppers, zucchini, or mushrooms.
- Gluten-Free: Ensure you are using corn tortillas that are certified gluten-free.
- Spicy: Add a pinch of cayenne pepper or a dash of hot sauce to the meat mixture for an extra kick. You could also use a spicier variety of green chilies.
- Dairy-Free: Substitute the Monterey Jack cheese with a dairy-free cheese alternative. Use a dairy-free sour cream alternative.
- Chicken Chiliquiles: Swap the ground beef for shredded cooked chicken.
FAQs (Frequently Asked Questions)
Q: Can I use different types of tortillas?
A: While corn tortillas are traditional for chiliquiles, you can use flour tortillas if you prefer. However, the texture and flavor will be slightly different.
Q: Can I add other vegetables to the meat mixture?
A: Absolutely! Feel free to add diced bell peppers, onions, zucchini, or mushrooms to the meat mixture for added flavor and nutrition.
Q: How can I prevent the tortillas from becoming soggy?
A: Lightly toasting the tortillas in a dry skillet before layering them in the casserole can help prevent them from becoming soggy. Avoid oversoaking the tortillas in the sauce.
Q: Can I make this ahead of time?
A: Yes, you can prepare the casserole up to the baking step and store it in the refrigerator for up to 24 hours. Add the sour cream just before baking.
Q: Can I freeze chiliquiles?
A: Yes, this casserole freezes well. Prepare it up to the sour cream topping stage, wrap it tightly, and freeze for up to 3 months. Thaw completely before baking. Add sour cream after reheating.
Final Thoughts
This chiliquiles casserole is more than just a recipe; it’s a journey back to heartwarming memories and shared experiences. Whether you’re a seasoned cook or a kitchen novice, I encourage you to give this recipe a try. Adapt it to your liking, make it your own, and share it with the people you love. Serve it with a side of refried beans and a refreshing margarita for the perfect fiesta! I’d love to hear about your experience and any creative twists you add to the recipe!